Do you have a question about the Magicshine RN 1500 and is the answer not in the manual?
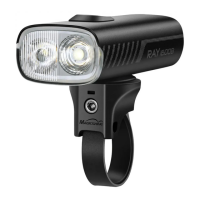
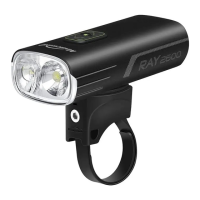
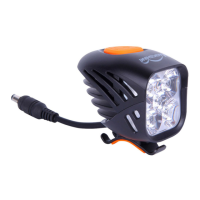
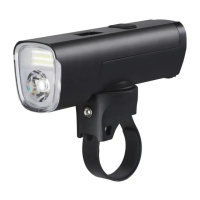
Identifies the specific model of the Magicshine light system.
Includes handlebar, GoPro, and aero bar compatible strap mounts for versatile attachment.
Details the Type-C USB cable for charging and the 3mm Hex tool for installation.
Explains how to turn the light on/off and its mode memory function.
Lists available lighting modes including Always-on and Flash.
Describes how the power button light indicates battery level when the device is on.
Explains how to check battery status by short-pressing the power button when off.
Details the color indicators (Red, Green) for different battery percentage ranges.
An optional accessory for mounting the light on a helmet.
An optional accessory for mounting the light on the front.
Details the 24-month warranty for the lighting system and 6 months for accessories.
Explains how to get a bonus 6-month warranty by registering online.
Outlines requirements for a valid warranty claim, including proof of purchase and no tampering.
Provides contact details (phone, email) for submitting warranty claims.
The Magicshine RN 1500 is a versatile lighting system designed for various applications, primarily as a bicycle light, but also adaptable for helmet and other mounting options. This user manual provides comprehensive instructions on its operation, installation, and maintenance, ensuring users can maximize its features and longevity.
The primary function of the Magicshine RN 1500 is to provide illumination, offering multiple lighting modes to suit different environmental conditions and user preferences. It serves as a reliable light source for cycling, enhancing visibility for both the rider and others, especially during low-light conditions or at night. Beyond its primary lighting function, the device also incorporates a phone charging capability, allowing users to power their mobile devices on the go, making it a practical accessory for longer rides or emergencies. The RN 1500 is designed with a robust build, ensuring durability and resistance to various outdoor elements.
The RN 1500 offers a user-friendly experience with several key features:
Lighting Modes and Memory Function: The device provides multiple lighting modes, including Low, Mid, High, Flash 1, and Flash 2. Users can easily switch between these modes with a single click of the power button. A notable feature is the "Mode memory function," which ensures that when the light is turned on, it will resume in the last lighting mode used, saving users the hassle of re-selecting their preferred setting each time. The "Always-on" mode is the default, and subsequent clicks cycle through the other modes. A double click activates a different sequence of modes, including a "Flash" mode.
Easy On/Off Operation: To turn the light on or off, users simply need to hold the power button for 1 second, providing a straightforward control mechanism.
Battery Indicator: The RN 1500 is equipped with a clear battery indicator system. When the device is powered on, the power button light will display the current battery level. A flashing red light indicates 0%-10% battery, a solid red light indicates 11%-20%, and a green light indicates 21%-100%. This allows users to monitor the battery status at a glance and plan their usage accordingly. Even when the device is off, a short press of the power button will activate the indicator light for 2 seconds, providing a quick check without fully powering on the unit.
Recharging Capability: The device can be recharged using a Type-C USB cable. During charging, a flashing red light indicates that the device is charging, and a solid green light signifies that it is fully charged. The standard charging time is approximately 2.5 hours with a 5V 3A input.
Phone Charging Function: A unique feature of the RN 1500 is its ability to charge mobile phones. While the manual indicates that an external charging cable needs to be purchased additionally for this function, it highlights the device's versatility as a portable power bank.
Mounting Options: The RN 1500 is designed for flexible installation. It comes with a handlebar mount, allowing for easy attachment to most bicycle handlebars. Additionally, it supports a Gopro mount and an aero bar compatible strap, expanding its utility to various bicycle types and setups. Optional parts, such as a helmet mount and a TTA front mount, are also available (sold separately), further enhancing its adaptability for different user needs and activities.
While the manual does not explicitly detail a "maintenance features" section, it provides crucial information that contributes to the longevity and proper functioning of the device:
Warranty Information: Magicshine offers a 24-month warranty on its lighting system from the date of purchase. Registering the lighting system on the Magicshine website provides an additional 6-month bonus warranty. Battery packs and AC adapters have a 6-month warranty, though no bonus warranty is available for these components. The warranty covers defects in material and workmanship, provided the affected parts have not been tampered with and there is no intentional damage. Users are advised to keep their proof of purchase for any warranty claims. This warranty structure encourages proper handling and provides recourse for manufacturing defects, indirectly supporting device maintenance.
Contact Information for Support: The manual provides contact details (Tel, Fax, E-mail) for customer support, allowing users to address any issues, complaints, or warranty claims directly with Magicshine. This accessibility to support is a key aspect of maintaining the device's functionality and addressing potential problems effectively.
ANSI FL 1 Standard Compliance: The inclusion of ANSI FL 1 Standard specifications (Light Output, Beam Distance, Peak Beam Intensity, Impact Resistance, Waterproof) indicates that the device is built to meet certain performance and durability standards. For instance, its waterproof rating suggests it can withstand exposure to water, which is important for outdoor use, reducing the need for specific water-related maintenance beyond typical drying. The impact resistance rating implies a certain level of robustness against accidental drops or impacts, contributing to its overall durability and reducing the likelihood of damage that would require repair.
In summary, the Magicshine RN 1500 is a multi-functional lighting system that combines powerful illumination with practical features like phone charging and versatile mounting options. Its intuitive operation, clear battery indicators, and robust design, backed by a comprehensive warranty and support system, make it a reliable and convenient accessory for cyclists and outdoor enthusiasts.
| Brightness | 1500 lumens |
|---|---|
| Battery Capacity | 5000 mAh |
| Runtime | 1.5 - 30 hours |
| Charging Time | 3.5 hours |
| Water Resistance | IPX7 |
| Mounting Type | Handlebar mount |
| Weight | 172 grams |
| Beam Distance | 205 meters |
| Waterproof Rating | IPX7 |
| Luminous Flux | 1500 lumens |
| Water Resistance Rating | IPX7 |
| Battery | Lithium-ion |