10. Fan insert
Fan insert
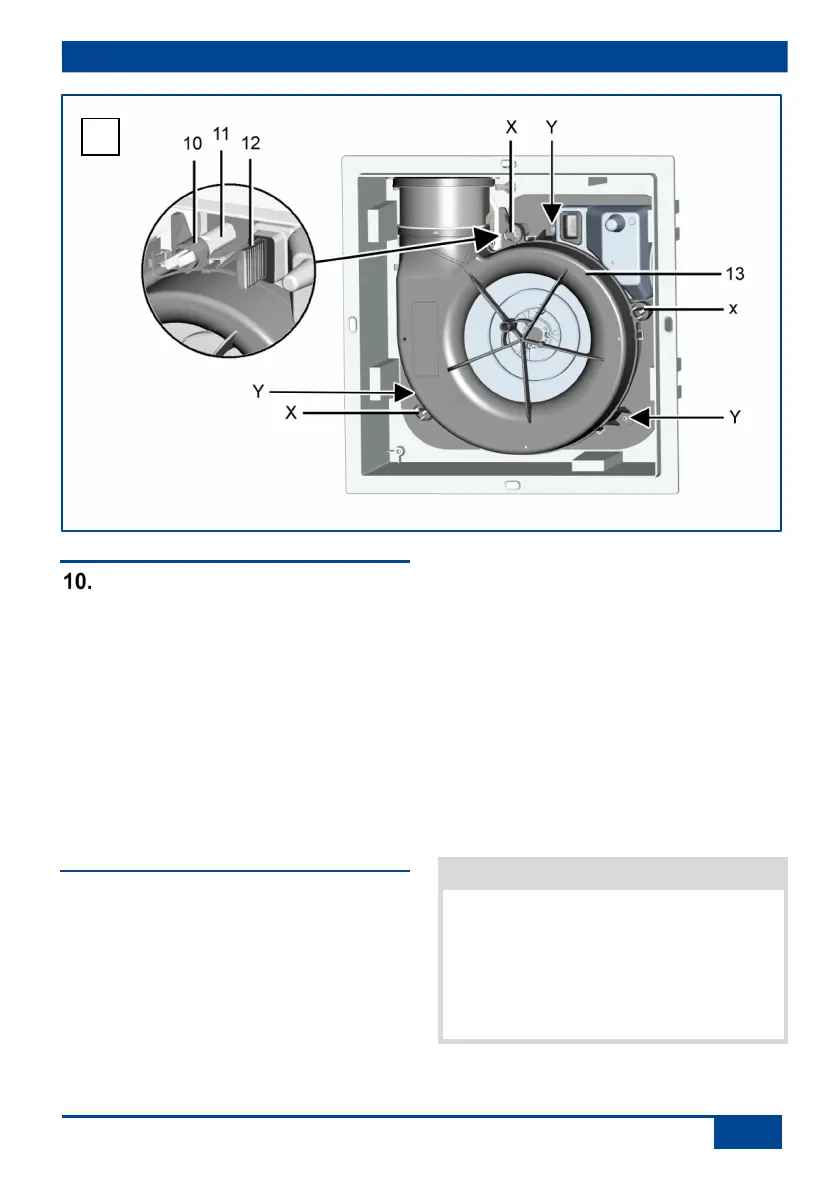
10 Accommodation mounts
11 Stud with locking hook
12 Sealing plugs
13 Fan insert
X Locking hook
Y Fixing holes for alternative
screw fixings
The fan insert is delivered separately. The
installation takes place in the completion
stage. Operation of the ER EC unit during
the shell phase is not permissible.
10.1 Installation of fan insert
1. Before accessing the connection
terminals, shut down all supply circuits
(switch off mains fuse), secure against
being accidentally switched back on and
position a visible warning sign.
2. Remove plaster protective cover and clean
ER GH housing from construction soiling if
necessary.
3. Check wiring diagram sticker for
correctness of the ticked fan type.
4. Check ease of movement of shutter. When
installed, it must close automatically.
5. Check that connection data matches the
technical data on the unit ( rating plate).
6. Plug the fan insert directly into the 3 studs
[11] with locking hooks [X]. Make sure that
the fan insert audibly clicks into all 3 snap-
fit fasteners.
7. Check for firm seating of the fan insert.
To do this, gently pull and press on the fan
insert. It must not move.
Function will be impaired if fan insert
element is not inserted correctly. Ensure
proper insertion in the locking hooks. If the
fan insert is not firmly seated, screw it to
the housing at the 3 [Y] positions shown in
the figure above. Suitable mounting mate-
rial is to be supplied by the customer.