Do you have a question about the Makita 4304 and is the answer not in the manual?
Procedure for creating a starting hole for internal cutouts.
Method for plunge cutting without a starting hole.
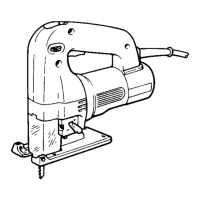
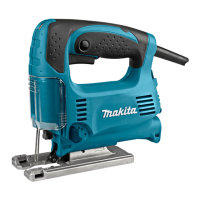
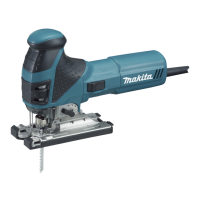
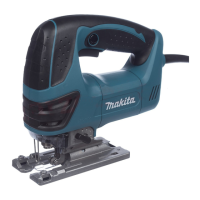
The Makita Jig Saw, available in models 4304 and 4305, is a variable speed power tool designed for cutting various materials. This instruction manual provides comprehensive guidance on its function, usage, and maintenance to ensure safe and effective operation.
The jig saw is primarily used for cutting operations in materials such as wood, mild steel, stainless steel, aluminum, and plastics. It features a reciprocating blade that moves up and down to create cuts. The tool is equipped with a variable speed adjusting dial, allowing users to select the appropriate cutting speed for different workpieces and applications. This adaptability makes it suitable for a wide range of tasks, from clean, straight cuts to fast, roughing-in work and intricate scroll cutting.
The jig saw offers different cutting actions: straight line, small orbit, medium orbit, and large orbit. These orbital actions are particularly useful for faster cutting in wood, plywood, aluminum, and mild steel, while the straight line action is ideal for clean cuts in various materials. The tool's design allows for both internal cutouts, either by boring a starting hole or by plunge cutting, and edge trimming.
Blade Installation and Removal: To install a saw blade, the tool must first be switched off and unplugged. The screw on the blade holder is loosened, the blade is inserted with its teeth facing forward, ensuring the back edge fits into the roller's groove, and then the screw is firmly tightened. For universal shank blades, the blade is inserted until the shank reaches the bottom of the inner slit, and the bolt is tightened with a hex wrench. It is crucial to secure the blade firmly and clean the blade holder to prevent breakage or injury. Lubricant or cutting oil should be used between the blade and roller when cutting iron or composition board to extend blade and roller life and prevent breakage.
Cutting Action Selection: The jig saw allows users to switch between orbital and straight line cutting actions by turning a lever. The manual provides a table to guide the selection of the appropriate cutting action based on the material and desired cut quality.
Switch Action (Model 4304): The 4304 model features a switch trigger. To start, the trigger is pulled. Releasing it stops the tool. For continuous operation, the trigger is pulled, and the lock lever is moved backward. To stop from the locked position, the trigger is pulled fully and then released.
Switch Action (Model 4305): The 4305 model uses a switch lever. To start, the lever is slid forward. Sliding it backward stops the tool.
Speed Adjustment: Both models feature a speed adjusting dial, marked from 1 (lowest speed) to 6 (full speed), allowing the user to set the strokes per minute between 500 and 3,000. The manual advises selecting the proper speed based on the workpiece, noting that higher speeds cut faster but reduce blade service life. The dial should only be adjusted within its marked range to prevent damage.
Cutting Operation: Before cutting, the blade must be adequately secured, and the tool should be turned on without the blade contacting the workpiece. The base is rested flat on the workpiece, and the tool is gently moved forward along the marked cutting line. It is important to hold the tool flush with the workpiece and advance it slowly, especially when cutting curves, to avoid slanted cuts and blade breakage.
Bevel Cutting: The tool can make bevel cuts at angles between 0° and 45° (left or right). To do this, the bolt on the bottom of the tool is loosened, the base is moved so the bolt is centered in the cross-shaped slot, and then the base is tilted to the desired angle, indicated by graduations on the motor housing. The bolt is then tightened to secure the base.
Flush Cutting: For flush cutting, the bolt on the bottom of the tool is loosened, and the base is slid all the way back before tightening the bolt.
Cutouts: Cutouts can be made by either boring a starting hole (at least 12 mm in diameter) and inserting the blade, or by plunge cutting. Plunge cutting involves tilting the tool on the front edge of the base with the blade point above the workpiece, applying firm pressure to prevent base movement, switching on the tool, and slowly lowering the back end of the tool as the blade slices into the material.
Finishing Edges: For trimming or slight dimensional adjustments, the blade is run lightly along the cut edges.
Metal Cutting: When cutting metal, a suitable coolant (cutting oil) should always be used to prevent significant blade wear. Greasing the underside of the workpiece can also serve as a coolant.
General Maintenance: To maintain product safety and reliability, all repairs, carbon brush inspection and replacement, and any other maintenance or adjustment should be performed by Makita Authorized or Factory Service Centers using genuine Makita replacement parts.
Safety Precaution: Before performing any inspection or maintenance, it is crucial to ensure the tool is switched off and unplugged.
The manual also includes a detailed list of accessories, including various jig saw blades with different teeth per inch and effective cutting blade lengths, along with their recommended applications for different materials and cut types. This ensures users can select the correct blade for optimal performance and safety.
| Power Source | Corded Electric |
|---|---|
| Amperage | 3.9A |
| Strokes per Minute | 500-3, 100 SPM |
| Max. Cutting Capacity (wood at 90°) | 65mm |
| Max. Cutting Capacity (steel at 90°) | 6mm |