Do you have a question about the Makita 4323 and is the answer not in the manual?
Keep work area clean, avoid hazards, and keep bystanders away for accident prevention.
Proper use of polarized plugs and outlets to prevent electric shock.
Maintain alertness, dress properly, avoid accidental starts, and ensure proper footing.
Service by qualified personnel using identical parts to ensure safety and longevity.
Grip insulated surfaces, wear safety glasses, avoid nails, and check clearance.
Ensure blade is clear, keep hands away, wait for stop before removing, avoid hot parts.
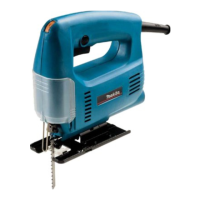
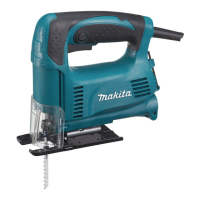
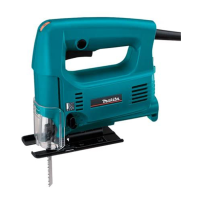
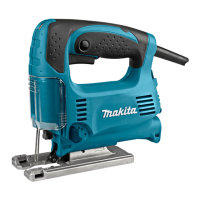
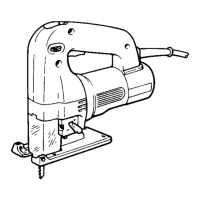
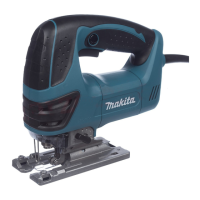
This document is an instruction manual for the Makita Jig Saw, Model 4323, emphasizing safety, operation, and maintenance. The jig saw is designed for cutting various materials, including wood, mild steel, stainless steel, aluminum, and plastics, and features double insulation for enhanced electrical safety.
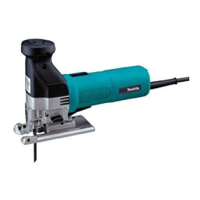
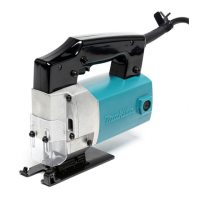
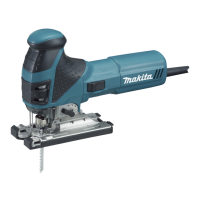
The Makita Jig Saw, Model 4323, is a power tool primarily used for cutting materials. Its core function involves a reciprocating blade that moves up and down to create cuts. The tool is equipped with a switch trigger for starting and stopping operation, and a lock button allows for continuous operation, enhancing user comfort during extended use.
A key functional feature is the speed adjusting dial, which enables users to infinitely adjust the tool's speed between 500 and 3,100 strokes per minute. This adjustability is crucial for optimizing cutting performance across different materials and thicknesses. Higher speeds generally result in faster cuts but may reduce blade life, while lower speeds are suitable for more delicate or harder materials. The dial settings range from 1 to 6, with higher numbers corresponding to higher speeds.
The tool also supports bevel cutting, allowing the base to be tilted at angles between 0° and 45° (left or right). This feature expands the jig saw's versatility for specialized cuts. For straight cuts and circular cuts, an optional rip fence (guide rule) accessory can be installed, providing guidance for precise and repeatable cuts.
For dust management, the jig saw can be connected to a Makita vacuum cleaner via a hose inserted at the rear of the tool. A dust cover is also present, which can be lowered to prevent chips from flying during operation, though it must be raised for bevel cuts.
An anti-splintering device, available as an optional accessory, can be installed for splinter-free cuts. This device is inserted between two protrusions of the base when the base is moved all the way forward. However, it cannot be used when making bevel cuts.
Operating the Makita Jig Saw requires adherence to several safety and operational guidelines to ensure personal safety and optimal performance. Before plugging in the tool, users must ensure the switch trigger actuates properly and returns to the "OFF" position when released. When starting the tool, the switch trigger is pulled. For continuous operation, the trigger is pulled, and the lock button is pushed in. To stop from the locked position, the trigger is pulled fully and then released.
When making cuts, it is critical to hold the base flush with the workpiece to prevent blade breakage and serious injury. The tool should be turned on without the blade contacting the workpiece, allowing it to reach full speed before resting the base flat on the workpiece and gently moving it forward along the marked cutting line. For curves or scrolling, the tool should be advanced very slowly to avoid slanted cutting surfaces and blade breakage.
For bevel cuts, the dust cover must be raised. The base is tilted to the desired angle (indicated by graduations on the motor housing) by loosening a bolt on the back of the base with a hex wrench, moving the base so the bolt is in the center of the cross-shaped slot, and then tightening the bolt.
Front flush cuts are achieved by loosening the bolt on the back of the base, sliding the base all the way back, and then tightening the bolt.
Cutouts can be made using two methods:
When cutting metal, a suitable coolant (cutting oil) is essential to prevent significant blade wear. Greasing the underside of the workpiece can serve as an alternative to using a coolant.
The optional rip fence (guide rule) is used for straight cuts of specific widths or circular cuts. For straight cuts, it's inserted into a rectangular hole on the side of the base with the fence guide facing down, adjusted to the desired width, and secured. For circular cuts, it's inserted with the fence guide facing up, and a circular guide pin is passed through one of the holes on the fence guide, secured with a threaded knob. The rip fence is then slid to the desired cutting radius, and the bolt is tightened, with the base moved all the way forward.
Proper maintenance is crucial for the safety and reliability of the Makita Jig Saw. All service, including repairs, carbon brush inspection and replacement, and any other maintenance or adjustment, should be performed by Makita Authorized or Factory Service Centers, using only genuine Makita replacement parts. This ensures that the tool remains in safe operating condition and prevents electric shock or injury from unauthorized parts or improper procedures.
Before performing any inspection or maintenance, it is imperative to ensure the tool is switched off and unplugged from the power source.
Regular cleaning is important, especially for the blade and blade holder. All chips and foreign matter adhering to these parts must be cleaned out to ensure proper tightening of the blade, preventing breakage and potential injury.
The roller, which the blade fits into, should be occasionally lubricated. To adjust the roller, the bolt on the back of the base is loosened with a hex wrench, the retainer is moved so the roller lightly contacts the blade, and then the bolt is tightened.
The hex wrench, used for blade installation and base adjustments, has a designated storage location on the tool to prevent it from being lost when not in use.
Users are advised to maintain cutting tools with care, keeping cutting edges sharp and clean, as properly maintained tools are less likely to bind and are easier to control. Before using the tool, it is important to check for any misalignment or binding of moving parts, breakage, or any other condition that might affect the tool's operation. Any damaged parts should be serviced before use.
The manual also warns against continuous operation at low speeds for extended periods, as this can overload and heat up the motor. Additionally, the speed adjusting dial should not be forced past its minimum (1) or maximum (6) settings, as this can damage the speed adjusting function.
| Power Source | Corded |
|---|---|
| No Load Speed | 500 - 3, 100 spm |
| Type | Jigsaw |
| Cutting Capacity (steel) | 6 mm |
| Bevel Capacity | 45 degrees |
| Blade Type | T-shank |
| Orbital Settings | 3 |