Repair
P 11 / 14
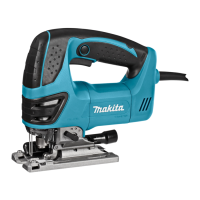
[12] Assembling armature
Do not assemble the used self lock 6. Self lock 6 has to be replaced with the new one.
Pay attention to the assembling direction of Self lock 6 and Wave washer 6. (Fig. 37)
Magnet sleeve is installed to the armature shaft on commutator side for sensing the variation of rotating speed.
If it would be damaged, the electronic speed control does not work any more.
Press Magnet sleeve by hand carefully instead of arbor press while applying 1R026 to Self lock 6.
*Self lock
*Wave washer 6
*It is not used for model 4350T.
Insulation washer
Ball bearing 607LLB
Rubber ring 19
*Magnet sleeve
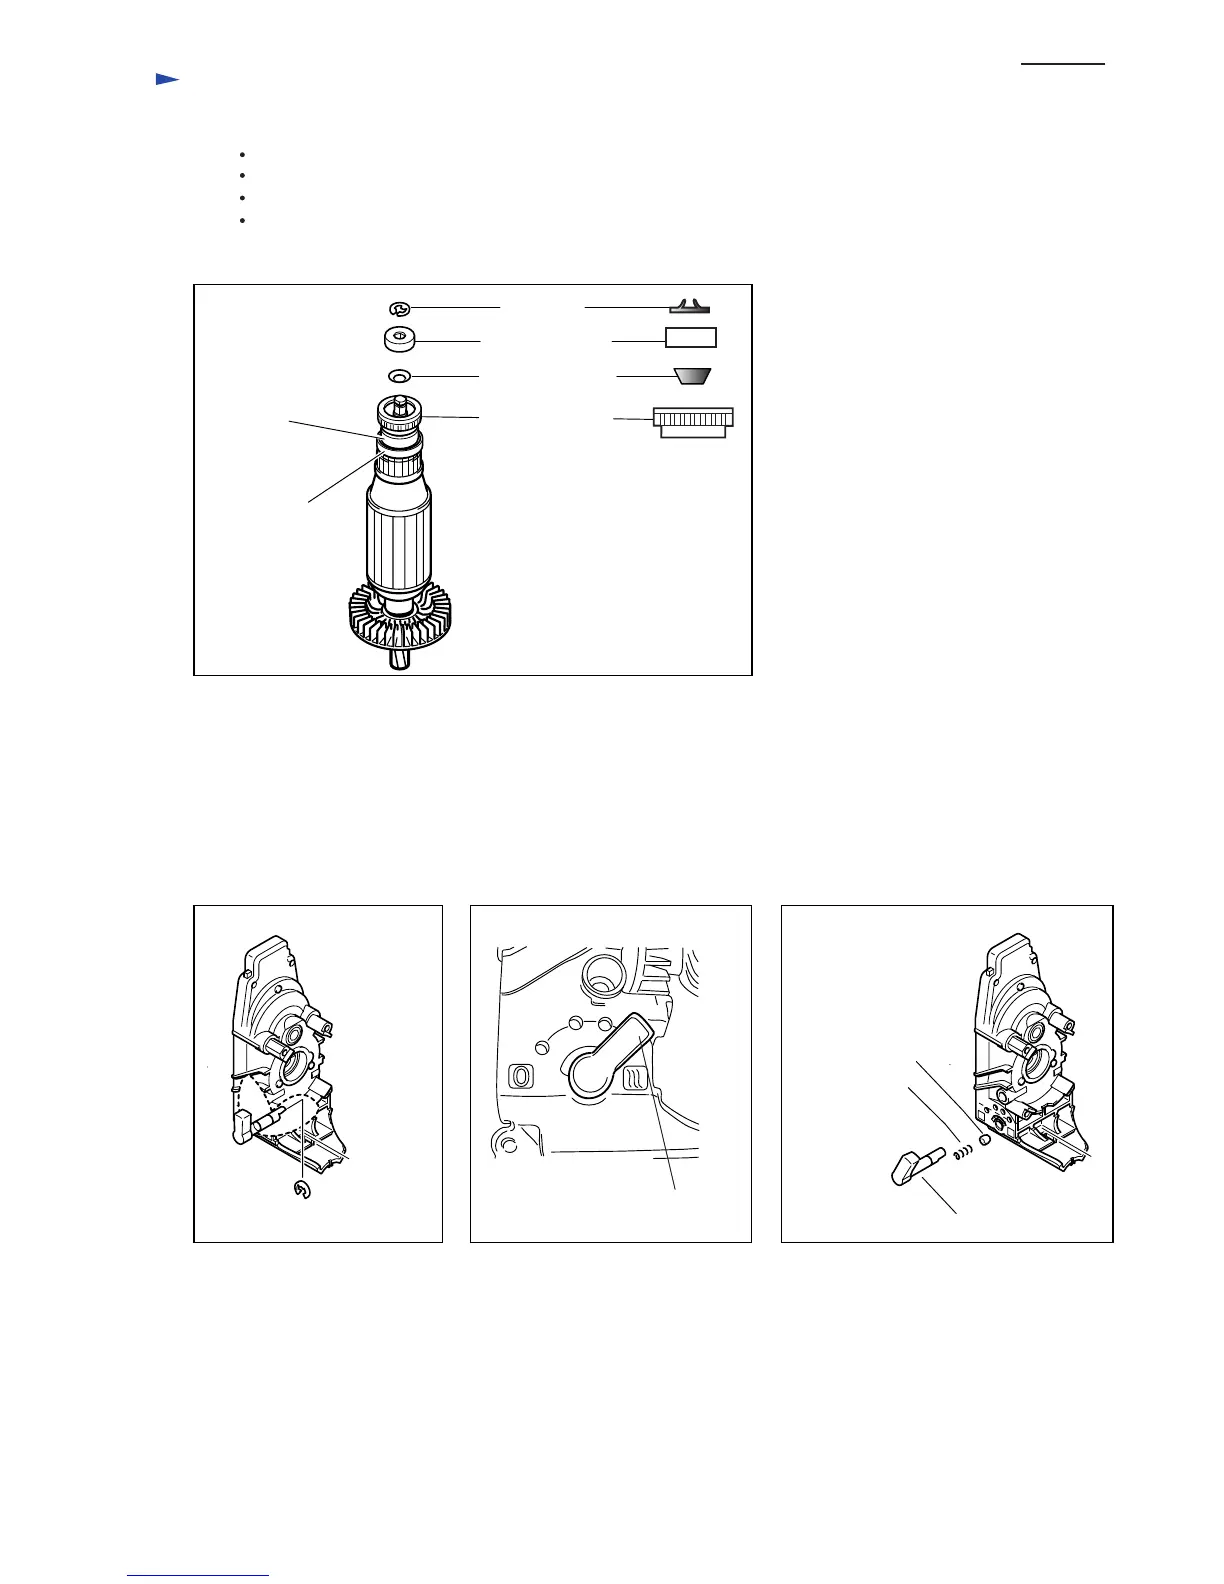
[13] Disassembling Lever 17 (for orbital action mode change)
1. With referring to the following section, Handles L and R, and Gear housing cover.
[4] Disassembling Handle section section in page 3
[5] Disassembling Gear housing cover section in page 4
2. Remove Stop ring E-5 from the shaft of Lever 17 with slotted screwdriver. (Fig. 38)
3. While aligning Lever 17 with indication III, pull it out from Gear housing. (Fig. 39)
Then, Cap 5 and Compression spring 3 are removed. (Fig. 40)
Stop ring E-5
Align Lever 17 with indication III.
Compression
spring 3
Cap 5
Lever 17
Fig. 37
Fig. 38 Fig. 39 Fig. 40
Note:
 Loading...