8 ENGLISH
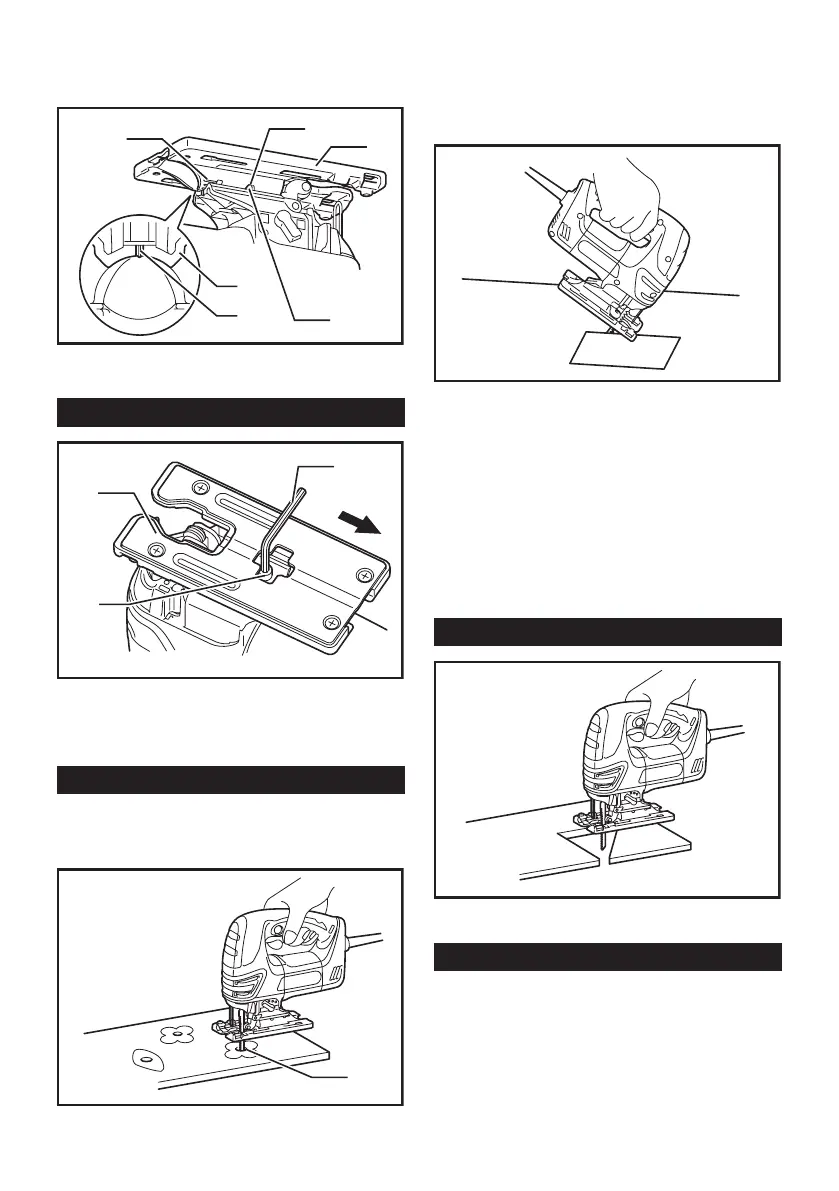
Tilt the base until the desired bevel angle is obtained.
The V-notch of the gear housing indicates the bevel
anglebygraduations.Thentightentheboltrmlyto
secure the base.
1
2
3
4
5
6
►1. Graduation 2. Bevel slot 3. Base 4. Gear housing
5. V-notch 6. Bolt
Front ush cuts
1
2
3
►1. Base 2. Bolt 3. Hex wrench
Loosen the bolt on the back of the base with the hex
wrench and slide the base all the way back. Then
tighten the bolt to secure the base.
Cutouts
Cutouts can be made with either of two methods A or B.
A) Boring a starting hole:
1
►1. Starting hole
For internal cutouts without a lead-in cut from an
edge, pre-drill a starting hole 12 mm or more in
diameter. Insert the blade into this hole to start
your cut.
B) Plunge cutting:
You need not bore a starting hole or make a
lead-in cut if you carefully do as follows.
(1) Tilt the tool up on the front edge of the base
withthebladepointpositionedjustabovethe
workpiece surface.
(2) Apply pressure to the tool so that the front
edge of the base will not move when you
switch on the tool and gently lower the back
end of the tool slowly.
(3) As the blade pierces the workpiece, slowly
lower the base of the tool down onto the
workpiece surface.
(4) Complete the cut in the normal manner.
Finishing edges
Totrimedgesormakedimensionaladjustments,runthe
blade lightly along the cut edges.
Metal cutting
Always use a suitable coolant (cutting oil) when cutting
metal.Failuretodosowillcausesignicantbladewear.
The underside of the workpiece can be greased instead
of using a coolant.

 Loading...