Do you have a question about the Makita DTD172 and is the answer not in the manual?
Lists compatible battery cartridges and chargers, with a warning about using only specified models.
Explains symbols used on the equipment for understanding their meaning.
Details typical A-weighted noise levels including sound pressure, sound power, and uncertainty.
Provides vibration total value for impact tightening, including emission and uncertainty.
Covers essential safety rules for operating any power tool, including work area and electrical safety.
Guidelines for maintaining a safe work environment, including lighting, explosive atmospheres, and keeping bystanders away.
Precautions related to electrical connections, grounding, water exposure, and cord management.
Emphasizes staying alert, using common sense, and wearing appropriate personal protective equipment like eye protection.
Instructions to ensure the tool is off before connecting power or handling, preventing accidental starts.
Advises removing adjusting keys before operation and maintaining proper footing and balance for control.
Guidance on appropriate clothing to avoid entanglement and using dust extraction facilities.
Warns against complacency from familiarity and stresses the importance of wearing safety goggles.
Advises using the correct tool for the job, proper maintenance, and handling of cutting tools.
Details on keeping handles clean, using accessories correctly, and avoiding dangerous situations.
Guidelines for charging, using, and caring for battery packs, including avoiding damage and proper storage.
Critical warnings about handling, charging, and potential hazards of battery cartridges.
Advises against using damaged or modified batteries due to risks of fire, explosion, or injury.
Warnings about exposure to fire, excessive temperatures, and charging outside specified ranges.
Emphasizes that service and repairs should be done by qualified personnel using identical replacement parts.
States that battery pack servicing should only be done by the manufacturer or authorized providers.
Warns about insulated gripping surfaces and potential shock from contact with hidden wiring.
Advises on maintaining firm footing, checking locations, and holding the tool firmly for control.
Reminds users to keep hands away from rotating parts and use auxiliary handles if provided.
Stresses checking for electrical cables, pipes, or other hazards that could be damaged by the tool.
Advises caution when handling hot battery cartridges after use due to burn risk.
Warns against dust or soil on terminals and potential malfunction due to contamination.
Advises not to use the tool near high-voltage lines to prevent malfunction.
Recommends removing the battery when not in use and keeping it away from children.
Provides tips on charging before complete discharge, avoiding overcharging, and optimal charging temperatures.
Advises removing the battery when not in use and recharging it if stored for over six months.
Explains the system that automatically cuts off power to extend tool and battery life under certain conditions.
Describes how the tool stops automatically when drawing abnormally high current.
Explains that the tool stops and the lamp blinks when overheated, requiring cooling.
Details the automatic stop when battery capacity is insufficient, requiring charging.
Explains how to check remaining battery capacity using indicator lamps and the check button.
Instructions on how to start, control speed, and stop the tool using the switch trigger.
Guidance on using the reversing switch lever to change rotation direction safely and setting it to neutral.
Notes the presence of an electric brake and when to seek service if it fails to stop the tool quickly.
How to turn the front lamp on and off, including disabling the lamp status.
Explains how to confirm if the front lamp status is on or off, and notes on overheating indication.
Advice on cleaning the front lamp lens with a dry cloth to maintain illumination.
Instructions on how to use the tool as a handy light, its duration, and how to turn it off.
Explanation of application modes for better control and finish, and lists impact force and assist types.
How to change application modes using the button or quick mode-switching button.
Explains the function of the quick mode-switching button for changing modes, especially when registered.
Instructions on how to disable and re-enable the quick mode-switching button functionality.
How to change impact force using the quick mode-switching button when the function is OFF.
How to switch to a registered application mode using the quick mode-switching button when the function is ON.
Step-by-step guide to register a desired application mode for quick switching.
How to erase a previously registered application mode.
Procedure to disable or resume the quick mode-switching button.
Details the four impact force levels (Max, Hard, Medium, Soft) and their applications.
Explains how to adjust impact force using the button or quick mode-switching button.
Introduction to assist functions for controlled screw driving, listing modes like Wood, Bolt, T mode.
Detailed explanation of features and purposes for Wood mode, Bolt mode, T mode (1), and T mode (2).
How the quick mode-switching function saves time by allowing rapid switching between application modes.
Steps to register a desired application mode for use with the quick mode-switching button.
How to switch to a registered application mode using the button when the tool is in an unregistered mode.
Process to erase a registered application mode, restoring the button's default function.
Visual guide to indicator patterns when registering or when a registered application mode is active.
Detailed instructions for attaching and detaching driver bits and socket bits, including sleeve operation.
Guidance on how to securely install the hook accessory to the tool for hanging.
Charts showing the relationship between fastening time and torque for high tensile bolts of different sizes.
Charts illustrating the relationship between fastening time and torque for standard bolts of various sizes.
Steps for starting operation, using spare batteries, selecting bits, and holding the tool correctly.
Lists factors like battery discharge, bit type, bolt diameter/class, holding manner, and speed that affect torque.
Emphasizes ensuring the tool is off and battery removed before maintenance, and warnings against using solvents.
States that all repairs and adjustments should be performed by authorized centers using genuine parts.
Lists recommended accessories such as driver bits, socket bits, hooks, and carrying cases for use with the tool.
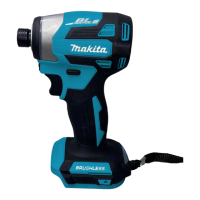
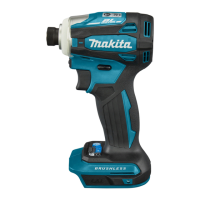
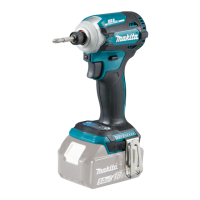
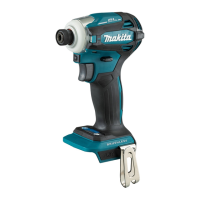
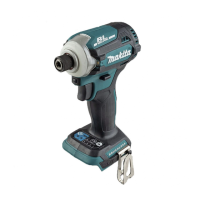
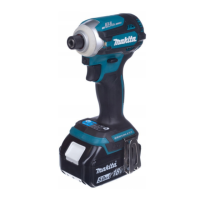
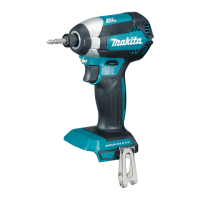
This document provides an instruction manual for the Makita Cordless Impact Driver, model DTD172. It covers safety warnings, functional descriptions, operation, and maintenance.
The Makita Cordless Impact Driver DTD172 is designed for driving screws into wood, metal, and plastic. It is a battery-operated tool, offering cordless convenience. The tool features an impact mechanism that delivers rotational force and impacts to drive fasteners efficiently. It is equipped with a tool/battery protection system that automatically cuts off power to the motor under certain conditions (overload, overheat, overdischarge) to extend the life of both the tool and the battery.
The DTD172 includes a reversing switch to change the direction of rotation, allowing for both tightening and loosening of fasteners. An electric brake is also integrated, which quickly stops the tool's rotation when the switch trigger is released. For illumination of the work area, the tool has front lamps that can be turned on and off, and their status can be managed.
A key feature of this impact driver is its "application mode" function, which allows users to select from various preset driving rotation and impact settings. These modes are designed to optimize performance for different types of work, enabling quicker completion and a better finish. The tool offers both impact force modes (Max, Hard, Medium, Soft) and assist modes (Wood, Bolt, T mode (1), T mode (2)).
Battery Installation and Removal: To install the battery cartridge, align the tongue on the cartridge with the groove in the tool's housing and slide it in until it locks with a click. A red indicator will not be visible when the battery is fully locked. For removal, slide the button on the front of the cartridge and pull it out. Always ensure the tool is switched off before installing or removing the battery.
Switch Action: The tool is operated by a switch trigger. Pulling the trigger starts the tool, and increasing pressure on the trigger increases the tool speed. Releasing the trigger stops the tool. The tool will automatically stop if the switch trigger is pulled for approximately 6 minutes.
Reversing Switch Action: The reversing switch lever allows for clockwise (A side) or counterclockwise (B side) rotation. When the lever is in the neutral position, the tool cannot be started. Always check the direction of rotation before operation and ensure the tool comes to a complete stop before changing the direction to prevent damage. For safety, set the reversing switch lever to the neutral position when not operating the tool.
Front Lamp Operation: The front lamps can be turned on by pulling the switch trigger. They will stay on for approximately 10 seconds after the trigger is released. To turn them off sooner, press and hold the button for a few seconds. The lamp status can also be disabled or re-enabled by pressing and holding the button after a brief trigger pull. The lamps will flash for one minute if the tool is overheated, and then the switch panel will turn off.
Light Mode: The tool can be used as a handy light. To activate, set the reversing switch lever to the neutral position and pull the switch trigger. The lamp will stay on for about an hour. To turn it off, pull the trigger again or depress the reversing switch lever. In light mode, application modes cannot be changed, and the lamps on the switch panel do not illuminate.
Changing Application Mode: The application mode, which dictates the driving rotation and impact, can be changed using the button or the quick mode-switching button. This allows for selection of appropriate settings for different tasks. The impact force can be adjusted in four steps: 4 (Max), 3 (Hard), 2 (Medium), and 1 (Soft). Assist types include Wood mode, Bolt mode, T mode (1), and T mode (2), each designed for specific fastening scenarios (e.g., preventing screw fall, loosening bolts, driving self-drilling screws into thin or thick metal plates).
Quick Mode-Switching Function: This function allows for quick switching between two frequently used application modes. Users can register a desired application mode to the tool. Once registered, a single press of the quick mode-switching button will toggle between the registered mode and the current application mode. This is particularly useful for repetitive tasks requiring mode changes. The quick mode-switching button can also be disabled or re-enabled.
Installing/Removing Driver Bit/Socket Bit: For tools with a shallow driver bit hole, use driver bits with specific dimensions (A=12mm, B=9mm) following Procedure 1. For tools with deep driver bit holes, different bit dimensions (A=17mm, B=14mm or A=12mm, B=9mm) may require a bit-piece and Procedure 2. To install, pull the sleeve and insert the bit as far as it goes, then release the sleeve. For one-touch type sleeves, simply insert the bit. Always ensure the bit is firmly secured.
Installing Hook: A hook can be installed on either side of the tool for temporary hanging. Insert it into a groove and secure it with a screw.
Fastening Operation: Hold the tool firmly, place the driver bit in the screw head, and apply forward pressure while pulling the switch trigger. The fastening torque is influenced by factors such as screw/bolt type and size, workpiece material, battery charge level, and the driver bit or socket bit used. Always check the torque with a torque wrench after fastening.
General Maintenance: Always ensure the tool is switched off and the battery cartridge is removed before performing any inspection or maintenance.
Cleaning: Avoid using gasoline, benzine, thinner, alcohol, or similar substances, as they can cause discoloration, deformation, or cracks. Use a dry cloth to wipe dirt off the front lamp lens, being careful not to scratch it.
Repair: For product safety and reliability, all repairs, maintenance, or adjustments should be performed by Makita Authorized or Factory Service Centers using genuine Makita replacement parts.
Battery Cartridge Care: To maximize battery life, charge the cartridge before it is completely discharged and stop operation when tool power decreases. Avoid overcharging a fully charged battery. Charge the battery at room temperature (10 °C - 40 °C). If the battery is hot, let it cool down before charging. Remove the battery from the tool or charger when not in use for a long period. Charge the battery if it will not be used for more than six months. Avoid touching the tool's terminals immediately after use, as they may be hot. Do not allow chips, dust, or soil to get into the battery cartridge terminals, holes, or grooves.
Safety Precautions: Always wear eye protection (goggles complying with ANSI Z87.1, EN 166, or AS/NZS 1336) and ear protection during operation. In Australia/New Zealand, a face shield is also legally required. Avoid wearing cloth work gloves that may become entangled in rotating parts.
| Voltage | 18V |
|---|---|
| Max Torque | 180 Nm |
| No Load Speed | 0 - 3, 600 RPM |
| Impacts Per Minute | 0 - 3, 800 IPM |
| Driving Shank | 1/4" Hex |
| Battery Type | Li-ion |
| Length | 114 mm |
| Weight | 1.2 - 1.5 kg (depending on battery) |
| Battery Capacity | 1.5Ah - 6.0Ah (depending on battery) |