Do you have a question about the Makita DTD152 and is the answer not in the manual?
Precautions for electrical connections and usage.
Recommendations for operator's safety.
Precautions for handling battery packs and preventing hazards.
Safety advice tailored for this impact driver.
Key safety rules for battery cartridges.
Step-by-step guide for battery insertion and removal.
Guide for inserting and removing bits.
Detailed steps for replacing worn carbon brushes.
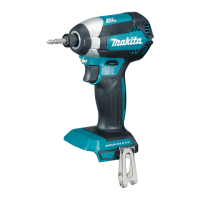
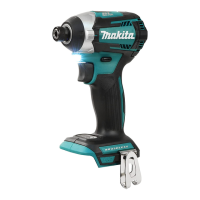
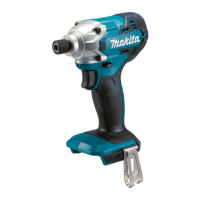
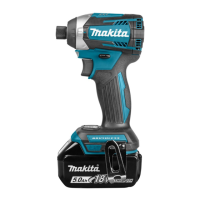
This document provides comprehensive instructions for the Makita Cordless Impact Driver DTD152, covering its functionality, safe operation, and maintenance.
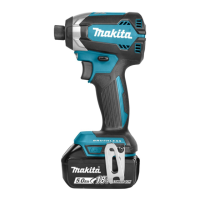
The Makita DTD152 is a cordless impact driver designed for screw driving in wood, metal, and plastic. It operates on an 18V D.C. battery and features a powerful motor capable of delivering high impact force for efficient fastening. The tool is equipped with a reversing switch, allowing for both clockwise and counterclockwise rotation, which is essential for driving and removing fasteners. A front lamp illuminates the work area, improving visibility in dimly lit conditions. The tool also incorporates a battery protection system for lithium-ion batteries with a star marking, which automatically cuts off power to extend battery life and prevent damage from overload or low battery voltage. For battery cartridges with a "B" at the end of the model number, an indicator system allows users to check the remaining battery capacity.
Battery Installation and Removal: To install the battery cartridge, align the tongue on the cartridge with the groove in the tool's housing and slide it in until it clicks. Ensure the red indicator on the upper side of the button is no longer visible, indicating a secure lock. To remove, slide the button on the front of the cartridge and pull the battery out. Always switch off the tool before installing or removing the battery to prevent accidental starts.
Driver Bit Installation and Removal: The DTD152 supports different types of driver bits depending on the depth of the driver bit hole. For tools with a shallow driver bit hole (A=12mm, B=9mm), only specific driver bits are used, and a bit-piece is not necessary. For tools with a deep driver bit hole (A=17mm, B=14mm or A=12mm, B=9mm), a bit-piece may be required. To install a driver bit, pull the sleeve in the direction of the arrow, insert the driver bit as far as it will go, and then release the sleeve to secure it. For one-touch type sleeves, simply insert the driver bit. If a bit-piece is needed, insert it into the sleeve with its pointed end facing in before inserting the driver bit. Always ensure the driver bit is firmly secured before use. To remove, pull the sleeve and pull the driver bit out.
Switch Action and Reversing Switch: To start the tool, pull the switch trigger. The tool speed increases with greater pressure on the trigger. Release the trigger to stop. The reversing switch lever changes the direction of rotation. Depress the lever from the "A" side for clockwise rotation and from the "B" side for counterclockwise rotation. When the lever is in the neutral position, the switch trigger is locked, preventing accidental operation. Always check the direction of rotation before operating and ensure the tool comes to a complete stop before changing direction to avoid damage.
Front Lamp: Pulling the switch trigger activates the front lamp, which remains lit while the trigger is pulled and for 10-15 seconds after release. This feature enhances visibility in dark work areas. Avoid looking directly into the light source.
Fastening Operation: Hold the tool firmly and position the driver bit in the screw head. Apply forward pressure to prevent the bit from slipping. The fastening torque can vary based on screw/bolt type and size, workpiece material, battery charge, and driver bit/socket bit size. It is recommended to perform a test operation to determine the proper fastening time for your specific screw. After fastening, always verify the torque with a torque wrench. If using a spare battery, allow the tool to rest for at least 15 minutes before continuing operation.
Hook Installation: A hook can be installed on either side of the tool for temporary hanging. Insert the hook into a groove in the tool housing and secure it with a screw. To remove, loosen the screw and take out the hook.
General Maintenance: Always ensure the tool is switched off and the battery cartridge is removed before performing any inspection or maintenance. Avoid using gasoline, benzine, thinner, alcohol, or similar substances, as they can cause discoloration, deformation, or cracks.
Carbon Brush Replacement: Regularly check the carbon brushes for wear. Replace them when they wear down to the limit mark. Always replace both carbon brushes at the same time with identical ones.
Battery Life Tips: To maximize battery life, charge the battery cartridge before it is completely discharged. Stop tool operation and recharge when you notice reduced power. Avoid overcharging, as this shortens service life. Charge the battery cartridge at room temperature (10 °C - 40 °C / 50 °F - 104 °F). Allow a hot battery cartridge to cool down before charging. If the battery is not used for a long period (more than six months), charge it.
Safety and Reliability: For product safety and reliability, all repairs, maintenance, or adjustments should be performed by Makita Authorized or Factory Service Centers using genuine Makita replacement parts.
| Power source | Battery |
|---|---|
| Battery voltage | 18 V |
| Battery level indicator | Yes |
| Product color | Black, Blue |
| Idle speed (max) | 3500 RPM |
| Screw diameter (max) | 16 mm |
| Maximum torque (hard applications) | 165 N⋅m |
| Vibration emission | 10.5 m/s² |
| Depth | 137 mm |
|---|---|
| Width | 79 mm |
| Height | 238 mm |
| Weight | 1500 g |