Do you have a question about the Makita DTD154 and is the answer not in the manual?
This document provides the instruction manual for the Makita Cordless Impact Driver DTD154, covering its functional description, usage, and maintenance.
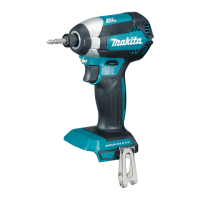
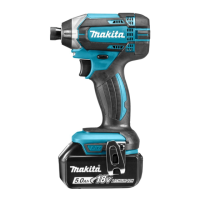
The Makita Cordless Impact Driver DTD154 is designed for screw driving in wood, metal, and plastic. It is a battery-operated power tool, emphasizing portability and ease of use without the constraints of a power cord. The tool incorporates various safety features and operational modes to enhance user experience and ensure efficient work.
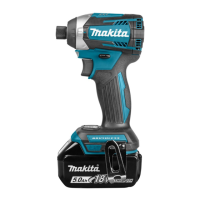
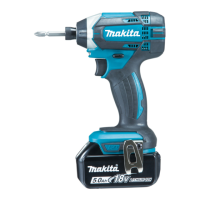
The impact driver features a robust design with a focus on user safety and operational flexibility. It is powered by a battery cartridge, which can be easily installed or removed from the tool. The battery cartridge includes an indicator system to display the remaining battery capacity, allowing users to monitor power levels and plan their work accordingly. This indicator system, specifically for battery cartridges with "B" at the end of the model number, uses a series of lighted, off, or blinking lamps to show capacity ranges from 75-100% down to 0-25%, and also indicates if the battery may have malfunctioned.
The tool is equipped with a tool/battery protection system that automatically cuts off power to the motor under certain conditions to extend the life of both the tool and the battery. This system includes:
The impact driver features a switch trigger for operation. Pulling the switch trigger starts the tool, and increasing pressure on the trigger increases the tool speed. Releasing the trigger stops the tool. An automatic shut-off feature stops the tool if the switch trigger is continuously pulled for approximately 6 minutes.
For enhanced visibility in various working conditions, the tool includes a front lamp. Pulling the switch trigger turns on the lamp, which then turns off approximately 10 seconds after the trigger is released. Users can also control the lamp's status (on or off) by pressing a dedicated button after pulling and releasing the switch trigger. This allows for continuous illumination or to keep the lamp off as needed.
A key feature of the DTD154 is its reversing switch, which allows for changing the direction of rotation. The lever can be depressed from the 'A' side for clockwise rotation or from the 'B' side for counterclockwise rotation. When the reversing switch lever is in the neutral position, the switch trigger is locked, preventing unintentional starting.
The impact force of the tool can be adjusted in four steps: hard, medium, soft, and T mode. This adjustment is made by pressing a dedicated button, cycling through the different impact force grades. The 'T' mode is a specialized setting for fastening self-drilling screws, where the tool starts with faster rotation for drilling and then transitions to a medium force grade for tightening. The impact force grade can be changed for approximately one minute after releasing the switch trigger.
The tool also includes a hook, which can be installed on either side of the tool housing using a screw. This hook is convenient for temporarily hanging the tool, improving user convenience and safety.
Before operating the tool, users must ensure the battery cartridge is fully installed and the red indicator is not visible, confirming it is securely locked in place. Forcing the battery cartridge into place is not recommended if it does not slide in easily, as this indicates incorrect insertion.
When installing or removing driver bits or socket bits, users should ensure the tool is switched off and the battery cartridge is removed. The manual specifies using only driver bits/socket bits with an inserting portion shown in the figure. For tools with a deep driver bit hole, a bit-piece may be necessary for installation. For tools with a shallow driver bit hole, a bit-piece is not required.
To install a driver bit, the sleeve is pulled in the direction of the arrow, the bit is inserted as far as it will go, and then the sleeve is released to secure the bit. For one-touch type sleeves, the bit is simply inserted as far as it will go. To remove a bit, the sleeve is pulled, and the bit is extracted. It is crucial to ensure the driver bit is inserted deeply enough for the sleeve to return to its original position and secure the bit; otherwise, the bit may not be secured and should not be used.
Proper fastening technique involves holding the tool firmly, placing the driver bit point in the screw head, and applying forward pressure to prevent the bit from slipping. The tool is then turned on to begin operation. The manual advises resting the tool for at least 15 minutes if a spare battery is used to continue operation, to prevent overheating.
The fastening torque can vary based on several factors, including the type and size of the screw/bolt, the material of the workpiece, battery charge level, driver bit/socket bit type, bolt characteristics (torque coefficient, class, diameter, length), and the manner of holding the tool or the material of the driving position. Users are advised to use the proper bit for the screw/bolt, carefully adjust pressure for smaller screws to prevent damage, and hold the tool straight. Performing a test operation to determine the proper fastening time is recommended before starting a job, and the torque should always be checked with a torque wrench after fastening. Operating the tool at low speed will reduce fastening torque.
Regular maintenance is essential for ensuring the safety and reliability of the Makita Cordless Impact Driver DTD154. Before performing any inspection or maintenance, the tool must be switched off, and the battery cartridge must be removed.
Users are explicitly warned against using gasoline, benzine, thinner, alcohol, or similar substances for cleaning, as these can cause discoloration, deformation, or cracks.
For all repairs, maintenance, or adjustments, it is recommended to use Makita Authorized or Factory Service Centers and genuine Makita replacement parts to maintain product safety and reliability.
The manual also provides important safety instructions for the battery cartridge, emphasizing the need to read all instructions and cautionary markings on the charger, battery, and product. Users should not disassemble the battery cartridge. If the operating time becomes excessively shorter, operation should cease immediately to prevent overheating, burns, or explosion. Battery cartridges should be kept away from other metal objects to prevent shorting, which can cause burns or fire. In case of contact with battery liquid, flush with water and seek medical attention, especially if it contacts the eyes.
To maintain maximum battery life, users should charge the battery cartridge before it is completely discharged and stop operation when tool power decreases. Overcharging a fully charged battery cartridge should be avoided as it shortens service life. Charging should occur at room temperature (10 °C - 40 °C / 50 °F - 104 °F), and a hot battery cartridge should be allowed to cool down before charging. If the battery cartridge is not used for a long period (more than six months), it should be charged. Damaged batteries should not be used, and battery cartridges should not be dropped or struck. Disposal of batteries should follow local regulations.
The manual also includes a list of optional accessories such as driver bits, socket bits, bit pieces, hooks, plastic carrying cases, battery protectors, tool hangers, and genuine Makita batteries and chargers. Some of these items may be included as standard accessories, varying by country.
| Voltage | 18V |
|---|---|
| Max Torque | 175 Nm |
| No Load Speed | 0-3, 600 RPM |
| Impacts Per Minute | 0-3, 800 IPM |
| Drive Size | 1/4" Hex |
| Battery Type | Lithium-Ion |
| Length | 117 mm |
| Weight | 1.5 kg (with battery) |