Do you have a question about the Makita DTD153 and is the answer not in the manual?
Essential safety instructions applicable to all power tools to prevent injury.
Critical measures to prevent electric shock during tool operation.
Emphasizes operator alertness, protective gear, and preventing unintentional starts.
Specific safety guidelines for operating this cordless impact driver model.
Crucial advice for handling, charging, and storing batteries to prevent hazards.
Illustrates torque vs. time for high tensile bolts.
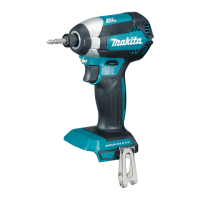
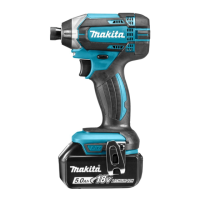
This document provides an instruction manual for the Makita DTD153 Cordless Impact Driver, covering its functional description, usage, and maintenance.
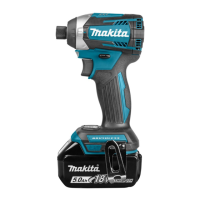
The Makita DTD153 is a cordless impact driver designed for driving screws into wood, metal, and plastic. It operates on a D.C. 18V battery cartridge. The tool is equipped with a tool/battery protection system that automatically cuts off power to the motor to extend tool and battery life. This system activates under conditions of overload, overheat, or overdischarge.
Battery Cartridge: The battery cartridge is installed by aligning the tongue with the groove in the housing and slipping it into place until it locks with a click. A red indicator on the upper side of the button indicates if the cartridge is not fully locked. To remove, slide the button on the front of the cartridge while sliding it out of the tool. For battery cartridges with "B" at the end of the model number, a check button and indicator lamps on the cartridge allow users to check the remaining battery capacity. The lamps light up for a few seconds, showing capacity ranges from 75-100% down to 0-25%, or indicating a need to charge or a malfunction.
Switch Action: The tool is started by pulling the switch trigger. Tool speed increases with increasing pressure on the trigger and stops when the trigger is released. Before installing the battery cartridge, it's important to ensure the switch trigger actuates properly and returns to the "OFF" position.
Reversing Switch Action: A reversing switch lever allows for changing the direction of rotation. Depressing the lever from the "A" side results in clockwise rotation, while depressing it from the "B" side results in counter-clockwise rotation. When the reversing switch lever is in the neutral position, the switch trigger cannot be pulled, preventing accidental starts. It is crucial to always check the direction of rotation before operation and to only use the reversing switch after the tool has come to a complete stop to avoid damage. When not operating the tool, the reversing switch lever should be set to the neutral position.
Lighting up the Front Lamp: The tool features a front lamp that lights up when the switch trigger is pulled. The lamp remains on while the trigger is pulled and goes out approximately 10 seconds after the trigger is released. This lamp helps illuminate the workpiece.
Installing and Removing Driver Bit/Socket Bit: The DTD153 supports specific types of driver bits and socket bits. For tools with a one-touch type sleeve, the driver bit is inserted into the sleeve as far as it will go. For tools with deep driver bit holes, a bit-piece may be necessary in addition to the driver bit. To remove a driver bit, pull the sleeve in the direction of the arrow and then pull the bit out. If the driver bit is not inserted deep enough, the sleeve may not return to its original position, and the bit will not be secured. In such cases, re-inserting the bit according to instructions is advised. Always ensure the driver bit is firmly secured before use.
Installing Hook: A hook can be installed on either side of the tool housing by inserting it into a groove and securing it with a screw. This hook is convenient for temporarily hanging the tool.
Operation: To operate, hold the tool firmly and place the driver bit into the screw head. Apply forward pressure to the tool to prevent the bit from slipping and then turn the tool on. The proper fastening torque depends on various factors, including the screw/bolt type and size, workpiece material, and battery charge level. It's recommended to perform a test operation to determine the proper fastening time for specific screws. Using the correct size driver bit or socket bit is essential for optimal fastening torque. If the battery cartridge is almost completely discharged, the fastening torque will be reduced.
General Maintenance: Before performing any inspection or maintenance, always ensure the tool is switched off and the battery cartridge is removed. To maintain product safety and reliability, all repairs, maintenance, or adjustments should be performed by Makita Authorized or Factory Service Centers, using only genuine Makita replacement parts.
Cleaning: Never use gasoline, benzine, thinner, alcohol, or similar substances, as they can cause discoloration, deformation, or cracks. For the front lamp, use a dry cloth to wipe dirt off the lens, being careful not to scratch it, as this may lower illumination. Keep handles dry, clean, and free from oil and grease.
Battery Cartridge Care: To maximize battery life, charge the battery cartridge before it is completely discharged, stopping operation when tool power decreases. Avoid overcharging fully charged battery cartridges, as this shortens service life. Charge battery cartridges at room temperature (10 °C - 40 °C / 50 °F - 104 °F) and allow hot cartridges to cool down before charging. If not used for a long period (more than six months), charge the battery cartridge.
Safety Precautions for Battery Cartridge: Do not disassemble the battery cartridge. If operating time becomes excessively shorter, stop operating immediately to prevent overheating, burns, or explosion. Do not short the battery cartridge by touching terminals with conductive material or storing it with metal objects like nails or coins. Do not expose the battery cartridge to water or rain. Do not store the tool and battery cartridge in locations where the temperature may reach or exceed 50 °C (122 °F). Do not incinerate the battery cartridge, even if damaged or worn out, as it can explode in a fire. Avoid dropping or striking the battery and do not use a damaged battery. If electrolyte gets into eyes, rinse with clear water and seek medical attention immediately.
Disposal: For EU countries, electric equipment and battery packs should not be disposed of with household waste. They must be collected separately and returned to an environmentally compatible recycling facility in accordance with European Directives and national laws. For commercial transport of lithium-ion batteries, observe special requirements for packaging and labeling, and consult an expert for hazardous materials. Tape or mask off open contacts and pack the battery to prevent movement in packaging. Follow local regulations for battery disposal.
| Voltage | 18V |
|---|---|
| Max Fastening Torque | 170 Nm |
| Drive | 1/4" Hex |
| Weight | 1.5 kg |
| Machine Screw | M4 - M8 |
| Standard Bolt | M5 - M16 |
| Weight with battery | 1.5 kg |
| Weight (without battery) | 1.2 kg |
| Length | 126 mm |
| Coarse thread screw (length) | 22 - 125 mm |
| Battery type | Li-ion |
| High Tensile Bolt | M5 |