EasyManuals Logo

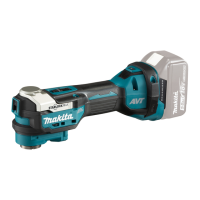
Makita DTM52Z User Manual

Makita DTM52Z
80 pages
To Next Page IconTo Next Page
To Previous Page IconTo Previous Page
Page #32 background imageLoading...
Page #32 background image
32 ITALIANO
Accensione della lampadina anteriore
ATTENZIONE: 
direttamente la fonte di luce.
      
        -
     
     
La lampadina anteriore si spegne circa 10 secondi
       

Fig.4: 1. Lampadina anteriore
NOTA:       -
      
la lampadina anteriore lampeggia per circa 1 minuto.
       
   
Funzione elettronica
       


       
     
   

         

accidentale
       
      -
tensile non si avvia.
      -
       
      
MONTAGGIO
Installazione o rimozione della
cartuccia della batteria
ATTENZIONE: Spegnere sempre l’utensile

batteria.
ATTENZIONE: Mantenere saldamente lo stru-

 Qualora non
si mantengano saldamente lo strumento e la cartuc-
      
        -
giamento dello strumento e della cartuccia della
    
Fig.5: 1. Indicatore rosso 2.  3. Cartuccia
 
       
        
il pulsante sulla parte anteriore della cartuccia.
       
       -
     
       
       -
       
completamente.
ATTENZIONE: 
-
 In caso contrario, la
    -
     
 
ATTENZIONE: Non installare forzatamente la
cartuccia della batteria.     
inserisca scorrendo agevolmente, vuol dire che non
viene inserita correttamente.
ATTENZIONE: -

󰀨-

Installazione o rimozione

Accessorio opzionale
AVVERTIMENTO: Non installare l’utensile
    
     -
      
ATTENZIONE: 

 In caso contrario, le pol-
      
      
ATTENZIONE: 


-

   
   
un dito.
Fig.6
AVVISO: 
 -
     -
    
AVVISO: 
si apre.      
danneggiato.

Questions and Answers:

Question and Answer IconNeed help?

Do you have a question about the Makita DTM52Z and is the answer not in the manual?

Makita DTM52Z Specifications

General IconGeneral
Motor typeBrushless
Product colorBlack, Blue, Silver
Adjustable speedYes
Multi-tool applicationsSanding, Sawing, Scraping
Input power- W
Output power370 W
Power sourceBattery
Battery voltage18 V
Oscillation angle3.6 °
Sound pressure level76 dB
Sound level uncertainty3 dB
Vibration level (sanding)2.5 m/s²
Idle oscillation rate (max)20000 OPM
Idle oscillation rate (min)10000 OPM
Weight and Dimensions IconWeight and Dimensions
Weight2000 g

Related product manuals