11 ENGLISH
For impact socket with O-ring and pin
1
2
3
►1. Impact socket 2. O-ring 3. Pin
Move the O-ring out of the groove in the impact socket
and remove the pin from the impact socket. Fit the
impact socket onto the square drive so that the hole in
the impact socket is aligned with the hole in the square
drive.
Insert the pin through the hole in the impact socket and
square drive. Then return the O-ring to the original posi-
tion in the impact socket groove to retain the pin.
To remove the impact socket, follow the installation
procedures in reverse.
Tool with the detent pin
Model DTW701
For tool with light t detent pin
1
3
3
4
4
2
►1. Impact socket 2. Hole 3. Square drive 4. Detent
pin
To install the socket, align the hole in the side of the
socket with the detent pin on the square drive, and then,
push it onto the square drive until it locks into place. Tap
itlightlyifrequired.
Toremovethesocket,simplypullito.
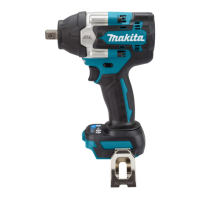
For tool with rm t detent pin
Optional accessory
1
3
3
4
4
2
►1. Impact socket 2. Hole 3. Square drive 4. Detent
pin
To install the socket, align the hole in the side of the
socket with the detent pin on the square drive, and then,
push it onto the square drive until it locks into place. Tap
itlightlyifrequired.
To remove the socket, depress the detent pin through
theholeinthesocketandpullthesocketothesquare
drive.
NOTE:Thermtdetentpinmayttoosecurelyto
remove the socket.
Inthatcase,depressthermtdetentpinfullyand
pullthesocketothesquaredrive.
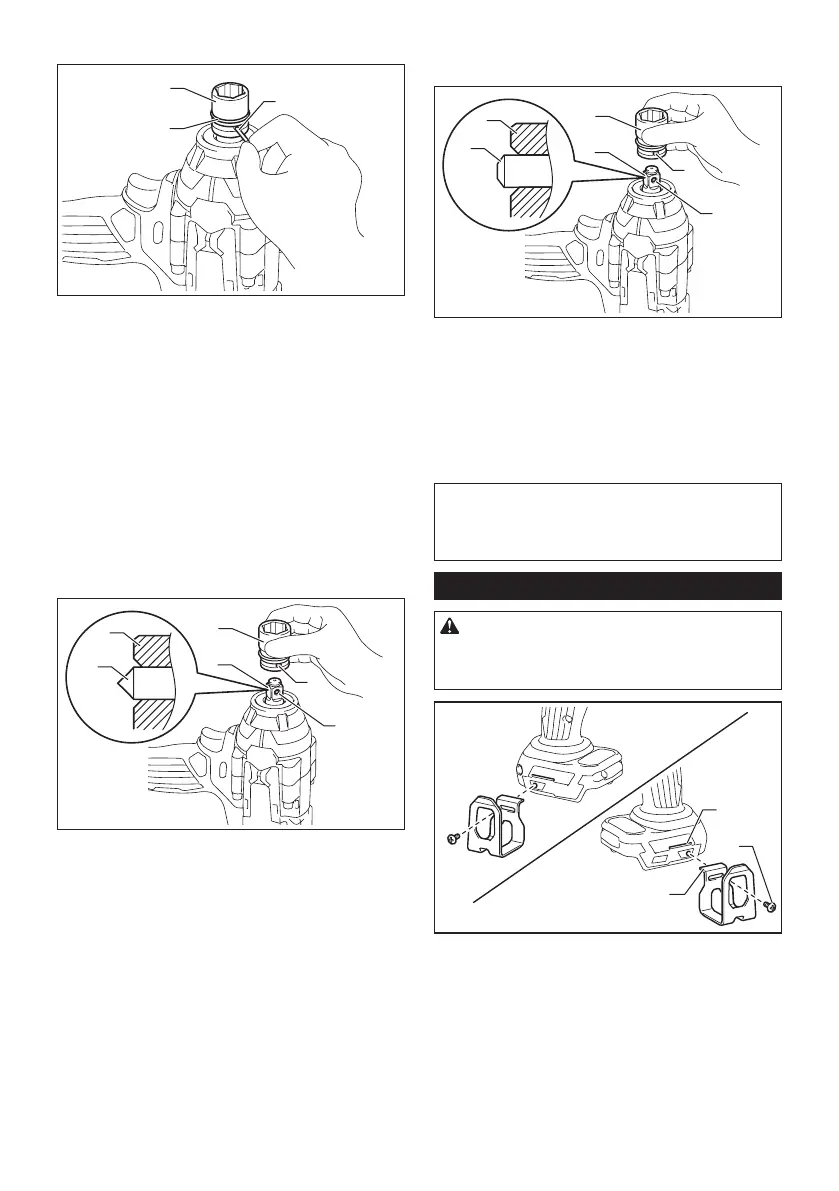
Installing hook
CAUTION: When installing the hook, always
secure it with the screw rmly. If not, the hook
maycomeofromthetoolandresultinthepersonal
injury.
2
3
1
►1. Groove 2. Hook 3. Screw
Thehookisconvenientfortemporarilyhangingthetool.
This can be installed on either side of the tool. To install
the hook, insert it into a groove in the tool housing on
either side and then secure it with a screw. To remove,
loosen the screw and then take it out.

 Loading...