This document is an instruction manual for the Makita Cordless Grass Trimmer models DUR190U, DUR190L, DUR191U, and DUR191L. It provides detailed information on the device's specifications, safety warnings, operation, and maintenance.
Function Description
The Makita Cordless Grass Trimmer is a power tool designed for cutting grass, weeds, bushes, and undergrowth. It is not intended for other purposes such as edging or hedge cutting. The tool operates on a D.C. 18V battery and features different cutting attachments depending on the model and application, including 3-tooth blades, 4-tooth blades, nylon cutting heads, and plastic blades. It incorporates a tool/battery protection system that automatically cuts off power to the motor under conditions like overload, overheating, or low battery capacity to extend tool and battery life. The trimmer also includes a reverse rotation function specifically for removing entangled weeds and debris from the cutting tool.
Important Technical Specifications
Model Variations:
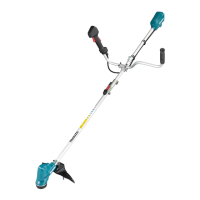
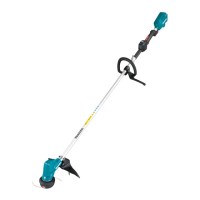
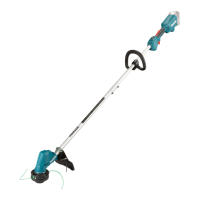
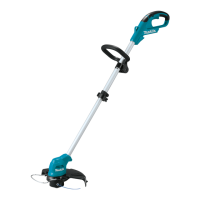
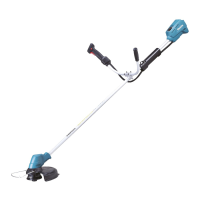
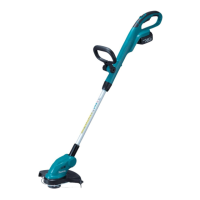
- DUR190U: Bike handle
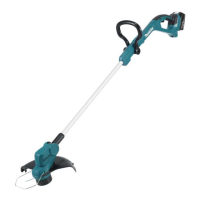
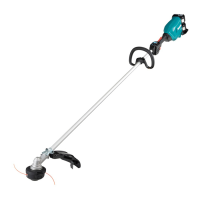
- DUR190L: Loop handle
- DUR191U: Bike handle
- DUR191L: Loop handle
No Load Speed:
- Speed 3: 6,000 min⁻¹
- Speed 2: 5,100 min⁻¹
- Speed 1: 3,500 min⁻¹
- ADT (Automatic Torque Drive Technology): 3,500 - 6,000 min⁻¹ (optimizes speed and torque for cutting conditions)
Overall Length (without cutting tool): 1,775 mm
Nylon Cord Diameter: 2.0 - 2.4 mm
Applicable Cutting Tool and Cutting Diameter:
- 3-tooth blade (P/N 191J34-5): 230 mm
- 4-tooth blade (P/N 729025-2): 230 mm
- Nylon cutting head (P/N 126674-0): 300 mm
- Plastic blade (P/N 126642-3): 230 mm
Rated Voltage: D.C. 18 V
Net Weight (depending on model and attachments):
- DUR190U: 3.1 - 3.4 kg
- DUR190L: 2.9 - 3.2 kg
- DUR191U: 3.4 - 3.7 kg
- DUR191L: 3.2 - 3.5 kg
Applicable Battery Cartridges: BL1815N, BL1820, BL1820B, BL1830, BL1830B, BL1840, BL1840B, BL1850, BL1850B, BL1860B.
Applicable Chargers: DC18RC, DC18RD, DC18RE, DC18SD, DC18SE, DC18SF, DC18SH.
Recommended Battery Adapter: PDC01.
Noise Emission Levels (LPA / LWA) and Vibration Levels (an,w):
- 4-tooth blade:
- Sound Pressure Level (LPA): 77.0 dB(A) (Uncertainty K: 3.9 dB(A))
- Sound Power Level (LWA): 91.6 dB(A) (Uncertainty K: 2.4 dB(A))
- Vibration (an,w): ≤ 2.5 m/s² (Uncertainty K: 1.5 m/s²)
- Nylon cutting head:
- Sound Pressure Level (LPA): 74.0 dB(A) (Uncertainty K: 1.9 dB(A))
- Sound Power Level (LWA): 87.1 dB(A) (Uncertainty K: 0.9 dB(A))
- Vibration (an,w): ≤ 2.5 m/s² (Uncertainty K: 1.5 m/s²)
- Plastic blade:
- Sound Pressure Level (LPA): 75.6 dB(A) (Uncertainty K: 1.3 dB(A))
- Sound Power Level (LWA): 85.9 dB(A) (Uncertainty K: 2.1 dB(A))
- Vibration (an,w): ≤ 2.5 m/s² (Uncertainty K: 1.5 m/s²)
Usage Features
Starting and Stopping:
- The tool is turned on by tapping the main power button and off by pressing and holding it until the speed indicator goes off.
- A lock-off lever prevents accidental pulling of the switch trigger. To start, grasp the handle to release the lever and then pull the trigger. Release the trigger to stop.
Speed Adjustment:
- The tool speed can be selected by tapping the main power button, cycling through different speed levels.
- ADT (Automatic Torque Drive Technology) automatically adjusts rotation speed and torque based on grass conditions.
Battery Management:
- Battery cartridges are installed by aligning the tongue with the groove and pushing until it clicks, and removed by sliding the button and pulling out.
- A red indicator on the battery cartridge shows if it's not fully locked.
- Battery cartridges with an indicator show remaining capacity via indicator lamps when the check button is pressed.
Cutting Tool Installation:
- The manual details installation of cutter blades, nylon cutting heads, and plastic blades.
- For cutter blades, ensure the arrows on the blade and protector point in the same direction.
- A spindle lock button is used to secure the cutting tool during installation and removal.
- A hex wrench (supplied) can be used to lock the spindle for easier tool changes.
Handle and Hanger Adjustment:
- For DUR190U and DUR191U models, the handle and hanger position can be adjusted to achieve a comfortable working position, with specific ranges for hanger position from the ground (≥750mm) and horizontal distance between hanger and unguarded part of the cutting tool (100-300mm).
- For DUR190L and DUR191L models, the handle and hanger can also be adjusted for comfort.
Attachment Pipe Mounting (DUR191U and DUR191L only):
- The attachment pipe is mounted to the power unit by turning a lever, pulling up a joint cover, inserting the pipe, and then turning the lever back to secure it.
Protector and Barrier:
- The tool must always be used with the guard (protector) in place to prevent serious personal injury.
- A barrier (country-specific for DUR190L and DUR191L) is attached to the handle as a safety part to prevent contact with the cutting blade.
Shoulder Harness:
- A shoulder harness is provided to prevent fatigue and ensure secure handling. It connects to the tool's hanger and features a quick-release mechanism.
Operation Guidelines:
- Always position the tool on the right-hand side for maximum control.
- Maintain a safe distance of at least 15m from bystanders and animals.
- Inspect the work area for solid objects before operation to prevent kickback.
- Never cut above waist height.
- Wait for the cutting attachment to reach constant speed before starting.
- When using a cutting blade, swing the tool from right to left like a scythe.
- Hold the tool with both hands by insulated gripping surfaces.
- Do not start the tool if the cutting tool is tangled.
- Ensure the cutting tool is not touching the ground or other obstacles before starting.
- For nylon cutting heads (bump & feed type), tap the head against the ground while rotating to feed out the cord.
Maintenance Features
General Maintenance:
- Always switch off the tool and remove the battery cartridge before any inspection, maintenance, or adjustment.
- Keep cutting tools sharp and clean.
- Regularly check for misalignment, binding, breakage, or other conditions affecting operation.
- Clean dust and dirt off the tool; avoid using gasoline, benzine, thinner, or alcohol.
- Tighten all screws and nuts after each use.
- Do not attempt repairs not described in the manual; contact an authorized service center.
- Use only genuine Makita spare parts and accessories.
Battery Cartridge Maintenance:
- Recharge only with the specified charger.
- Stop operation and charge the battery when tool power decreases.
- Avoid overcharging.
- Charge at room temperature (10 °C - 40 °C).
- Allow hot battery cartridges to cool before charging.
- Charge if not used for long periods (more than six months).
- Do not disassemble, short-circuit, expose to water/rain, or store in high temperatures (above 50 °C).
- Do not incinerate damaged or worn-out battery cartridges.
- Do not use damaged batteries.
- Remove the battery from the tool if not used for a long period.
Cutting Tool Maintenance:
- Inspect cutting attachments frequently for cracks or damage and replace immediately if found.
- When handling cutter blades, wear protective gloves and use the blade cover.
- Ensure cutter blades are well-polished and free of cracks or breakage.
- Replace nylon cord if it is no longer feeding.
- When replacing the nylon cord, remove the nylon cutting head from the tool and ensure the cover is properly secured.
Troubleshooting:
- The manual provides a troubleshooting guide for common issues such as the motor not running, stopping after short use, not reaching maximum RPM, cutting tool not rotating, abnormal vibration, and cutting tool/motor not stopping.
- It suggests probable causes (e.g., battery not installed, low charge, overheating, foreign objects) and remedies (e.g., install/recharge battery, remove foreign object, contact service center).