!"#$%&'($)*$+',-./001'2',-./0/1
//
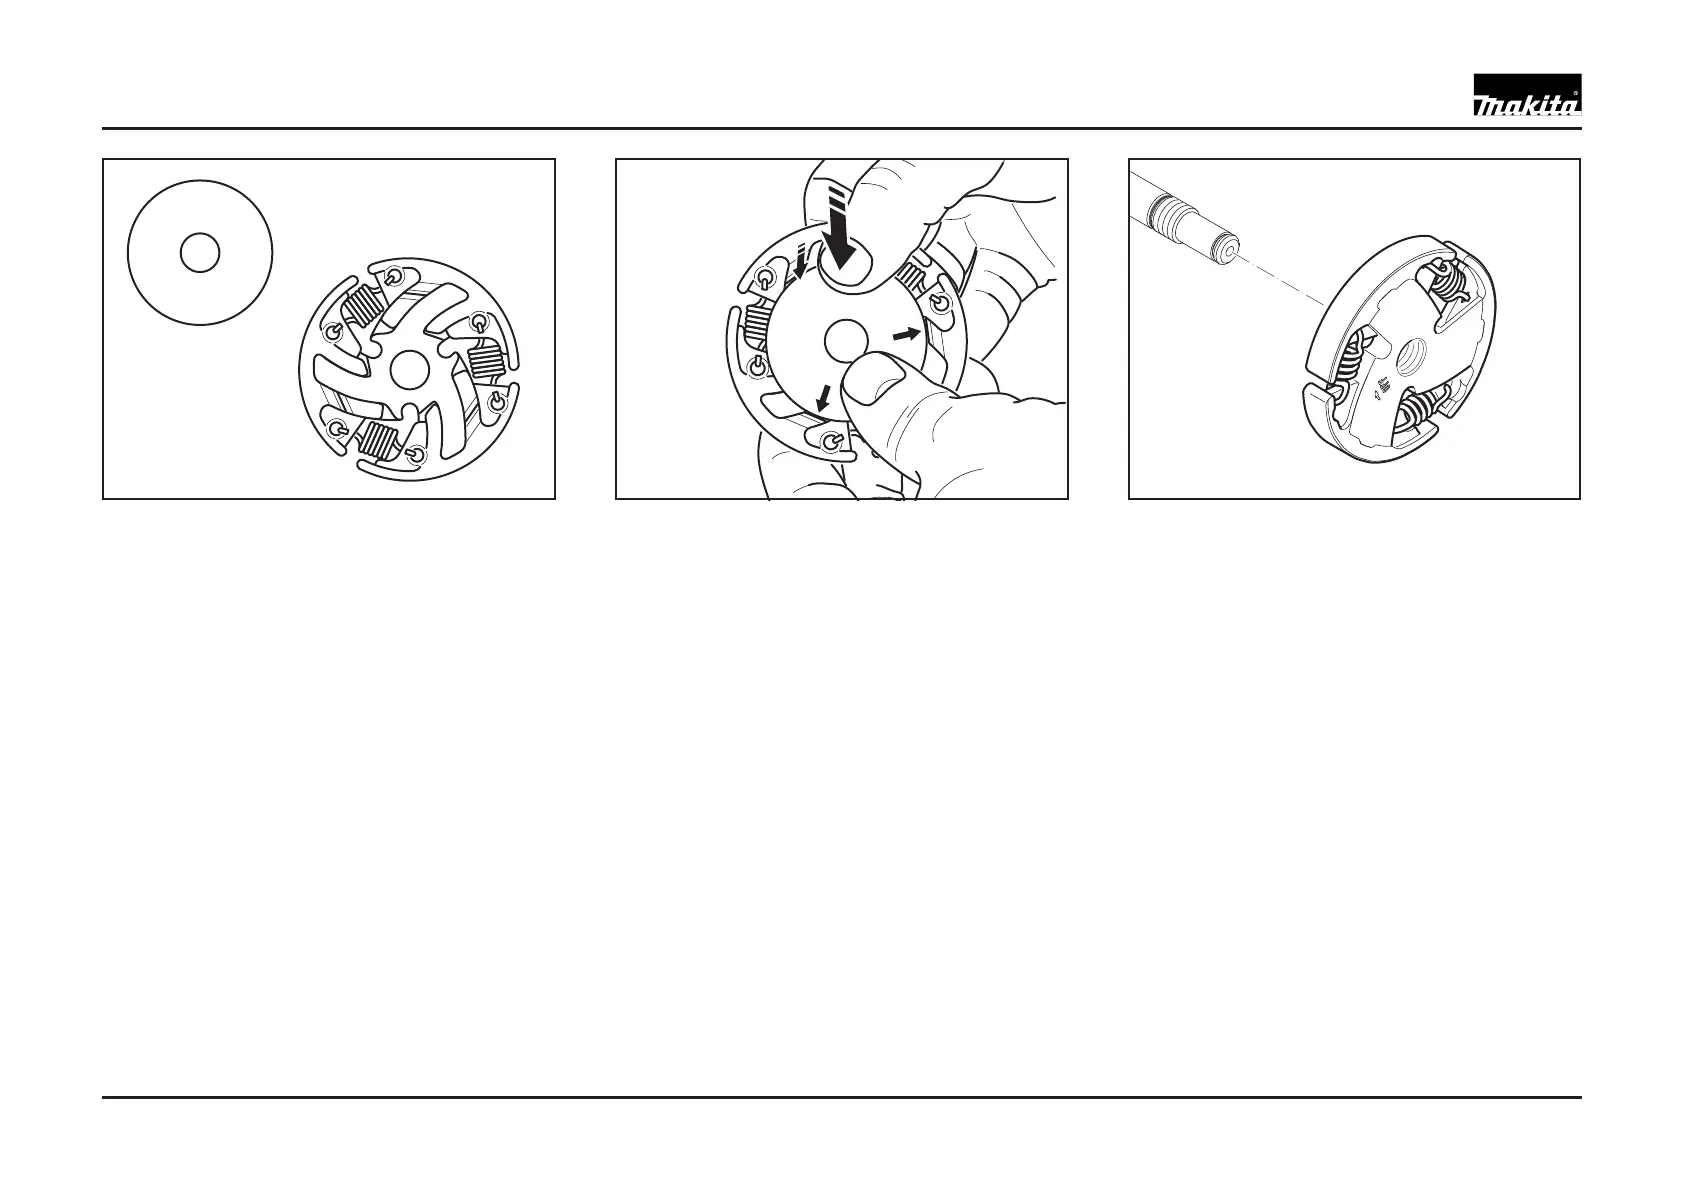
Inserting the yweights
g;;C'98"':#&%)F:'$:':8;E)'%)'98"'%++*:9&$9%;)4
M8")'#&"::'98"''@E"%F89:';)9;'98"'F*%D"4'M;'
D;'98%:S''&:9'#*:8';)'9E;''@E"%F89:'8$+PNE$@S'
98")'#*9';)'98"'98%&D''@E"%F89'?@':"99%)F'%9';)'
%9:'"DF"4
1&"::'98"''@E"%F89:'$++'98"'E$@';)9;'98"'
F*%D"4
CAUTION: Note the position of the springs.
Do not replace springs individually! If
a spring breaks or is fatigued, all three
springs must be replaced. The springs
must not touch the cover.
M8"'%++*:9&$9%;)':8;E:'98"'%):%D"';P'98"'=+*9=84
Installing the clutch
K):9$++'98"'=+*9=8'E%98'98"'$&&;E'>$&C%)F'#;%)9'
*#4
(;*)9%)F'9;&V*"_'5O'
^2N34O
'W>
CAUTION: Before installing the clutch,
disassemble the starter (chap. 06) in order
to prevent damage to the starting catches.
1&"::'98"'D%:=';)9;'98"'=+*9=84'K9'>*:9'?"''$9'
$)D'?"'")F$F"D4
04 CLUTCH

 Loading...