5 ENGLISH
ASSEMBLY
CAUTION: Always be sure that the tool is
switched o and unplugged before carrying out
any work on the tool.
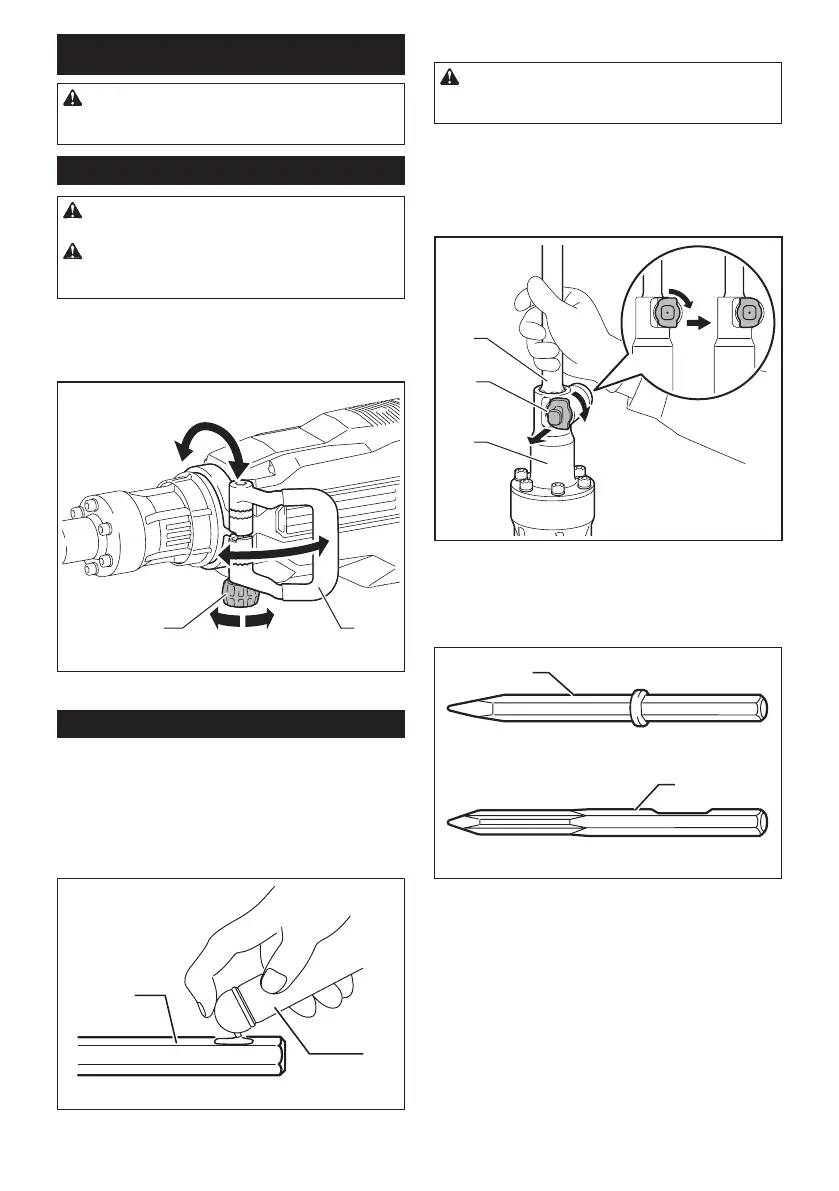
Side handle (auxiliary handle)
CAUTION: Always use the side handle to
ensure safe operation.
CAUTION: After installing or adjusting the
side handle, make sure that the side handle is
rmly secured.
The side handle can be swung 360° on the vertical and
secured at any desired position.
Loosen the clamp nut to swing the side handle to a
desired position, and then tighten the clamp nut securely.
12
► 1. Side handle 2. Clamp nut
Installing or removing the bit
Grease
Clean the shank end of the bit and apply grease before
installing the bit.
Coat the shank end of the bit beforehand with a small
amount of grease (about 0.5 - 1 g). This chuck lubrica-
tion assures smooth action and longer service life.
1
2
► 1. Shank end 2. Grease
Installing the bit
CAUTION: Always assure that the bit is securely
retained by attempting to pull the bit out of the tool
holder after completing the above procedure.
For Model HM1511, HM1501 only
With the notched portion on the shank of the bit fac-
ing toward the tool retainer, insert the bit into the tool
holder as far as it will go. Then pull out and turn the tool
retainer 180° to secure the bit.
1
2
3
► 1. Bit 2. Tool retainer 3. Tool holder
For Model HM1512, HM1502 only
This tool accepts bits either with or without a collar on
its shank.
1
2
► 1. Bit with collar 2. Bit without collar

 Loading...