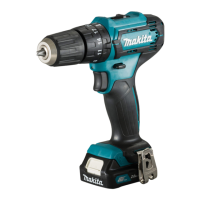
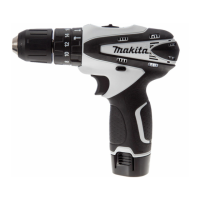
9 ENGLISH
Thistoolhasthreeactionmodes.
•
Drilling mode (rotation only)
•
Hammer drilling mode (rotation with
hammering)
•
Screwdriving mode (rotation with clutch)
Selectonemodesuitableforyourwork.Turnthe
action mode changing ring and align the mark that you
selectedwiththearrowonthetoolbody.
Adjusting the fastening torque
►Fig.7: 1.Adjustingring2. Graduation 3.Arrow
Thefasteningtorquecanbeadjustedin18levelsby
turningtheadjustingring.Alignthegraduationswiththe
arrowonthetoolbody.Youcangettheminimumfas-
teningtorqueat1andmaximumtorqueat18.
Beforeactualoperation,driveatrialscrewintoyour
materialorapieceofduplicatematerialtodeter-
minewhichtorquelevelisrequiredforaparticular
application.
NOTE:Thefasteningtorquecanbeadjustedonly
when the arrow points toward the
mark on the
ring.
ASSEMBLY
CAUTION: Always be sure that the tool is
switched o and the battery cartridge is removed
before carrying out any work on the tool.
Installing or removing driver bit/
drill bit
►Fig.8: 1. Sleeve 2. Close 3. Open
Turnthesleevecounterclockwisetoopenthechuck
jaws.Placethedriverbit/drillbitinthechuckasfar
asitwillgo.Turnthesleeveclockwisetotightenthe
chuck.Toremovethedriverbit/drillbit,turnthesleeve
counterclockwise.
OPERATION
CAUTION: Always insert the battery cartridge
all the way until it locks in place.Ifnot,itmay
accidentallyfalloutofthetool,causinginjurytoyou
or someone around you.
CAUTION: When the speed comes down
extremely, reduce the load or stop the tool to
avoid the tool damage.
CAUTION: Do not cover vents, or it may
cause overheating and damage to the tool.
Holdthetoolrmlywithonehandonthegripandthe
otherhandonthebottomofthebatterycartridgeto
control the twisting action.
►Fig.9
Screwdriving operation
CAUTION: Adjust the adjusting ring to the
proper torque level for your work.
CAUTION: Make sure that the driver bit is
inserted straight in the screw head, or the screw
and/or driver bit may be damaged.
First, turn the action mode changing ring so that the
arrowonthetoolbodypointstothe marking.
Placethepointofthedriverbitinthescrewheadand
apply pressure to the tool. Start the tool slowly and then
increase the speed gradually. Release the switch trigger
as soon as the clutch cuts in.
NOTE: When driving wood screw, pre-drill a pilot hole
2/3thediameterofthescrew.Itmakesdrivingeasier
andpreventssplittingoftheworkpiece.
Hammer drilling operation
CAUTION: There is a tremendous and sud-
den twisting force exerted on the tool/drill bit
at the time of hole breakthrough, when the hole
becomes clogged with chips and particles, or
when striking reinforcing rods embedded in the
concrete.
First, turn the action mode changing ring so that the
arrowonthetoolbodypointstothe marking.The
adjustingringcanbealignedinanytorquelevelsfor
this operation.
Besuretouseatungsten-carbidetippeddrillbit.
Positionthedrillbitatthedesiredlocationforthehole,
thenpulltheswitchtrigger.Donotforcethetool.Light
pressuregivesbestresults.Keepthetoolinposition
andpreventitfromslippingawayfromthehole.
Donotapplymorepressurewhentheholebecomes
clogged with chips or particles. Instead, run the tool at
anidle,thenremovethedrillbitpartiallyfromthehole.
Byrepeatingthisseveraltimes,theholewillbecleaned
outandnormaldrillingmayberesumed.
Blow-out bulb
Optional accessory
►Fig.10: 1.Blow-outbulb
Afterdrillingthehole,usetheblow-outbulbtocleanthe
dustoutofthehole.
Drilling operation
First,turntheadjustingringsothatthearrowpointsto
the marking.Thenproceedasfollows.
Drilling in wood
Whendrillinginwood,thebestresultsareobtained
withwooddrillsequippedwithaguidescrew.Theguide
screwmakesdrillingeasierbypullingthedrillbitinto
the workpiece.
 Loading...