6 ENGLISH
After securing the upper blade, be sure that there is no
gap left between the upper blade and the beveled sur-
face of the blade holder.
1
2
3
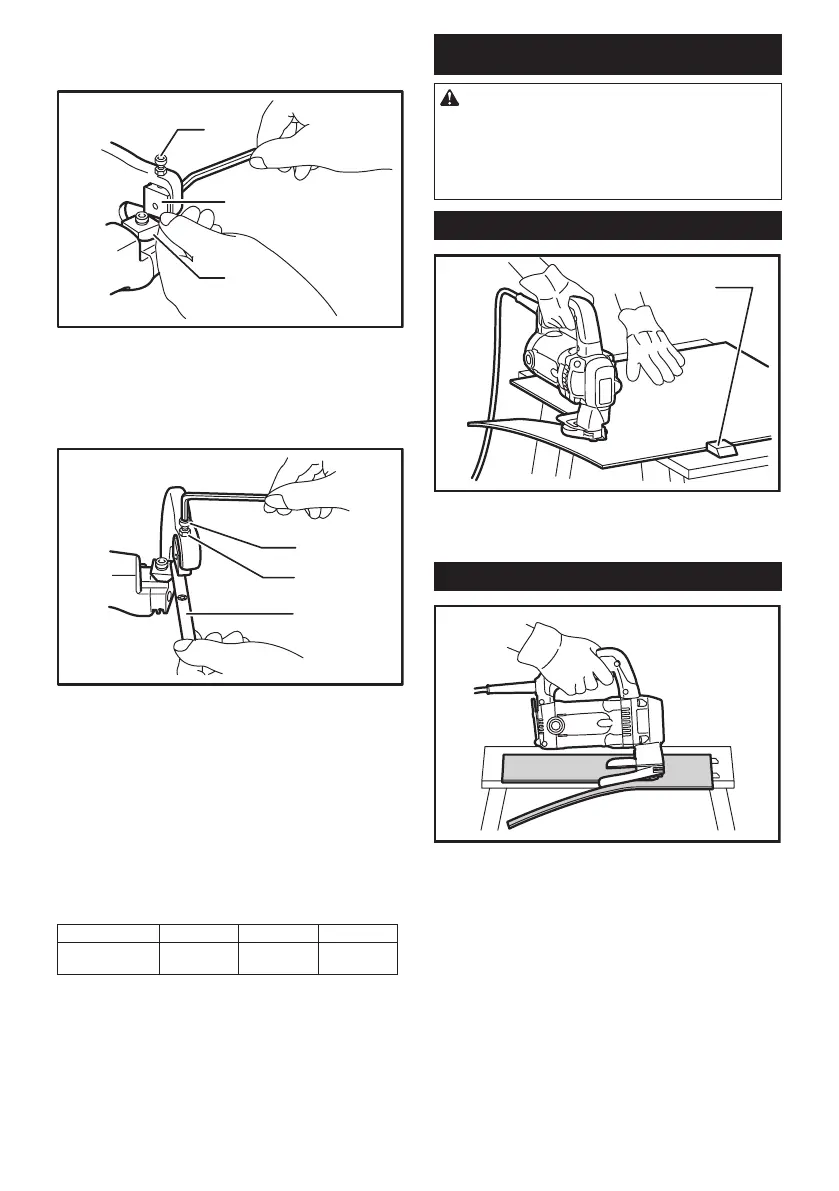
► 1. Lower blade positioning bolt 2. Lower blade
3. Upper blade
Then install the lower blade like the upper blade while
adjusting the clearance between the upper blade and
lower blades. When performing this adjustment, the
upper blade should be in the lowered position.
1
2
3
► 1. Lower blade positioning bolt 2. Hex nut
3. Thickness gauge
First, semi- tighten the lower blade securing bolt, then
insert the thickness gauge for the desired clearance.
The cutting thickness is indicated on the thickness
gauge so the combinations shown in the table below
should be used. Work the lower blade positioning bolt
on the yoke until the clearance is such that the thick-
ness gauge moves only with some difculty. Then rmly
tighten the lower blade securing bolt. Finally, tighten the
hex nut to secure the lower blade positioning bolt.
Thickness gauge combinations
Material thickness
2.3 mm (14 ga.) 2.5 mm (13 ga.) 3.2 mm (10 ga.)
Thickness gauge
combinations
1.0 +1.5 1.0 +1.5 1.5 + 2.0
OPERATION
CAUTION:
• When cutting, always place the shear on the
workpiece so that the material cut away is posi-
tioned on the right side to the operator.
• Hold the tool rmly with one hand on the main
handle when performing the tool.
Holding material
1
► 1. Workholder
The materials for cutting should be fastened to the
workbench by means of workholders.
Shearing method
For smooth cuts, tip the tool slightly backward while
advancing it.

 Loading...