21
OPERATION
A. Connection
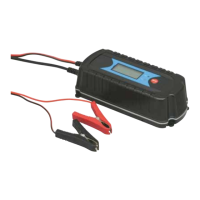
First connect the charger to the + pole and then to the - pole of the battery. Then the
charger can be connected to the power outlet. The charger is now showing the voltage
according to Fig. 6.
If the polarity is reverse, the red (Fault) LED flashes, and LCD displays as shown in Fig. 7
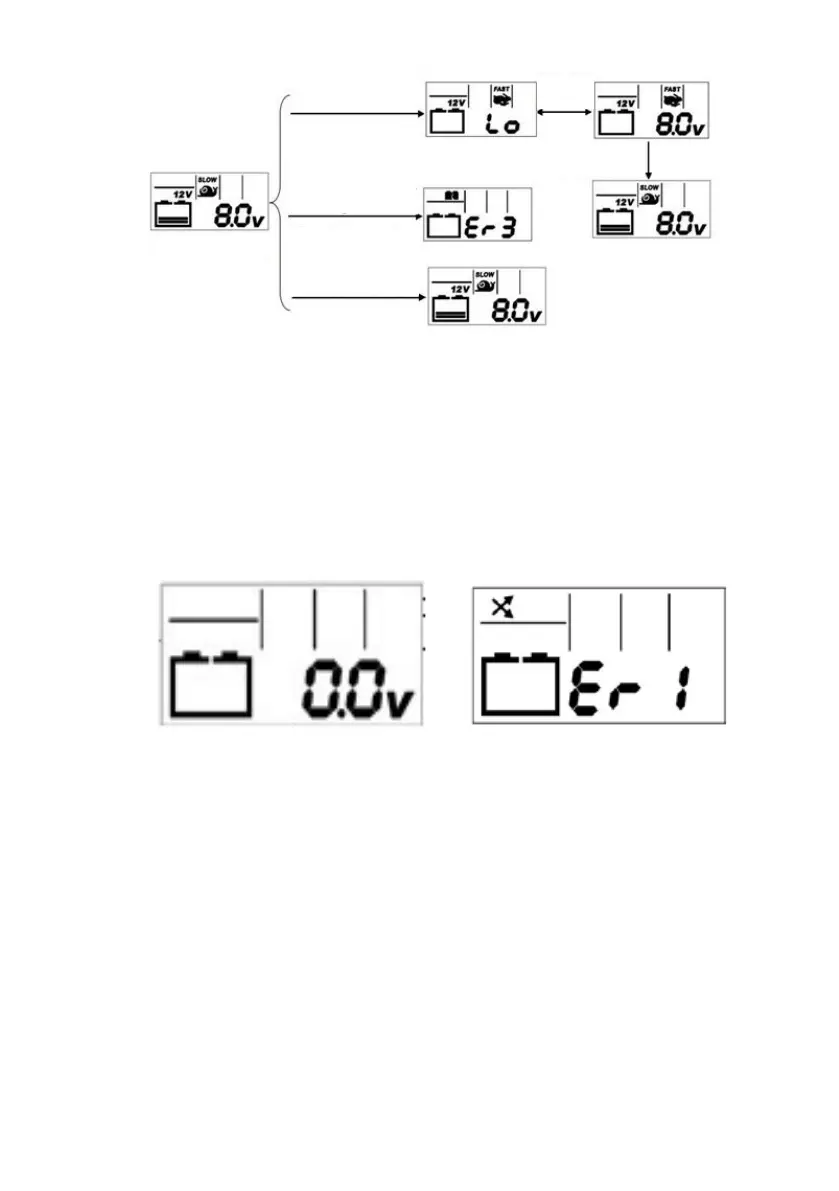
Fig. 4 and Fig. 5: 6V/ 12V LCD charging block diagram
Fig. 6 Fig. 7
12V/Slow mode
for battery voltage
between 7.4V-10V
Process will be stopped if
the voltage is <9V after 2
mins charging
If the voltage is still <10V
after 4 hours charge
display error message.
Press button to select the
mode: 12V/Slow, 12V/
Fast, 12V/Low temp and
pause the charging.
Press the button to
restart the process
Flash
alternately