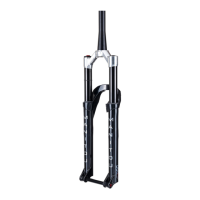
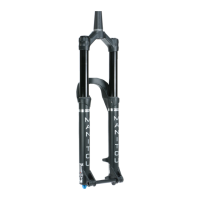
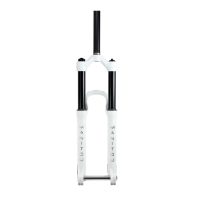
The provided manual describes the Manitou Dorado suspension fork, a high-performance component designed for mountain biking, particularly for freeriding, dirt jumping, and downhill disciplines.
Function Description
The Dorado fork is engineered to provide advanced suspension technology for bicycles, enhancing control, comfort, and performance over varied terrain. It manages impacts, absorbs shocks, and maintains tire contact with the ground, allowing riders to navigate challenging trails more effectively. The fork is delivered fully assembled and ready for installation.
Important Technical Specifications
The Dorado fork is available in two main configurations, optimized for different wheel sizes and frame geometries:
- Crown Fitment:
- 27.5" Wheels: Features a 47OS flat upper crown.
- Cup-to-Cup Stack Height Range: 106-140mm (for 27.5" wheels)
- Axle to Crown: 582mm
- 29" Wheels: Features a 57OS drop upper crown.
- Cup-to-Cup Stack Height Range: 87-121mm (for 29" wheels)
- Axle to Crown: 602mm
- The manual also provides a 29" wheel option with a 104-138mm cup-to-cup stack height.
- Tire Clearance:
- 27.5" x 2.6" Tire:
- Max Tire Diameter: 717mm
- Max Tire Width: 72mm
- Min Tread Drop: 13.25mm
- 29" x 2.6" Tire:
- Max Tire Diameter: 756mm
- Max Tire Width: 72mm
- Min Tread Drop: 13.25mm
- Brake Mount: The 37mm Dorado uses a 203mm [8"] post mount style brake mount. It can accommodate up to a 223mm [9"] rotor with a proper adapter.
- Hub Compatibility: Designed around a 20x110mm Boost hub. A disc brake rotor adapter is included for 20x100mm non-boost hubs.
- Travel Settings:
- 180mm travel (Seal to Dropout Measurement: 185mm)
- 203mm travel (Seal to Dropout Measurement: 208mm)
- Air Spring System:
- Dorado Pro and Expert: Feature the Dorado Air system, which is a high-volume, low-pressure air spring designed for quick, linear break-away and progressive bottoming ramp-up. It includes linked positive and negative air chambers that auto-equalize via a poppet valve.
- Recommended Air Pressure: 35-89psi, not to exceed 120psi.
- Dorado Pro: Equipped with IRT (Infinite Rate Tune), an advanced air spring system located on the bottom of the spring side (left) leg. IRT independently modifies air pressures in the beginning and end stroke, providing improved small bump sensitivity, mid-stroke support, and moderate to aggressive end-stroke ramp-up.
- Dorado Expert: Equipped with IVA (Incremental Volume Adjust), located on the bottom of the spring side (left) leg. IVA is a self-contained air volume adjustment system that allows users to customize ramp-up by moving spacers on either side of the air piston.
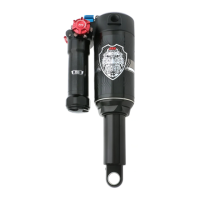
- Dorado Comp: Uses a coil spring system with external preload located on the bottom of the spring side (left) leg.
- Torque Specifications (NM [IN-LBS]):
- Crown Pinch Bolts: 10.7-12.4 NM [95-110 IN-LB]
- Drop Out Pinch Bolts: 10.7-12.4 NM [95-110 IN-LB]
- Axle Tension Bolt (with wheel installed): 12.0-15.0 NM [106-133 IN-LB]
- Fender Screws: .5-.7 NM [4-6 IN-LB]
- Cable Guide Screw: .5-.7 NM [4-6 IN-LB]
- Brake Caliper Screw: 8.5-9.5 NM [75-84 IN-LB]
Usage Features
- Installation: The manual provides detailed steps for fork installation, including steerer tube cutting, headset assembly, handlebar installation, and brake lever adjustment. It emphasizes the importance of proper torque application and the use of spacers in the lower crown clamp joint.
- Break-in Period: New Dorado forks require approximately 20 hours of riding to break in, after which they will feel smoother and react better to bumps. Rechecking adjustments after this period is recommended.
- Sag Measurement: A sag measuring tool is included, with a gradient for 20%, 25%, and 30% sag (based on a 203mm travel Dorado). The process involves mounting the bike in an "attack position," gently bouncing to settle the suspension, resetting travel indicator rings, and dismounting without further compressing the fork. Air pressure is then adjusted based on the desired sag percentage.
- Air Pressure Adjustment:
- Increasing Air Pressure: Remove the cap, firmly tighten a shock pump, cycle the fork to ensure the balancing valve opens, pull the fork to full extension, adjust pressure, and rapidly remove the pump to minimize pressure loss.
- Releasing Air Pressure: Firmly tighten a shock pump, note the pressure, and use the pump's release valve until all air is released. For full air release (e.g., for servicing or IVA setting changes), a 3mm Allen key can be used to depress the air shaft.
- Brake Hose Routing: A black brake hose guide with two spacers and a zip tie are included. The preferred routing is inside the spring leg, secured to the bash guard, then through the brake hose guide, ensuring the hose is loose enough to translate up and down without crimping or touching the tire.
Maintenance Features
- Regular Maintenance: The fork requires periodic maintenance, cleaning, and inspection, with more frequent checks for extreme riding conditions.
- Suggested Service Intervals:
- Every Ride: Clean dirt from wipers, wipe legs; inspect for scratches on legs; check air pressure and sag; check axle torque; release built-up casting pressure using TSR buttons or screws.
- Every 50 Hours: Replace casting semi-bath oil; lubricate leg seals; clean and inspect bushings; check fastener torques; clean and re-lubricate air piston(s).
- Every 200 Hours / Yearly: Replace casting semi-bath oil; replace leg seals & foam rings; replace damper oil; clean and inspect bushings; replace air spring seals and re-lubricate; check fastener torques.
- Pre-Ride Checks: Before every ride, riders should ensure the Hex Axle is properly installed, all bolts are torqued to specifications, inner legs are wiped clean, the entire fork is inspected for damage, the headset is properly adjusted, and the front brake cable is correctly routed and adjusted.
- Professional Service: Manitou recommends returning the suspension fork to an authorized dealer every two years for a thorough inspection, especially for moderate or aggressive off-road riders or those who ride frequently on rough terrain.
- Warnings: The manual includes extensive warnings about the hazardous nature of bicycling, the importance of proper installation and maintenance, the risks associated with improper use (e.g., landing jumps incorrectly, riding out of control), and the potential for reduced fork life under extreme conditions. It explicitly states that modifications not authorized in the manual are unsafe and that the steerer tube and stanchion dropouts are press-fit and should never be removed or threaded.