Do you have a question about the Manitou Mara Pro and is the answer not in the manual?
Release all air from the shock using the pump's release valve to depressurize the air spring.
Clamp the shock's upper eyelet or trunnion mounts in a vise using soft jaws to prevent damage.
Loosen the air can one full turn with the air can wrench; do not remove it completely yet.
Compress the shock and then fully unthread the air can.
Remove the air can, bumper, and spacers, keeping them for later re-assembly.
Remove the wire ring and slide the outer air can sleeve off the inner can.
Remove the upper and lower O-rings from the inner can, including the Mid King O-ring if applicable.
Grease new O-rings and install them into the seal glands using a tool or by hand.
Slide the outer air can sleeve back onto the inner can and install the wire ring.
Remove the negative chamber MCU and spacers, then carefully remove the dust wiper with a pick.
Remove the glide ring from the air can.
Remove the quad ring from the air can.
Utilize the Air Can Seal Install tool for easier air can seal installation.
Place the air can onto the seal tool or a flat surface for the next step.
Visual guide to seal placement: quad seal and glide ring in lower groove, wiper seal in upper groove.
Take a new air can quad ring from the kit and apply Slickoleum grease liberally.
Install the greased quad ring into the lower groove of the air can, ensuring it is not twisted.
Install the glide ring into the lower groove, on top of the quad ring.
Lightly grease and install the wiper seal into the upper groove of the air can.
Remove the split glide ring from the air piston.
Remove the quad seal, clean the white glide ring and piston with isopropyl alcohol. Do not remove the white glide ring.
Apply Slickoleum grease liberally to the air piston quad ring.
Install the greased quad ring onto the air piston.
Install the quad ring tightly, ensuring it's not twisted, to create space for the split glide ring.
Install the split glide ring onto the air piston.
Apply Slickoleum grease to the seals on the air piston.
Place the foam ring and any spacers onto the damper body.
Push the air can onto the shock as far as possible; compression may be needed for full installation.
Mount the shock in a tester or frame and compress it until the air can threads onto the top cap.
Tighten the air can onto the shock until it reaches the hard stop, but do not overtighten.
Set the air pressure, clean the shock, record tuning notes, and prepare for riding.
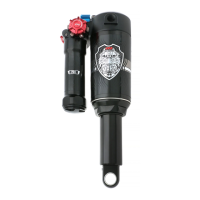
The provided document is a service guide for the Manitou Mara 50 Hour Air Can & Piston, specifically for the Mara Pro and Mara Inline rear shocks. This manual outlines the necessary steps for servicing the air can and air piston components of these bicycle suspension shocks.
The Manitou Mara Pro and Mara Inline rear shocks are suspension components designed for bicycles, providing damping and spring functionality to absorb impacts and maintain tire contact with the ground. The air can and piston are critical elements of the air spring system within these shocks, responsible for generating the spring force that supports the rider's weight and absorbs terrain irregularities. Regular servicing of these components, as detailed in this guide, ensures optimal performance, longevity, and safe operation of the rear shock. The service involves disassembling the air can, replacing seals, greasing components, and reassembling the unit to maintain proper air pressure and smooth operation.
The Manitou Mara shocks are designed for bicycle suspension applications, offering adjustable damping and air spring characteristics to suit various riding styles and terrain. The air can and piston system allows for tuning of the air spring's progressiveness and sag. The "King Can" service mentioned suggests a larger volume air can option, which typically provides a more linear spring curve, beneficial for certain frame designs or rider preferences. The shock features a valve for air pressure adjustment using a shock pump, allowing riders to set their desired spring rate. The design incorporates a negative air chamber, which equalizes pressure with the positive chamber to provide a smoother initial stroke. The presence of a "hand dyno" in the required tools list suggests that the shock's performance can be tested and verified post-service to ensure proper function.
The manual provides a detailed, step-by-step guide for a 50-hour service of the air can and piston, emphasizing safety and correct procedure.
The manual emphasizes the importance of safety warnings, particularly regarding the high pressures within the shock, and strongly recommends that service be performed by a certified bicycle mechanic to prevent serious injury or death. Contact information for Manitou Customer Support is provided for assistance. The warranty information directs users to hayesbicycle.com/warranty.
| Brand | Manitou |
|---|---|
| Model | Mara Pro |
| Category | Bicycle Accessories |
| Language | English |
