12 Operator’s Manual
CHARGER INFORMATION (CONTINUED)
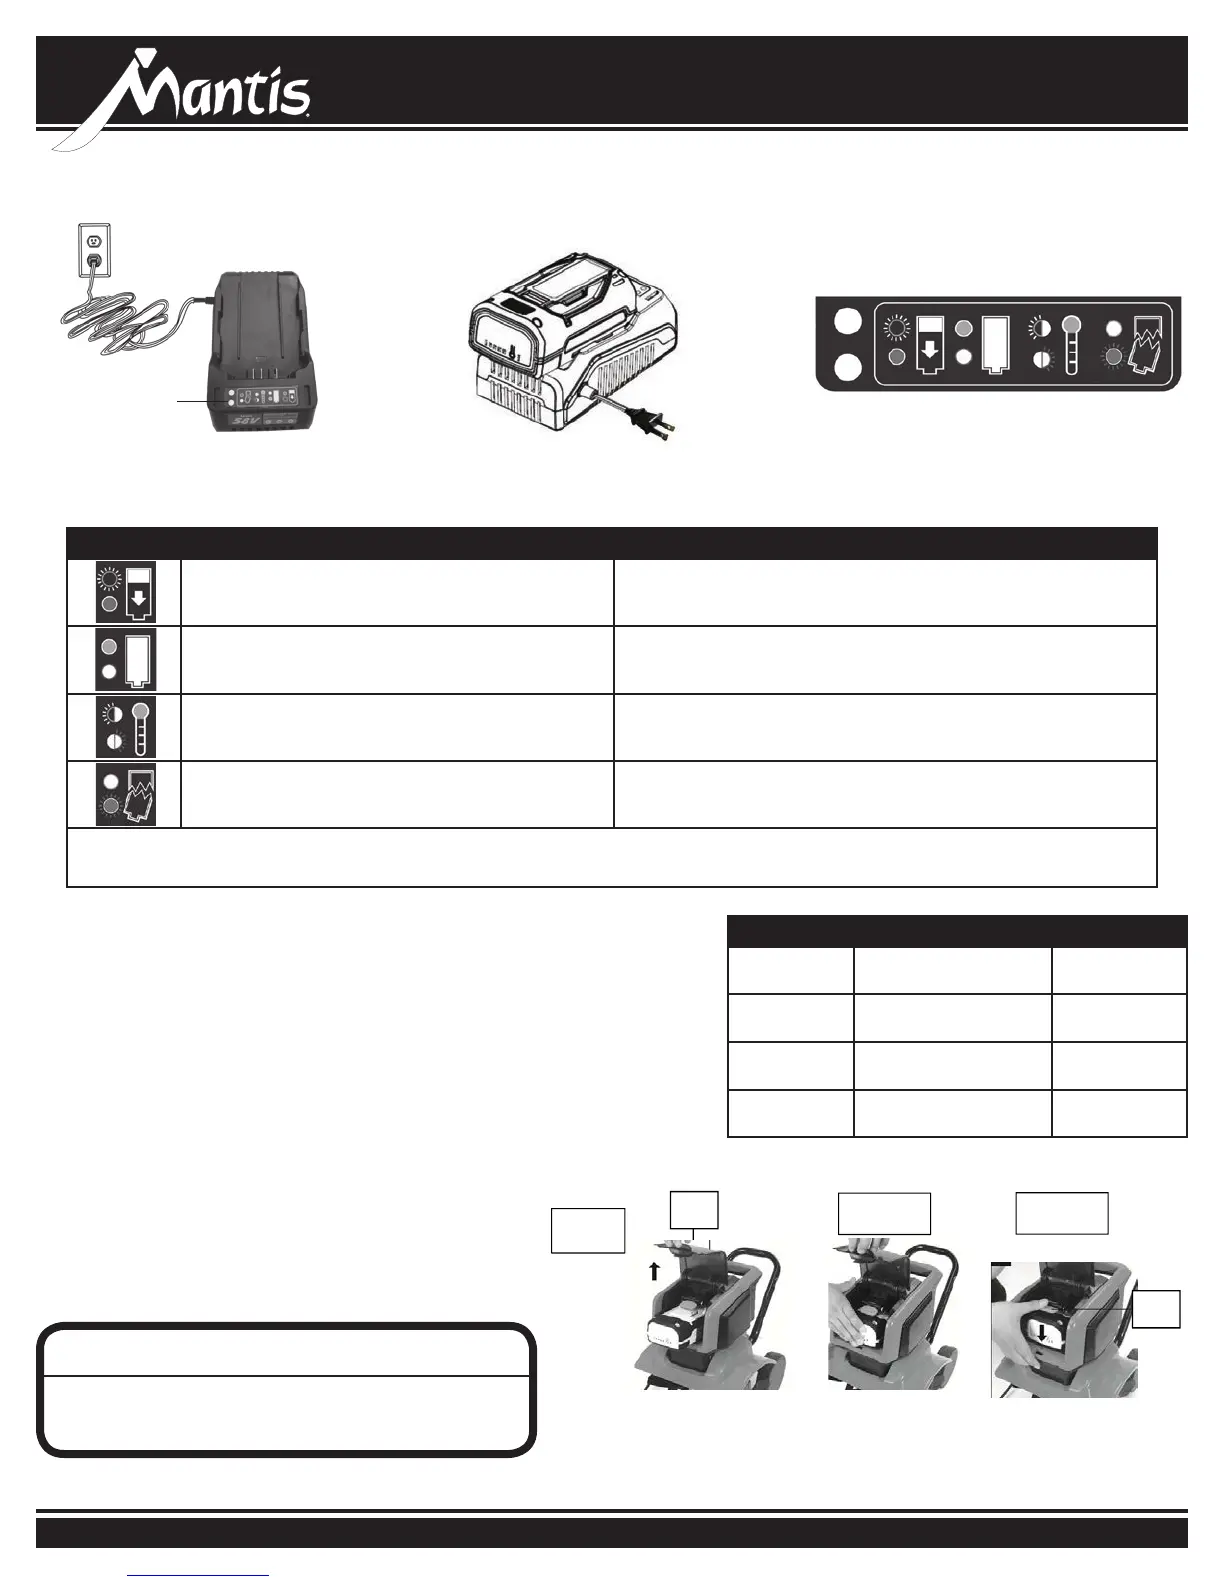
Insert the plug of the charger into
the wall receptacle. The RED light
will illuminate and stay red.
RED Light is ON
Place the battery pack into the charger by
sliding the battery forward until it is fully seated.
Mantis charger also works as a battery
diagnostic center and the charger’s LED’s will
illuminate in specic order to communicate the
current battery status. See table below.
CHARGER’S LED INDICATOR
RED is ‘ON’ continuously, GREEN is ‘BLINKING’ Battery is charging
GREEN is ‘ON’ continuously and RED is ‘OFF’ Battery is fully charged. Remove the battery from the charger.
Two lights are ‘BLINKING’ RED & GREEN
Abnormal Temperature. The battery pack is either too hot or too
cold
GREEN light is ‘OFF,’ the RED light is ‘BLINKING’
Something is wrong with the battery. Remove and Replace it.
Contact Mantis Customer Service center at 1-800-366-6268 for
assistance.
• When charging is complete, remove the battery by sliding it out.
NOTE: Typical time required to reach a full charge is around 100 minutes.
INSTALLING THE BATTERY
Open the battery cover. This is done by pressing the lock release
(Item C) as shown in Fig. 1 and swinging up the cover. Then connect
the battery into the mounts as shown in Fig. 2 and push it forward
until you hear it engage (click). In order to remove the battery, push
the battery release button Fig.3 (item D) and slide it out.
CHARGING A HOT OR COLD BATTERY PACK
Batteries operate over a wide temperature range, but this does not give permission
to also charge them at these conditions. The charging process is more delicate than
discharging and special care must be taken. Extreme cold and high heat reduce
charge acceptance, so the battery must be brought to a moderate temperature
before charging.
If two charger indicator lights are ashing RED & GREEN, it means that the battery
pack temperature is outside the charging range. Once the pack is within the
acceptable range, normal charging will take place. Hot or cold battery packs may
take longer to charge.
TO CHARGE
Insert the plug of the charger into the wall receptacle.The top red light will
illuminate and stay red.See figure .
Place the battery pack into the charger by sliding the pack
as shown in figure 8 to lock it into position .
The bottom light will Illuminate green to indicate that the battery is charging.
The bottom green (charging) light will blink continuously and the top red light
remaining ON continuously, indicating that the charging process has started.
NOTE: Typical time required to reach a full charge is around 100 minutes.
NOTE: If the top light remains red while the bottom light alternately flashes red and green, this indicates a
temperature abnormality (i.e. that the battery pack is either too hot or too cold). If there is only a red blinking light, this indicates that something is
wrong with the battery. Contact Schiller customer service c enter at 1-800-366-6268 for assistance.
If the charging light indicator alternately blinks red and green or the light indicator does not come on at all, check that the battery pack is fully seated
into the bay. Remove the pack and reinsert. If the problem persists, contact the Schiller customer s ervice center at 1-800-366-6268 for assistance.
INATALLING THE BATTERY
Open the battery cover. This is done by pressing the lock release (Item c) as shown in Fig. 1 and swinging up the cover. Then connect the battery
into the mounts as shown in Fig. 2 and push them forward until you hear the batteries engage. Push the button Fig.3/item D and then ta ke out the
battery when finish using.
Important!
The battery must always be fully charged before use. Close the battery cover by swinging it down, and make sure that it latches in place correctly.
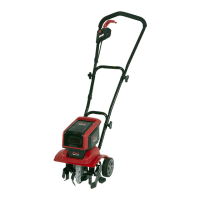
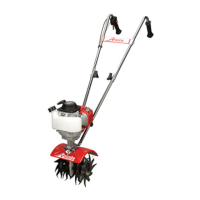
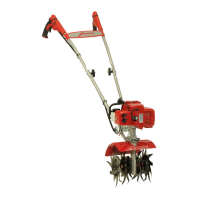
Cordless Tiller Operation
INTENDED USE
The cordless tiller is designed for small gardens and flower beds, this cordless tiller effectively loosens and turns over new soil. It may also be used
to mix coarse soil with fertilizer, peat, and compost. This product may not be used to till extremely d ry or wet soil.The use of this product in rain or
wet conditions is prohibited.
For safety reasons, it is essential to read the entire instruction manual before first use and to observe all the instructions contained within this
manual.
TO CHARGE
Insert the plug of the charger into the wall receptacle.The top red light will
illuminate and stay red.See figure .
Place the battery pack into the charger by sliding the pack
as shown in figure 8 to lock it into position .
The bottom light will Illuminate green to indicate that the battery is charging.
The bottom green (charging) light will blink continuously and the top red light
remaining ON continuously, indicating that the charging process has started.
NOTE: Typical time required to reach a full charge is around 100 minutes.
NOTE: If the top light remains red while the bottom light alternately flashes red and green, this indicates a
temperature abnormality (i.e. that the battery pack is either too hot or too cold). If there is only a red blinking light, this indicates that something is
wrong with the battery. Contact Schiller customer service c enter at 1-800-366-6268 for assistance.
If the charging light indicator alternately blinks red and green or the light indicator does not come on at all, check that the battery pack is fully seated
into the bay. Remove the pack and reinsert. If the problem persists, contact the Schiller customer s ervice center at 1-800-366-6268 for assistance.
INATALLING THE BATTERY
Open the battery cover. This is done by pressing the lock release (Item c) as shown in Fig. 1 and swinging up the cover. Then connect the battery
into the mounts as shown in Fig. 2 and push them forward until you hear the batteries engage. Push the button Fig.3/item D and then ta ke out the
battery when finish using.
Important!
The battery must always be fully charged before use. Close the battery cover by swinging it down, and make sure that it latches in place correctly.
Cordless Tiller Operation
INTENDED USE
The cordless tiller is designed for small gardens and flower beds, this cordless tiller effectively loosens and turns over new soil. It may also be used
to mix coarse soil with fertilizer, peat, and compost. This product may not be used to till extremely d ry or wet soil.The use of this product in rain or
wet conditions is prohibited.
For safety reasons, it is essential to read the entire instruction manual before first use and to observe all the instructions contained within this
manual.
The battery must always be fully charged before use.
Close the battery cover by swinging it down, and make
sure that it latches in place securely.
ATTENTION!
Lithium-Ion Charging Status
Battery Pack
Temperature
Indicator Lights Charging Status
Too hot
Two lights are ashing
RED & GREEN
Not charging
Normal range
RED is ‘ON’ continuously,
GREEN is ‘BLINKING
Normal charging
Too cold
Two lights are ashing
RED & GREEN
Not charging
 Loading...