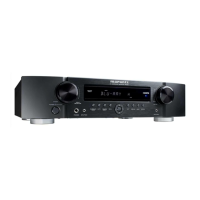
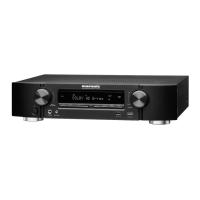
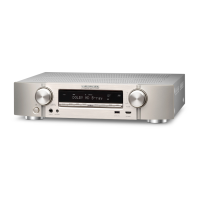
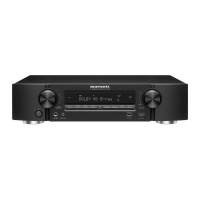
What to do if my Marantz Receiver display is not working properly?
- MMegan ZhangSep 6, 2025
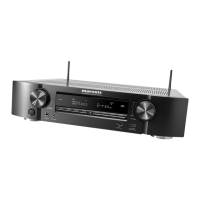
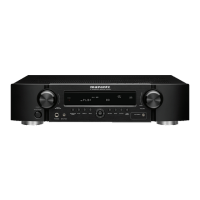
If the display on your Marantz Receiver isn't displaying correctly, unplug the AC power cord and then plug it back in.
What to do if my Marantz Receiver display is not working properly?
If the display on your Marantz Receiver isn't displaying correctly, unplug the AC power cord and then plug it back in.
Why does the sound image not localize correctly on my Marantz NR1501?
If the sound image from your Marantz Receiver doesn't localize correctly and sounds unnatural, unplug the AC power cord and check the speaker cable connections, ensuring the polarity (+/-) is correct and the speaker positions are accurate.
Why is my Marantz NR1501 making a humming noise?
If you hear a humming noise coming from inside your Marantz Receiver, try turning off electric heaters and other similar appliances, as the sound can sometimes be related to power source conditions.
Channels | 5.1 |
---|---|
Power Output | 50W per channel (8 ohms, 20Hz-20kHz, 0.08% THD) |
HDMI Inputs | 4 |
HDMI Outputs | 1 |
Dolby Digital | Yes |
DTS | Yes |
Type | AV Receiver |
Video Upscaling | No |
Amplifier Type | Discrete |
Total Harmonic Distortion | 0.08% |
Frequency Response | 20Hz-20kHz |
Input Sensitivity | 200 mV |
Signal-to-Noise Ratio | 98dB |
Video Conversion | No |
Audio Decoders | Dolby Digital, DTS, Dolby Pro Logic II |
Network Connectivity | No |
USB Port | No |
Provides extra safety guidelines for installation and operation, emphasizing ventilation and object placement.
Details the supported digital surround sound decoding technologies for enhanced audio experiences.
Explains the automatic setup function that analyzes speakers and room for optimal listening.
Highlights the unit's 7-channel amplifier providing high-level performance across a wide range.
Describes the integrated HDMI IC for advanced audio/video signal transmission, supporting latest standards.
Details the up-converter function that converts analog video signals into HDMI signals.
Mentions the unit's support for three input and one output lines for component video signals.
Notes the unit's slim dimensions, allowing installation even where space is limited.
Lists additional features like DSP, OSD menu system, and environmentally friendly standby mode.
Confirms the product complies with household power and safety requirements, operating on 120V AC.
Advises against placing the unit in direct sunlight, near heat, or in humid/dusty environments.
Warns against placing objects on the unit to prevent blocking vents and causing damage.
Provides step-by-step instructions for inserting batteries into the remote controller for the first time.
Lists important precautions for battery usage to prevent leakage, injury, or fire hazards.
Describes the effective range and angle for operating the remote controller with the unit.
Identifies and explains the function of each button and jack on the front panel of the unit.
Explains the indicators on the front display and their meanings during unit operation.
Details various terminals on the rear panel, including antenna, video, HDMI, audio, and speaker connections.
Details the functions of buttons on the Marantz universal remote controller for various modes.
Explains remaining buttons on the remote controller and their operations for different functions and sources.
Provides guidance on ideal placement of 7 speakers and a subwoofer for optimal surround sound.
Explains how to connect speakers to the unit, including impedance specifications and connection notes.
Details the process of stripping and connecting speaker wires securely to the unit's terminals.
Explains how to connect analog and digital audio components, including VCR OUT terminals.
Describes connecting digital audio sources via coaxial or optical jacks for high-quality sound.
Illustrates connections for DVD players, VCRs, and projectors using composite and component video.
Explains the function of VIDEO and COMPONENT jacks and provides important connection notes.
Details connecting HDMI components like Blu-ray players and projectors for high-quality digital signals.
Guides on connecting supplied FM/AM antennas and options for outdoor antennas for better reception.
Explains how to connect the AC power cable to the unit and an AC outlet.
Explains how to turn on the unit using the power button and other connected components.
Instructs on how to select input media sources using the unit's knob or remote control.
Explains how to adjust the volume level using the front panel knob or remote control buttons.
Guides on adjusting bass and treble controls to suit listening preferences or room acoustics.
Describes how to use the MUTE button to silence audio output temporarily without affecting recording.
Explains how to select the tuner mode and listen to radio stations using the unit or remote.
Details how to set AM frequency steps and switch between FM/AM bands.
Guides on using auto tuning to scan and stop at the strongest radio stations for AM and FM.
Explains manual tuning steps to select desired FM or AM stations using the unit or remote.
Describes how to switch between FM stereo and monaural modes for better reception quality.
Explains how to select AMP or TUNER mode and lists button functions for each.
Details how to connect Marantz components for synchronized remote control operation.
Introduces the OSD menu system for performing unit operations and settings.
Explains how to set the OSD output mode between VIDEO OUT and COMPONENT VIDEO MONITOR OUT.
Illustrates button layout of the Marantz remote controller for OSD menu navigation.
Shows the front panel buttons used for OSD menu navigation and system setup.
Displays the main menu structure, showing the primary setup categories and their page references.
Outlines the System Setup menu, listing options like SUB W MODE, HDMI AUDIO OUT, and TONE CONTROL.
Explains how to configure input sources, including naming, digital input allocation, and audio modes.
Details speaker configuration, distance, crossover, and room EQ settings for acoustic optimization.
Guides on setting channel levels, memory modes, LFE levels, and storing settings.
Covers settings for NIGHT MODE, DOLBY PLII MUSIC, and NEO:6 PARAMETER for sound enhancement.
Details system setup options including subwoofer mode, HDMI audio output, tone control, and video conversion.
Explains settings for subwoofer mode (NORMAL, SW PLUS+) affecting bass reproduction.
Describes setting HDMI audio output to ON or OFF for speaker or TV/projector playback.
Explains how to enable/disable tone controls and adjust bass/treble levels.
Details the HT-EQ function for compensating shrill sound in movies, adjustable ON/OFF.
Guides on setting the video conversion function (AUTO, COMPONENT, CVBS, OFF) for HDMI output.
Covers setting input sources, renaming functions, allocating digital inputs, and selecting audio modes.
Explains how to change input function names up to 8 characters using the renaming area.
Details allocating digital audio input terminals (1, 2, 3) to desired input functions.
Explains selecting audio modes (AUTO, HDMI, DIGITAL, ANALOG) for input signals.
Guides on setting the AUTO SURROUND function to ON or OFF for automatic surround mode selection.
Explains the LIP SYNC function for adjusting audio delay to match video signals, adjustable 0-200 ms.
Details the AUTO SETUP process using the microphone to measure and set speaker characteristics.
Explains manual setup options for speaker configuration, distance, crossover, and room EQ.
Guides on setting speaker presence (YES/NO) for center, surround, surround back, and subwoofer channels.
Details setting speaker distances in meters or feet to calculate delay times for acoustic timing.
Explains setting crossover frequencies for speakers, directing bass to the subwoofer.
Guides on setting the ROOM EQ function (ON/OFF) to compensate for room acoustic characteristics.
Covers adjusting channel levels, memory modes (CALIBRATE, AUTO, REF1, REF2), LFE levels, and storing settings.
Explains storing and recalling channel level settings in memory modes REFERENCE 1 or REFERENCE 2.
Details adjusting individual speaker channel volume levels using the unit or remote control.
Guides on adjusting LFE signal output levels for Dolby Digital and DTS sources.
Explains how to store adjusted channel volume levels into memory locations REFERENCE 1 or REFERENCE 2.
Covers settings for NIGHT MODE, DOLBY PLII MUSIC, and NEO:6 PARAMETER for sound enhancement.
Explains the NIGHT MODE for reducing dynamic range, enabling clearer listening at low volumes.
Details the DOLBY PLII MUSIC mode for creating a rich surround sound from stereo sources.
Explains the NEO:6 PARAMETER for outputting up to 6.1 channels from 2-channel sources.
Explains how to use the sleep timer for automatic standby and select display modes.
Details programming the sleep timer for automatic shutdown at a set time.
Explains how to select different display modes for the unit's front display.
Describes how to dim or turn off the unit's display for reduced distraction.
Guides on how to record analog audio/video sources sent to VCR OUT outputs.
Explains how to temporarily select audio input modes (Auto, HDMI, Digital, Analog) for sources.
Guides on selecting surround modes, including AUTO SURROUND and NIGHT MODE.
Details using test tones to output from each speaker for volume level adjustment.
Explains how to store desired speaker volume levels in memory settings (REF1, REF2).
Guides on recalling previously stored speaker volume level settings from memory.
Explains adjusting speaker volume levels without using test tones via the CH SEL button.
Describes using the headphone jack to listen to unit output, automatically muting speakers.
Explains how to use the HT-EQ button to turn the HT-EQ function ON or OFF.
Guides on using the EQ button to turn the ROOM EQ function ON or OFF.
Explains the LIP.SYNC function for adjusting audio timing differences, adjustable in 10-ms increments.
Describes using the AUDIO button to select playback for bilingual sound sources (MAIN, SUB, M+S).
Details operating Marantz AV equipment products using the remote controller's preset modes.
Explains operating Marantz AV equipment products by selecting the source button.
Guides on programming the remote with 4-digit codes for controlling other AV equipment.
Explains how to scan code tables to find the correct code for controlling other AV equipment.
Details how to check the currently set remote control code by counting SEND indicator blinks.
Explains how to reset the remote control code to its initial setting using specific button sequences.
Explains how to control Marantz components like Blu-ray players, DVD players, and tuners using the remote.
Lists the remote control buttons used to operate a Blu-ray disc player.
Lists the remote control buttons used to operate a DVD player.
Lists the remote control buttons used to operate a DSS satellite tuner.
Lists the remote control buttons used to operate a CD player.
Lists the remote control buttons used to operate an AUX2 universal dock.
Provides solutions for common problems like the unit not turning on, no sound, or incorrect sound localization.
Offers solutions for surround sound issues, such as no sound from front or center speakers.
Addresses video issues like no image on the TV, mismatched source, or disturbed converted video signals.
Solves HDMI connection problems such as no picture, slow display, or no audio playback.
Provides guidance for abnormal display or malfunction, recommending power cycling and contacting service.
Explains how to reset the unit to default settings to resolve persistent issues.
Lists detailed technical specifications for FM/AM tuners, audio, video, HDMI, and general unit parameters.
Warns about listening at high volumes with headphones, advising caution to protect hearing.
Recommends using qualified technicians for servicing and provides contact information for repairs.
Provides instructions on cleaning the unit's exterior using soft cloths and mild detergents.
Provides descriptions of various audio technologies like DTS, Neo:6, and Dolby formats.
Describes the MULTI CH STEREO mode for creating a wider soundstage from stereo sources.
Explains the VIRTUAL mode for creating a dynamic and broad sound space.
Details DTS 96/24 features for high-quality audio on DVD-Video titles.
Explains DTS-HD Master Audio's lossless technology for bit-for-bit identical studio master audio.
Describes DTS-HD High Resolution Audio for high-quality multichannel sound from HD discs.
Explains Dolby Digital EX for creating six full-bandwidth output channels from 5.1 sources.
Details Dolby Pro Logic IIx technology for immersive 7.1-channel listening experiences.
Explains Dolby TrueHD as next-generation lossless technology for high-definition discs.
Describes Dolby Digital Plus as a versatile audio codec for future audio and storage systems.
Lists HDMI trademarks and registered trademarks.