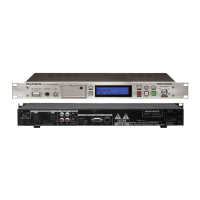
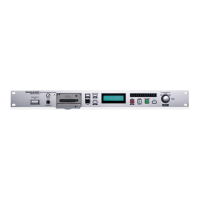
14
Clock Setting
The date and time are written on each audio track (file) when the
track is started. When an audio track is viewed on a computer, this
date and time appears as when the file was 'modified'.
1.
From Stop, press the (F1: MENU) button.
2.
Press the PITCH + or PITCH – button to select “Time/Date”.
3.
Press the 1/3/ENTER button to enter the Time/Date setting.
• PresstheSTOP button to cancel.
• Pressthe8 or 9 button to select the item.
• Whenthehourisset,pressthe8 button to return to the Top
Menu.
• Whentheyearisselected,the9 button is invalid.
• PressthePITCH + or PITCH – button to select the value.
4.
Press the (F1: EXIT) button.
• “Store?”appearsonthedisplay.
• Select “Yes” and pressthe1/3/ENTER button to write on the
Real Time Clock.
Note:
If it happens to be the date which does not exist such as Feb. 31, it gets revised
as back to Feb. 28.