EN
quick guide
1
Time Mode display
These first pages contain a quick guide to getting
started with your Nemo dive computer. Thanks to
the "easy access" system, you will be able to
intuitively navigate the many functions of the
instrument. In fact, the buttons are used in the
same way in every operating mode.
Use the <+> button to advance or the <-> button
to go back, press <enter> to confirm a choice or
press <esc> to quit the operating mode.
Pressing any one of the buttons will automatically
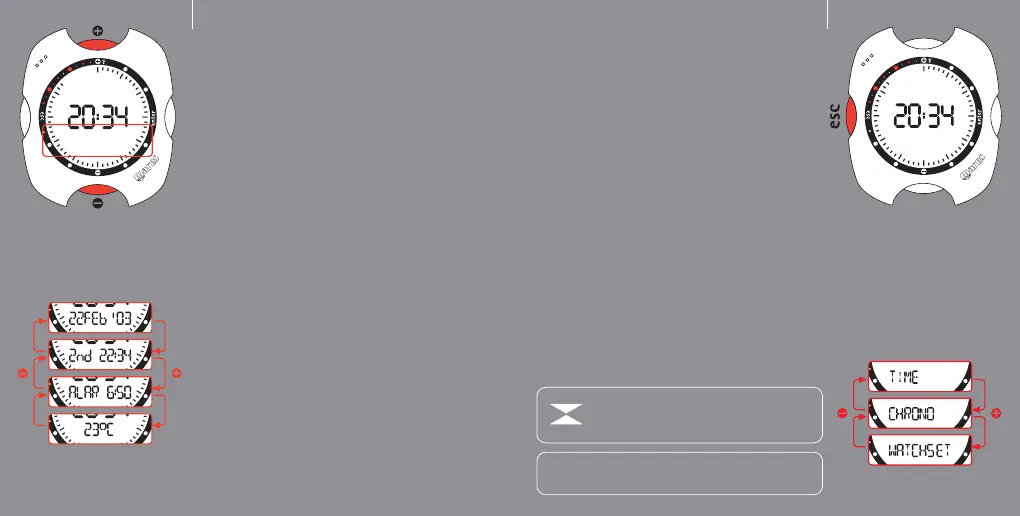
activate Nemo in "Time" mode (fig.1). The hours and
minutes are shown at the center of the display, while
the seconds are shown in analog form around the
perimeter of the dial. Underneath the hour there is a
"display bar" (red box in fig. 1) which can be used to
view additional information, using the <+> or <->
buttons (fig. 2):
- the date;
- the second time;
- the alarm;
- the temperature.
Note: these are the default display details.
fig. 1
fig. 2
EN
Time Menu
From Time mode, press the <esc> button to access
the "Time Menu", denoted by the "Time" message on
the display bar.
Press the <+> or <-> buttons to view the contents
of this menu (fig. 2).
Time: displays the time. This is the default operating
mode. If no button is pressed after a variable delay
(which depends on the function), Nemo
automatically reverts to this mode.
Stopwatch: stopwatch timer function.
Watchset: sets all the "land" functions of your
Nemo, as described in the following pages.
Note:
Press and hold down the + button for 2 seconds to activate the
display backlight
Note:
In Time Mode, if the wet contact is activated the
following icon appears on the display. To preserve
battery life, always be careful to dry the contact.
fig. 1
fig. 2
2



 To Next Page