6
1.6. WATCH DISPLAY
The watch display is the “home” display
of Smart Air. In this mode, the time of day
is shown in the middle row of the display
while date, temperature, seconds, wake-up
time and second time can be displayed by
pressing the DOWN button. Note that the
temperature reading will be affected by your
body heat while you are wearing the watch. A
growing or diminishing ring of 60 dots around
the perimeter of the display represents the
seconds.
When the wake-up time is displayed, pressing
and holding the DOWN button turns the wake-
up alarm on or off.
When the second time is displayed, pressing
and holding the DOWN button switches main
time and second time.
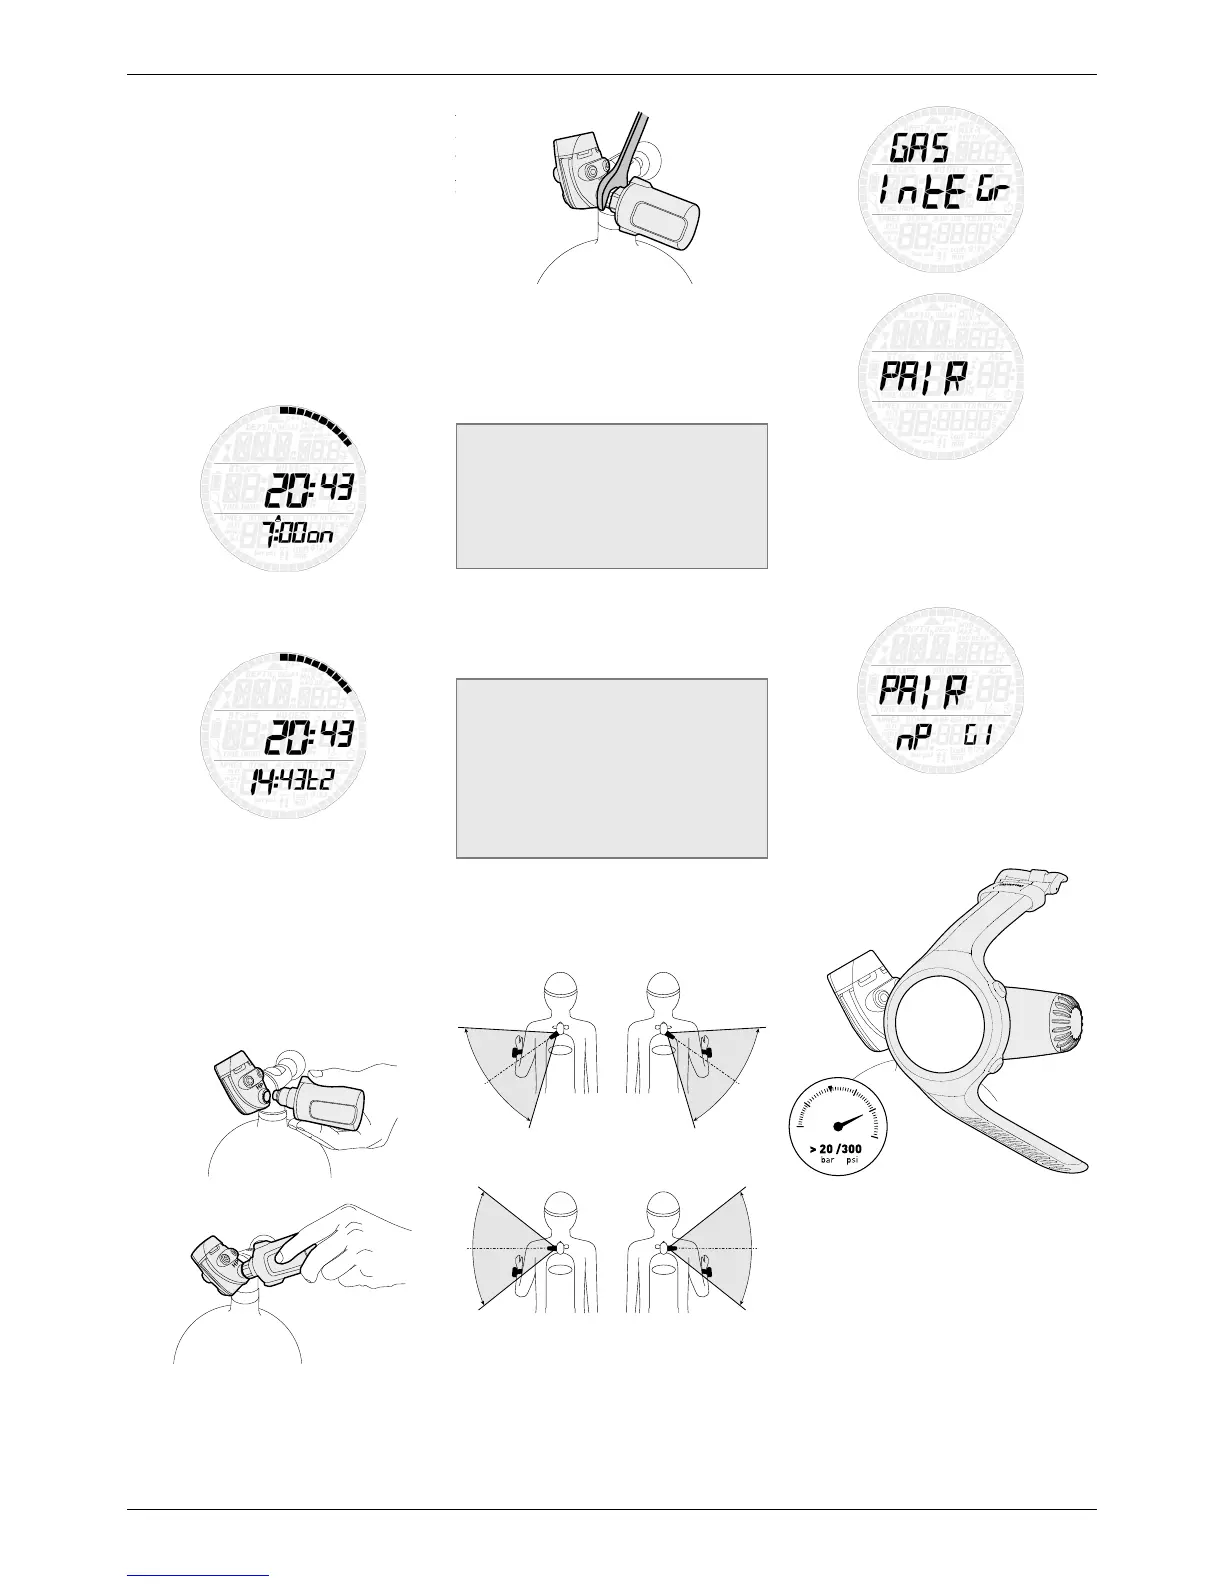
1.7. MOUNTING AND PAIRING OF
THE TANK MODULE (OPTIONAL)
Smart Air can communicate with up to 3 tank
modules regarding tank pressure and gas
consumption information. Each tank module
needs to be mounted on a high pressure port
of a first stage regulator.
In order for Smart Air to display tank pressure
and gas consumption information, you must first
establish a channel of communication between
the tank module and Smart Air. This is called
pairing. This operation needs to be performed
only once and ensures a permanent and
interference-free link between the two devices.
NOTE
To perform the pairing operation, the tank
module must be pressurized to at least
15bar/220psi. Hence it must be mounted
on a first stage regulator, which is itself
mounted on a full scuba tank and the valve
opened.
To mount the tank module on the first stage
regulator, first remove the high pressure port
plug, then screw in the tank module gently by
hand until you feel a minimum of resistance,
then use a 19mm wrench to tighten it.
NOTE
- Do not force the tank module while
holding it by the plastic cap.
- Do not overtorque while using the
wrench: the o-ring seal is assured as
soon as you feel the first resistance. The
only reason for using a wrench to tighten
a bit more is to prevent the tank module
from unscrewing itself over time.
The Mares tank module communicates via
radio frequency with Smart Air. For best
transmission, we recommend positioning the
tank module as described in the next figures.
To pair the tank module with the Smart Air,
proceed as follows:
- Open the tank valve to pressurize the tank
module. You now have two minutes to
perform all steps listed below;
- Go into SET/SET DIVE/GAS INTEGR/PAIR.
- The display will show G1 in the lower right
corner and the word PAIR in the middle. The
lower left corner shows the letters nP (Not
Paired) or P (Paired) to indicate the current
status of that channel. Use the UP and
DOWN buttons in case you are trying to pair
channel G2 or G3.
- Place Smart Air onto the tank module so
that there is contact between tank module
and Smart Air as shown below.
- Press ENTER and wait until OK appears
on the display, in which case you have
successfully established a connection. If OK
does not appear on the display you need to
repeat the operation, but you must turn off
the valve and depressurize the first stage
completely, then wait 20 seconds before
attempting again.
 Loading...