1918
• Seal (O-Ring)
• clamping ring
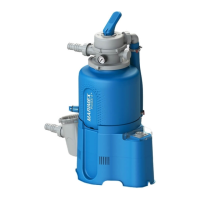
• vessel
• Central pipe
• Filter screen
• Drain plug
• Centralizer (cover for standpipe)
• Base plate
• Pressure hose
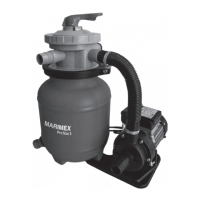
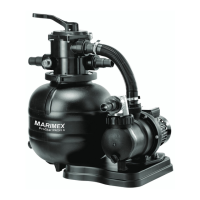
6-way valve
FILTER – Downstream water ow from the swimming pool through altration
vessel and back to the pool
RINSE – Downstream water ow from the swimming pool through altration
vessel to the waste pipeline or to the drain tank
WASTE – Water ow without ltration led into the waste pipeline or into the drain
tank
RECIRCULATE - Water ow from the swimming pool and back without ltration
BACKWASH – Upstream water ow from the swimming pool through altration
vessel to the waste pipeline or to the drain tank
CLOSED – Closure of all the drainages; water is not circulating
OPEN– without any function; position is used for the ltration shutdown and for
asafe winterization
Filter vessel
• Insert stand pipe including lter screen into boiler (Figure 2)
• Place the stand pipe with the lter screen on the oor of the boiler, make sure
that the stand pipe is located in the middle of the boiler and that the drain plug is
screwed in.
• Now put the centralizer on the tank opening, while centering the standpipe.
(Illustration 4)
• Fill in the lter quarz sand up to ahigh of about ¾ of the bowlhight.(right grit
0,6mm - 1,2mm, Quantity: depending on lter size) (Illus-tration 4)
• Then mount the top oft he boiler or the valve head and the boiler seal on the tank
top of the lter vessel. Before you dothis, it is neccassary to clean again and wash
o any sand or accumulated debris. The connection of the top of the boiler or the
head valve with the lter vessel is carried out by the clamping ring. The clamp-ing
ring is screwed with the clamping ring screw and the collet nut.(Illustration 5 & 6)
• Finally, mount the pump ttings on the valve head. Seal the pump ttings
suciently by using teon tape. 7. The pressure gauge (if included) is screwed to
the side of the 6- way valve and sealed. The existing vent plug should be removed
rst. Illustration 9
Pump hose connections (Illustration 7)
• Skimmers: Connection from skimmer to the front connector of the lter pump.
• Pressure line: Connection going from the upper area of the top of the lter pump
to the connector with the designation „PUMP“ at the 7-way valve.
• Return line: Connection from the 6-way valve with the designation „RETURN“ to
the connection at the inlet nozzle (pool). Secure all connections with hose clamps.
• Backwash: Connection „WASTE“ (Empty) in the channel. Connections are made
with special pool hoses and hose clamps!
Commissioning of the lter system
• Before you go in operation with the lter system, it must be insured that the lter
system stands outside the basin and in the level lower than the water level of the
pool is, and the hose connections are properly connected and secured.
• The swimming pool must be lled with water, according to the instructions of your
pool dealer. The water must ow towards the lter pump. Now the lter pump is
vented. If available, open slightly the preliminary lter of the lter pump until water
ows from the prelter top. (transparent cover with screw connection on the top of
the lter pump) For non self-priming pumps, it is neccassary that the water level is
above the lter pump.
• Place the handle on the 6- way valve to the Backwash position. Only now the lter
pump is taken in operation. Backwashing about 2 - 3 minutes to perform. Then
turn the lter pump o again and put the handle on the valve head in the RINSE
position. Rinsing for 30 seconds. Thereafter, the lter pump is switched o again
and the handle set to the position FILTER. The backwashing and rinse water you
best pipe in the channel.
• Turn the lter pump back on. The lter system is in normal lter operation. We
recommend alter run time of 2 x 4 - 5 hours per day. If you clean the bottom of
your pool with apool vacuum cleaner, this is also done in the position lter. After
each oorcleaning or when the pressure on the pressure gauge if available (by 2 - 3
ticks) rises, backwashing is required.
• After BACKWASH always aRINSE with aduration of approximately 30 seconds is
required. This causes the reduction of the sand in the lter vessel.
• If you clean your pool with apool vacuum cleaner, this can also be done with the
6-way valve in the position WASTE to remove impurities from the pool (eg: algae),
which otherwise go back through the lter sand. In doing so, the water which is
extracted from the ground, will be directly pumped through the backwash line
into the open air. After this process, the water level of the pool is supplemented
accordingly.
Filtration systems may not run dry (without water)! The
water takes the cooling – in case of dry running there is
no warranty replacement!
EN
 Loading...