5C-390-13645--2 495 LOWER UNIT
Installation
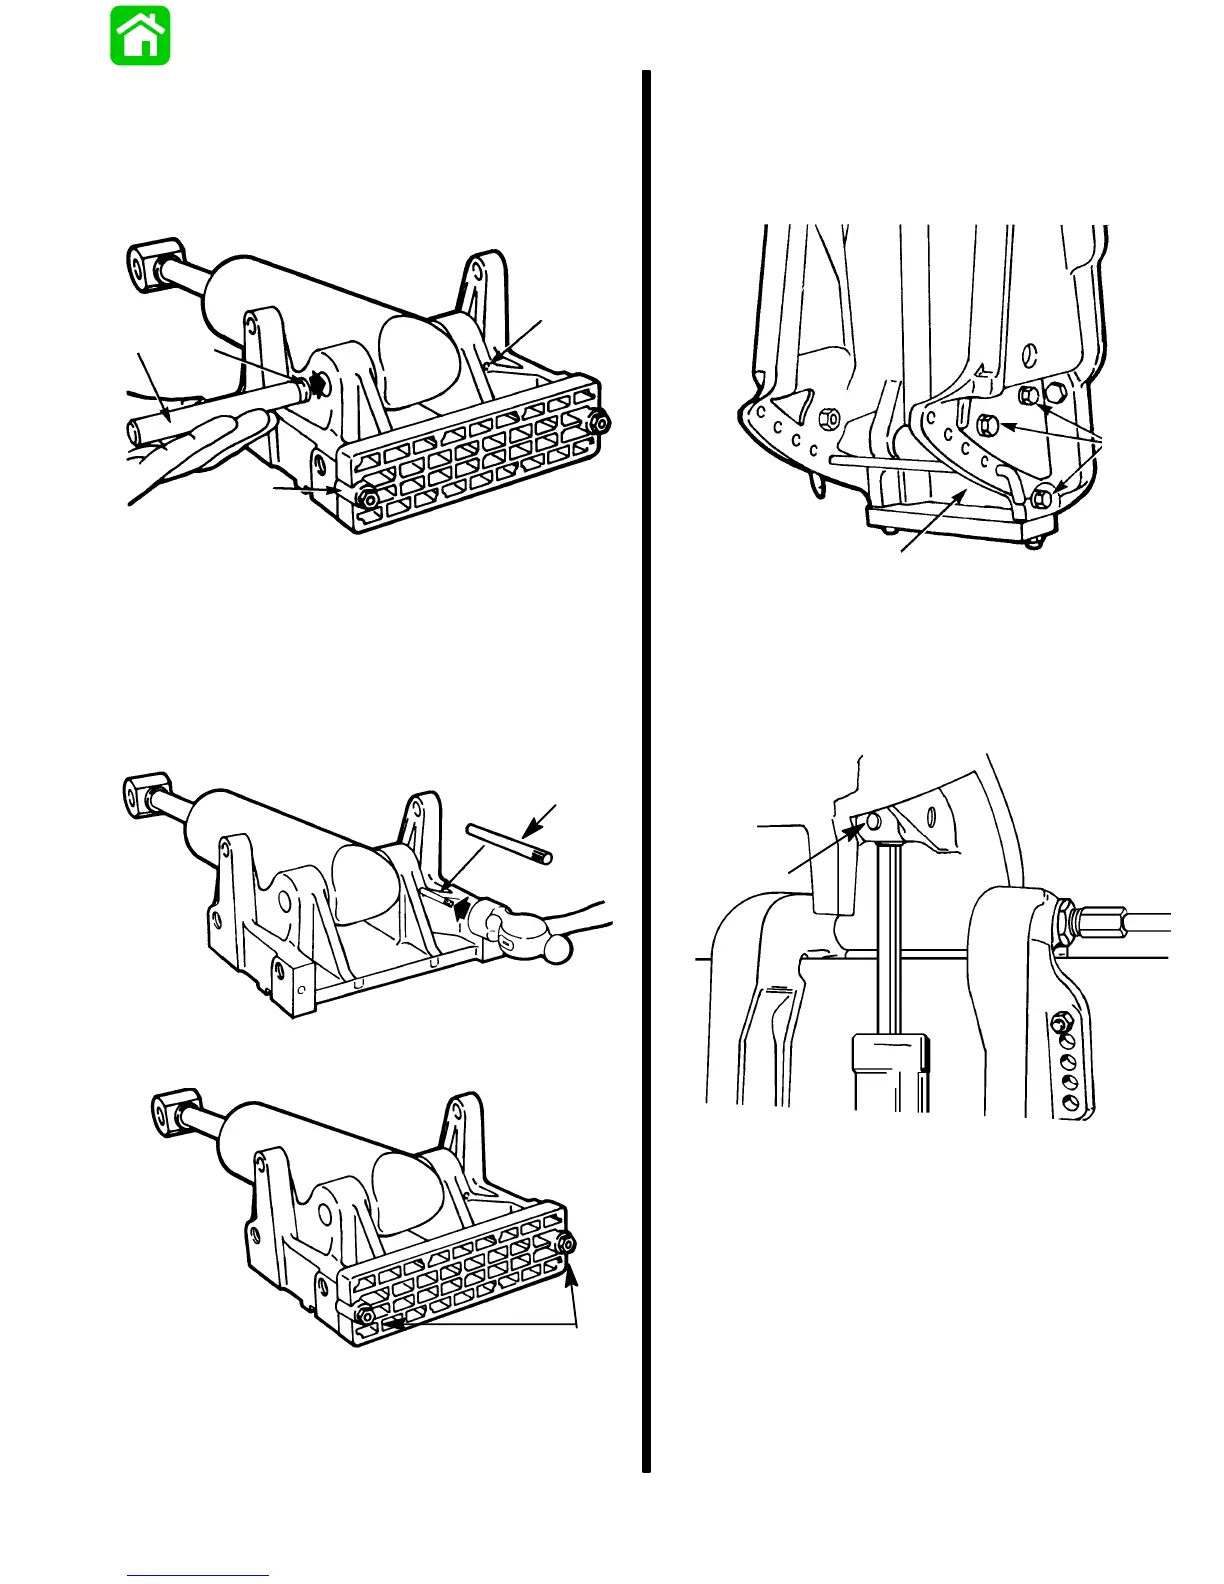
1. Remove anode plate. Lubricate retaining pin with
Quicksilver 2-4-C w/Teflon. Place shock absorber
into lower mount bracket, as shown, and install re-
taining pin so that groove aligns with hole.
17255
a
b
c
d
a - Anode Plate
b - Retaining Pin
c - Groove
d - Cross Pin Hole
2. Drive cross pin (flush) into lower mount bracket,
as shown and reinstall anode plate. Secure
anode with 2 bolts and washers. Torque bolts to
60 lb. in. (6.8 N·m).
17256
a
a - Cross Pin
a
a - Bolts [Torque to 60 lb. in. (6.8 N·m)]
3. Reinstall shock absorber assembly between
clamp brackets and secure shock assembly to
clamp brackets with 6 bolts and lockwashers (3
each clamp bracket). Torque bolts to 30 lb. ft.
(40.7 N·m).
17244
b
a
a - Bolts [Torque to 30 lb. ft. (40.7 N·m)]
b - Shock Asorber Assembly
4. Reinstall tilt pin through swivel bracket and shock
absorber eye.
5. Install new cross pin securing shock to tilt pin.
51505
a
a - Cross Pin
 Loading...