Series DC Digital Controllers
4
3 MECHANICAL SETUP & SAFETY
3.1 Mounting
The controller should be placed on a clean, flat and level work area free from
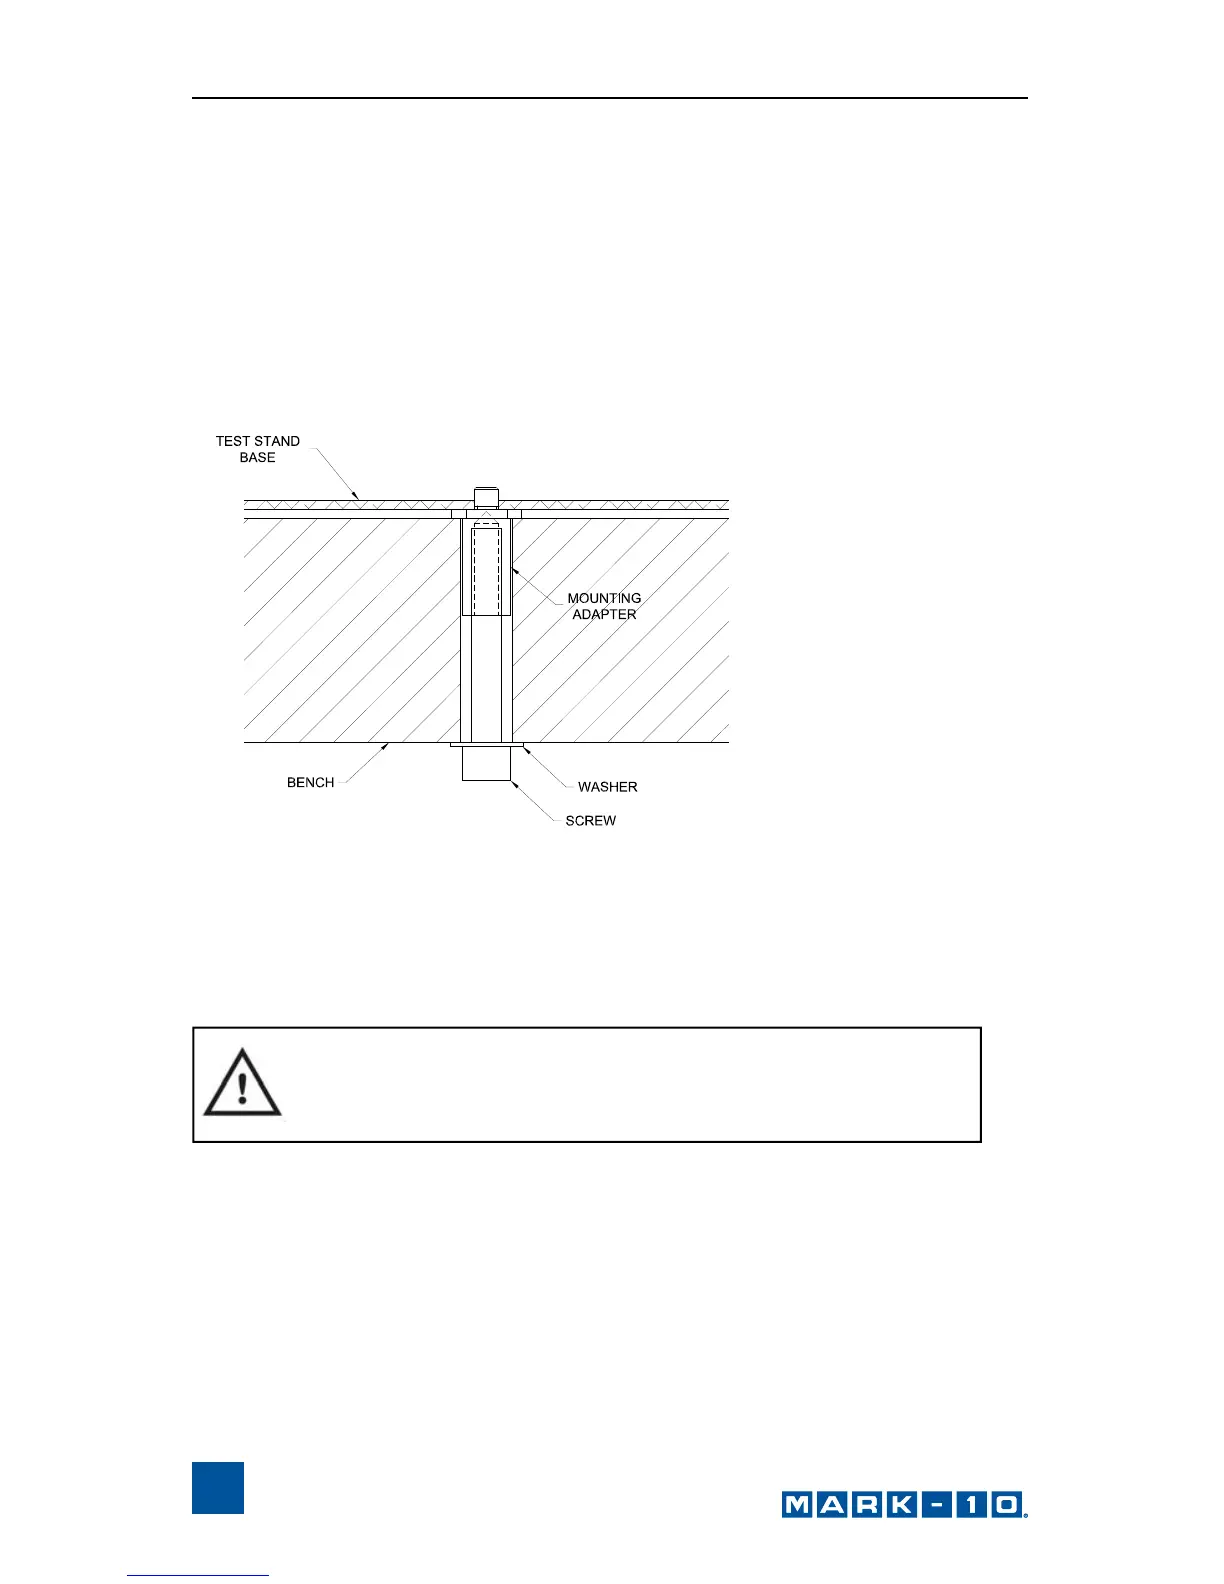
vibration. If desired, the controller can be secured to the work area with 1/4-20
screws fastened into the underside of the housing. The controller can also be
mounted using the ESM301-003 mounting kit. Screws of various lengths are
supplied with this kit to accommodate a range of bench thicknesses. Refer to
the following illustration for proper assembly:
In general, the controller can be mounted at any angle, although extra care
should be taken during installation and operation.
3.2 Setting Up The Controller
The power plug and controller cable must be connected to the rear of the
controller, as shown in the illustration below:
IMPORTANT: Do not fasten any screws more than 0.25
in [6 mm] into the base of the test stand, or damage to
internal components can occur.