17
FX20 INSTALL GUIDE
VERSION 1.6 | APRIL 26, 2024
LEVEL THE PRINT BED
Note: Maintain the same alternate zero on the digital level from the Y-rail leveling procedure.
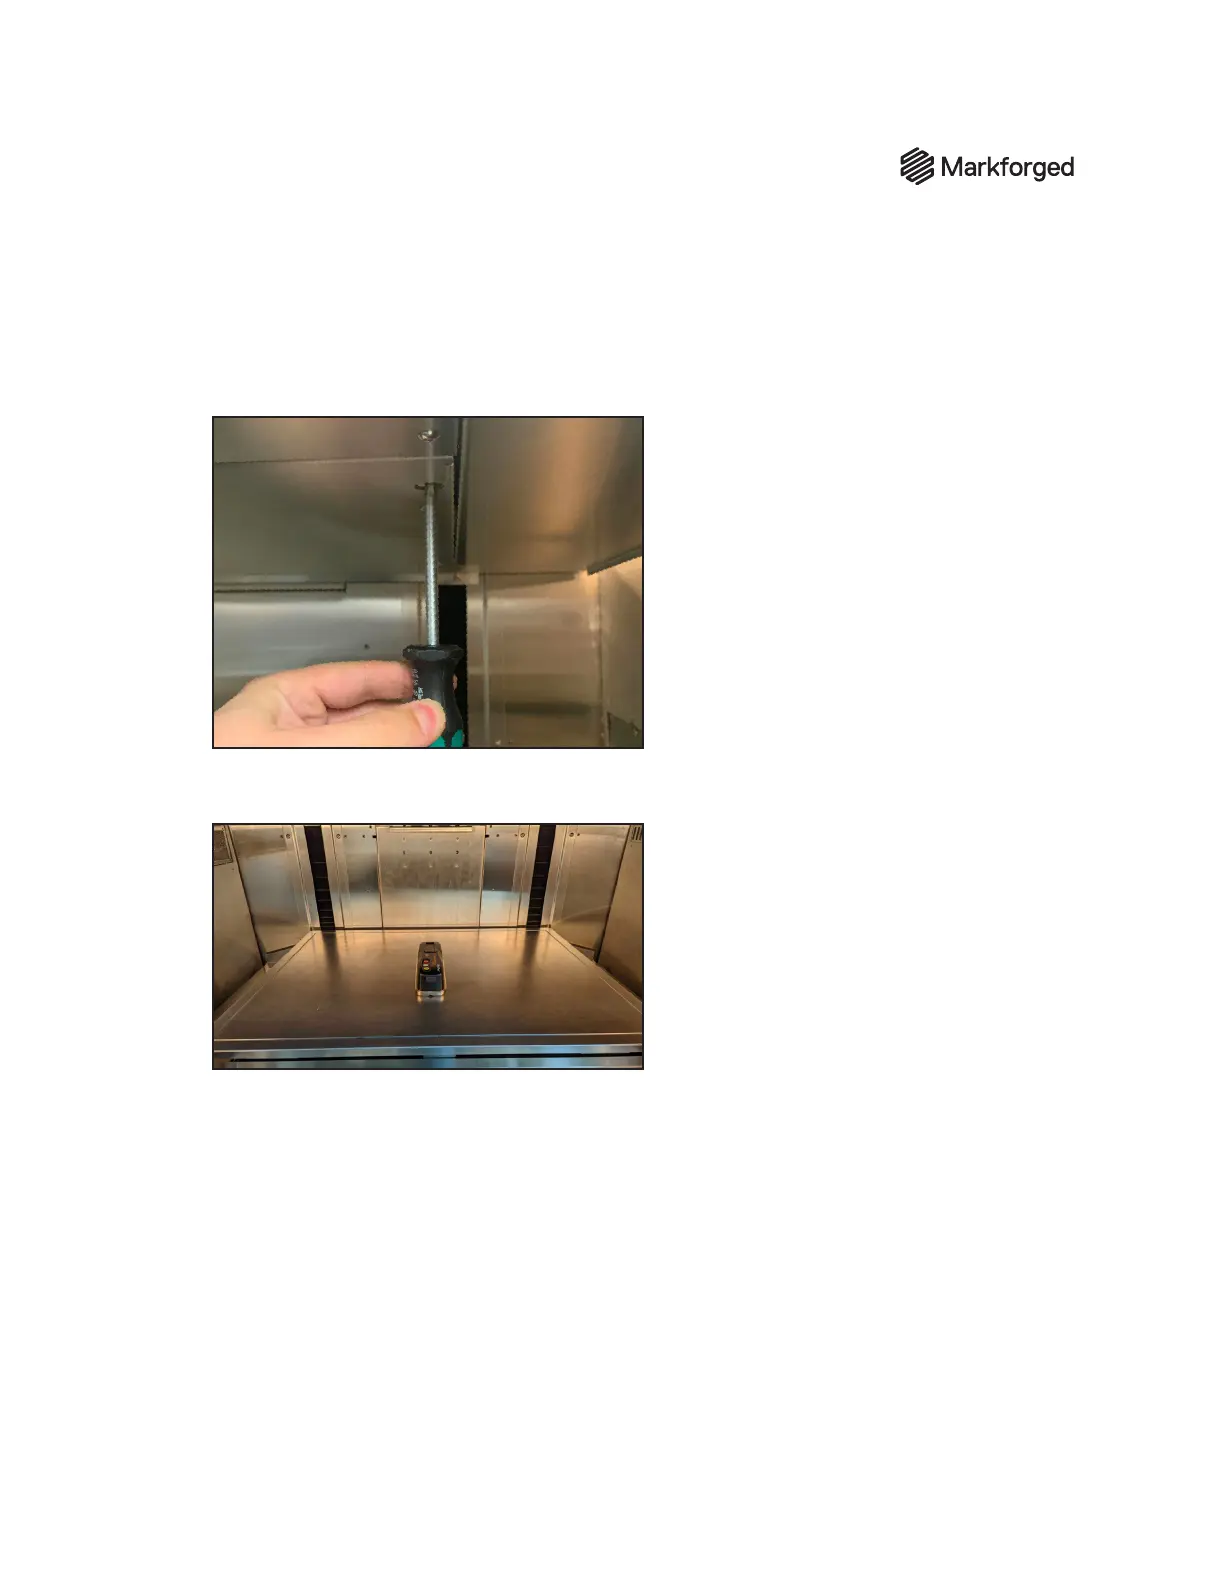
1. Using a 5mm driver, fully tighten all four bed leveling screws by turning them clockwise.
2. Loosen each screw 2.5 turns.
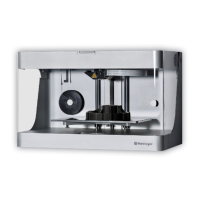
3. Place the digital level in the center of the print bed in the same orientation as in the previous
section. In the image below, the long axis of the digital level is the Y-axis of the printer/print bed.
4. Take x-axis and y-axis readings for the print bed on the digital level to identify which direction is
more out-of-level. Set the axis reading to the more out-of-leveled measurement.
5. Note the direction of the digital level arrow. Then, equally adjust the two screws on the side that
the level is pointing to until the level reads 0.000º +/– .05º. The bed leveling screws are located on
the underside of the bed.
6. Repeat step 5 for the other axis reading on the digital level.
7. Record both X- and Y-axis readings from the digital level on the Bed Level lines of the sign-o sheet.