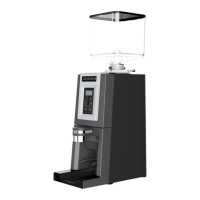
The IZAGA KEY is an automatic professional espresso coffee grinder designed to provide the right amount of freshly ground coffee quickly and conveniently. It incorporates the latest technology and over 20 years of experience in the espresso coffee market.
Technical Specifications:
- Voltage / Frequency: 230 V 50 Hz
- Rated Power: 525 W
- Rotation: 1350 rpm
- Overload Fuse: 10 A, Type T
- Maximum Permitted Operating Time: 50% on, 50% off
- Height H: 640 mm
- Width W1/W2: 180 mm
- Depth L: 352 mm
- Weight: 16 kg
- Bean Hopper Capacity: 1.5 kg
- Grinding Burrs: Ø64
- Production: 8 kg/hour
Usage Features:
Description of Components:
The grinder features a bean hopper (1) with a closing device (2), a grinding adjustment lock (3) and lever (5), and a hopper fixing device (4). It has a backlit branding area (6), a keypad and display (7), a press tamp (8), a filter-holder rest (9), and a coffee grounds tray (10). The power supply and fuse (11) are located at the back, and there is a cleaning access (12).
The keypad and display (7) include a display (A), a minus key "—" (B), a plus key "+" (C), an On/Off button (D), an Enter/Programming key (E), a 1-cup selection key (F), and a 2-cups selection key (G).
Installation and Setup:
- Grinder Location: Place the grinder on a solid, dry surface next to the coffee machine. Avoid wet or damp areas.
- Hopper Installation: Loosen the fixing screw (T) to place the hopper. Press it down until the blocking device (4) enters the hole (R) in the hopper neck. Tighten the fixing screw (T) with a 5mm allen wrench for safety.
- Coffee Grounds Tray: Insert the coffee grounds tray as shown in the illustration. Important: Do not put spilled ground coffee from the tray back into the hopper.
- Press Tamp: The grinder comes with a Ø57mm press tamp and an additional Ø53mm press tamp. Choose the one that matches your coffee machine's filter-holder.
- Power Connection: Ensure the electrical connection is protected by circuit breakers, a differential switch, and a ground connection. Verify that the voltage and frequency match the grinder's rating plate. Plug in the grinder; the display will show "1 CAFE".
- Grinding Process: Open the hopper lid and pour coffee beans into the hopper. Never put ground coffee in the hopper. Ensure the hopper closing device (2) is open. Select the desired coffee dose by pressing the "1 CUP" key (F) or "2 CUPS" key (G). Insert the filter-holder into the filter-holder rest (9) to activate the switch. The corresponding dose will be dispensed. Use the press tamp (8) to level the ground coffee. The grinder automatically grinds the selected dose.
- On/Off: Use the ON/OFF key (D) to turn the grinder on or off. In the Off position, the grinder remains in stand-by mode.
Basic Settings:
- Grinding Fineness Setting: The grinder is factory-adjusted for espresso. To fine-tune:
- If coffee flows too slowly, press the blue button (3) and turn the grinding adjustment handle in the direction of the blue arrows, pushing the lever (5) to achieve coarser grinding.
- If coffee flows too fast, press the red button (3) and turn the handle in the opposite direction, indicated by the red arrows, for finer grinding.
- Fine adjustments can be made by moving the handle one click at a time.
- No buttons pressed means grinding adjustment is blocked.
- A scale and dial around the grinding adjustment handle allow noting settings. A provided sticker can be used to mark the zero point for easier control.
- Coffee Dosage Setting: The factory setting is 1.8 seconds for 1 cup and 3.1 seconds for 2 cups. To modify:
- Press the 1-cup key (F) for 1.5 seconds until "C1: 1.80" appears.
- Use the "–" (B) or "+" (C) keys to adjust the value.
- Press the 1-cup key again to confirm.
- Repeat for the 2-cup key (G). The 2-cup dose is limited to double the programmed 1-cup dose.
- Filter-holder Detection System Setting: The grinder offers several dose selection systems, programmable by a Technical Assistance Service:
- Automatic Filter-holder Identification (Factory Programmed): This patented system automatically detects 1-cup or 2-cup filter-holders. A special magnetic tag (provided) must be fixed to the 2-cup filter-holder. The grinder senses the tag and dispenses two cups; without the tag, it dispenses one cup.
- Key Selection, 1 Cup: Insert the filter-holder for 1 cup. To get 2 cups, press the 2c button before inserting.
- Key Selection, 2 Cups: Insert the filter-holder for 2 cups. To get 1 cup, press the 1c button before inserting.
- Key Selection, Last Service: The filter-holder receives the same dose as the last service without pressing any key.
- Dose Selection by Filter-holder Click:
- Single click: One cup of coffee.
- Double click (press, release, press again): Two cups of coffee.
Safety Devices:
The motor is protected by a thermal safety device that cuts off power if it overheats. This device resets automatically when the machine cools. If it activates repeatedly, consult Technical Assistance.
Counter:
The IZAGA grinder displays the number of 1-cup and 2-cup coffees prepared.
- Press the Programming key (E) for 1.5 seconds to show "Partial Counter".
- Press the Programming key again to see "Part. C1" (1-cup coffees).
- Use "+" and "–" keys to navigate to "Part. C2" (2-cup coffees) and "Part.sum" (total cups).
- Optional Reset: To reset partial counters, press the Programming key when "Delete?" is shown. Use "+/-" keys to select "->NO YES" and confirm with the Programming key.
- To exit the menu, navigate to "EXIT" with "+" keys and confirm with the Programming key, or press the ON/OFF key (D).
Problem Solving:
- Grinder off, display off: Check differential switch/circuit breaker, electrical cord, and fuse.
- Grinder connected, but doesn't turn/grind: Grinding level too fine (set coarser), foreign object (contact TAS), overheating (wait for cool down).
- Grinder starts, turns, but no coffee: Bean hopper jammed or inlet hopper closed (check both).
- Device grinds slowly: Grinding burrs worn out (replace burrs).
- For other issues, contact Technical Assistance Service (TAS).
Maintenance Features:
Cleaning:
Important: Disconnect the grinder from the power supply before cleaning.
- Cleaning the Bean Hopper: Close the inlet hopper, loosen screw (T), pull and turn the hopper fixing device (4) to the horizontal position, then remove the hopper. Empty any remaining coffee. Clean with soap and water, then dry thoroughly. To re-install, pull the fixing device (4), turn it 90º, place the hopper, and push down until it fits into the hole (R).
- Outer Cleaning: Clean with a damp cloth. Do not use detergents, abrasive products, alcohols, or solvents. Use a brush for recessed areas. Do not spray with water.
Maintenance:
To ensure efficiency, follow manufacturer instructions and have maintenance performed by qualified personnel. Periodic technical inspections are recommended. Grinding burrs should be checked at least once a year and replaced if worn to maintain coffee quality.
Warranty Conditions:
- Period: 1-year warranty from purchase date.
- Coverage: Defects due to original materials or defective assembly. Repairs or replacements are free, excluding transport/shipping costs. Faulty parts must be sent prepaid with a copy of the warranty certificate (including serial number). Customer is responsible for shipping. Parts must be packaged carefully.
- Authorized Personnel: Only authorized personnel may access internal parts.
- Exclusions: Damage from inappropriate use, inadequate maintenance, lack of maintenance, use for unintended purposes, improper installation, incorrect voltage, falls, normal wear and tear.
- Parts: Only original replacement parts for warranty maintenance.
- Liability: Manufacturer is not liable for consequential or secondary damages.
- Unauthorized Repairs: Warranty does not cover damages from repairs by unauthorized personnel.