This section provides steps that guide you through the repair or replacement of certain
parts.
Cleaning the Treads
on the Left Feed
Wheel
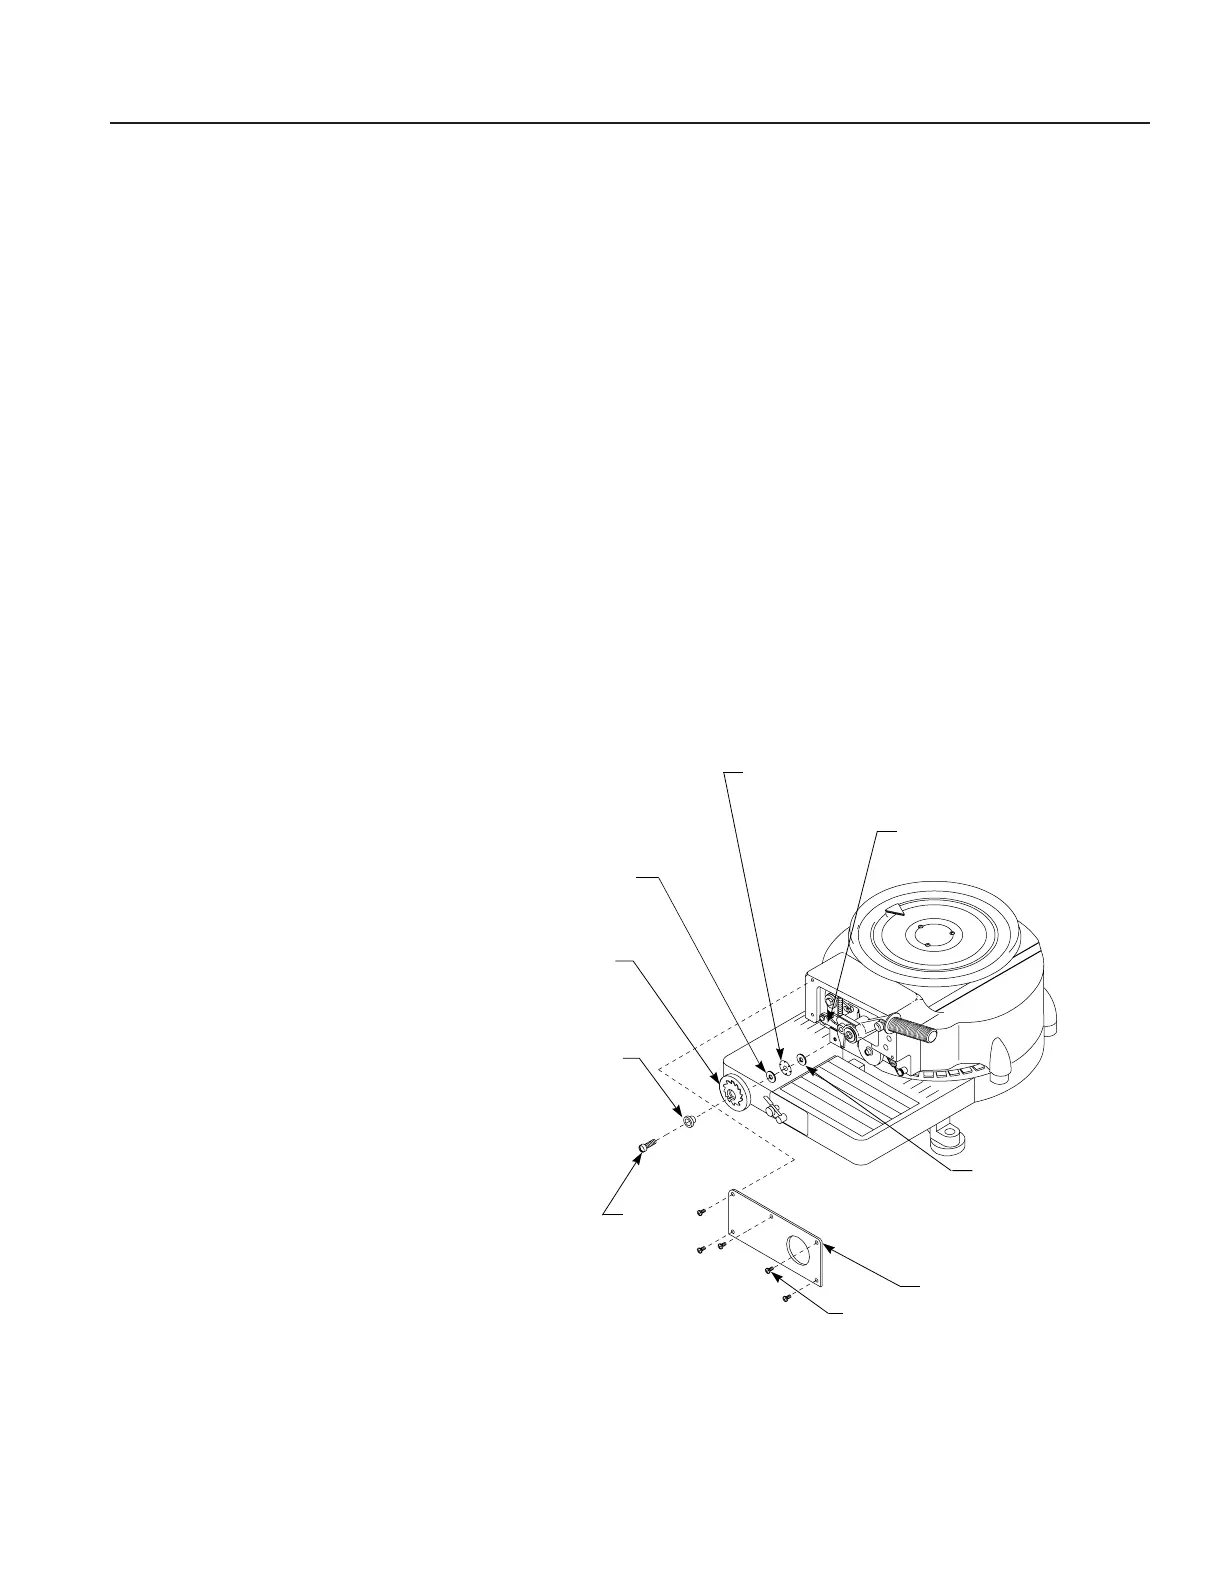
1. Loosen the bolt on the left feed wheel.
2. Carefully push the spacing cam to the right and remove the left feed wheel. See
Figure F.
Note: Please observe the placement of the washers on the back of the feed wheel because
they must be put back in the correct order.
3. Brush the treads of the feed wheel with a wire brush to remove dirt and particles.
4. Put the washers into place on the back of the feed wheel. The smaller washer is
placed directly on the back of the feed wheel and the larger spring washer sits over
it with the flat side resting on the feed wheel. The third washer follows the spring
washer. See Figure F. The 1" (25.4 mm) machines, have a fourth washer behind the
third one.
5. Push the spacing cam to the right and put the feed wheel in place.
6. Tighten the bolt to secure the wheel.
Figure F
Figura F