6 Lamp replacement Acrobat user manual
L
AMP
REPLACEMENT
2
The Acrobat comes from the factory with a Philips 500 hour lamp installed. This
a 24V, 250W ELC halogen lamp. A high-output 50 hour lamp from Osram is also
available. Installing any other lamp may damage the fixture!
Lamp life can be extended beyond the stated average hours by reducing the lamp
voltage slightly using DIP-switch pin 12. Set pin 12 to ON for longer lamp life, or
OFF for maximum brightness.
Allow the lamp to cool for at least 5 minutes before packing and moving the
fixture. To avoid possible damage, remove the lamp when shipping the fixture.
Warning! Always disconnect the fixture from AC power and allow it to
cool for 5 minutes before installing the lamp.
To install a lamp in the Acrobat
1 Disconnect the fixture from AC power. If replacing a lamp, allow it to cool for
5 minutes before removing the lamp access cover. The lamp cools faster with
the cover in place.
2 Remove both screws from the lamp access cover and lift the cover off.
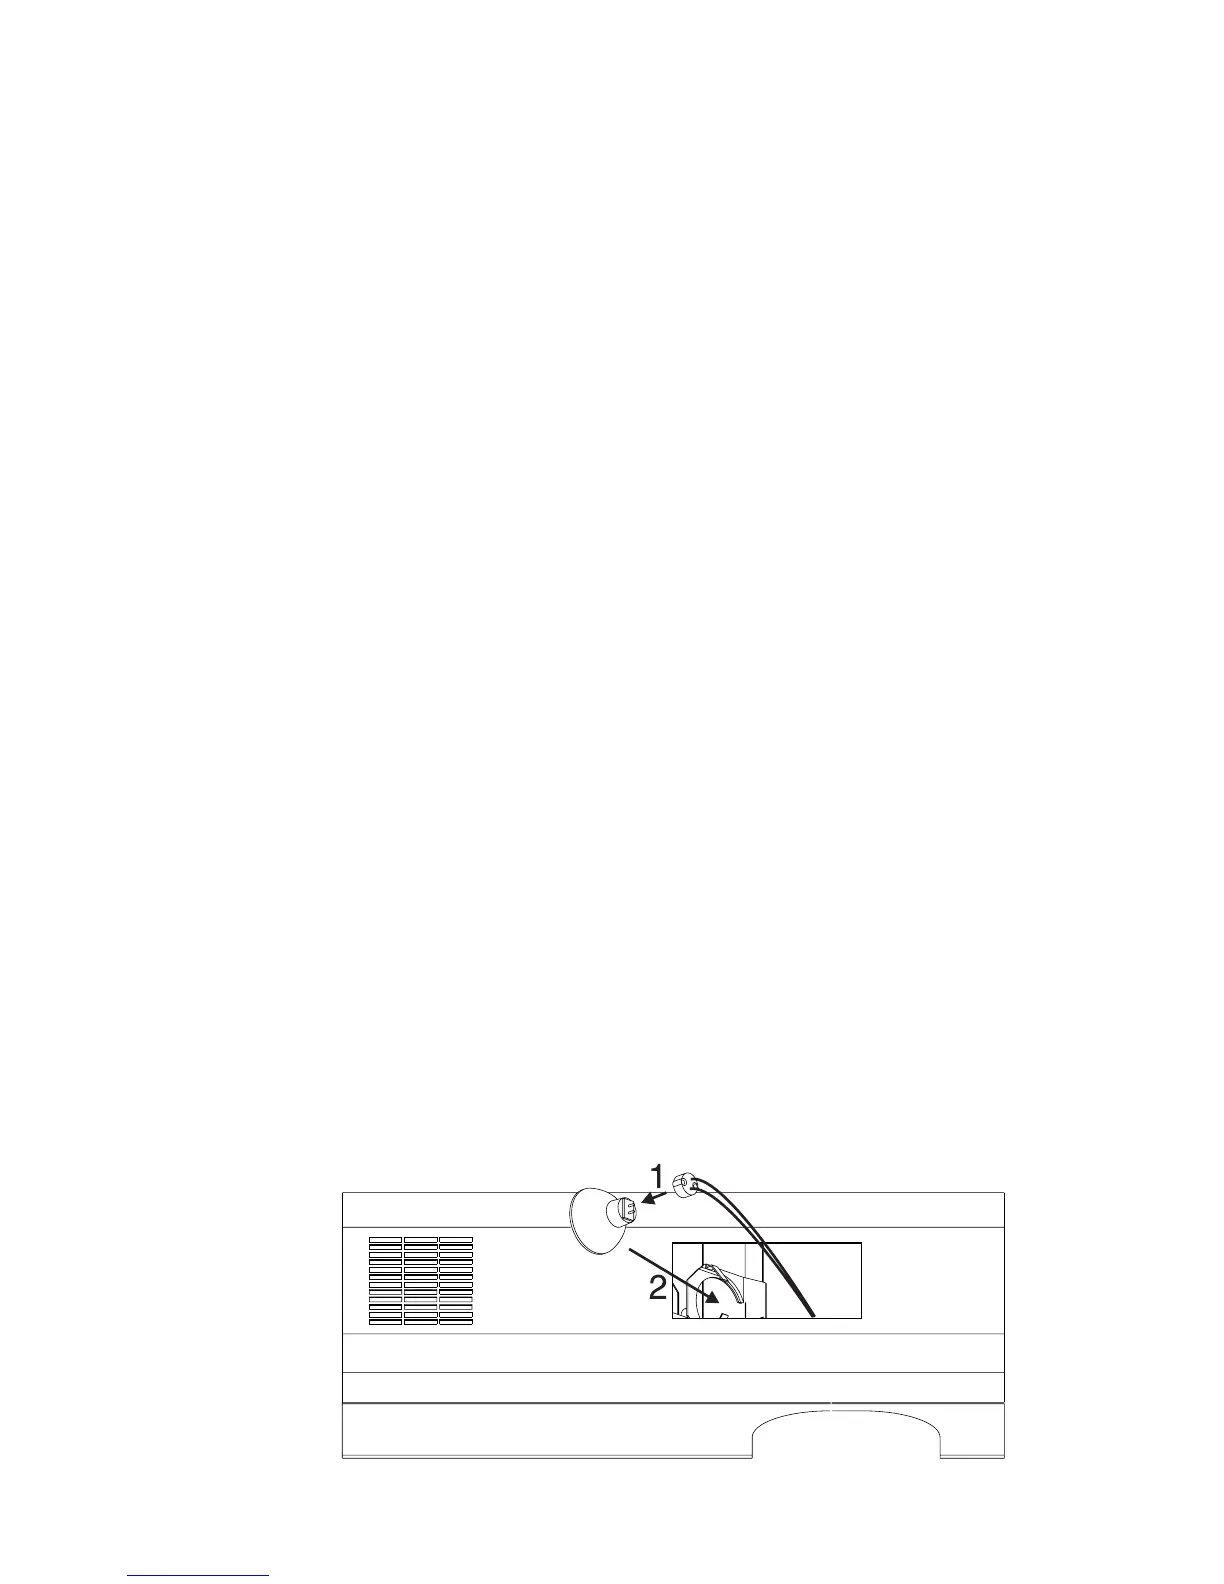
3 If replacing a lamp, grasp the old lamp by the reflector and pull it out of the
holder. Then pull the socket off the lamp. Do not pull the wires.
4 Push the socket fully onto the pins of the new lamp.
5 Gently push the lamp into the holder until it snaps into place.
6 Replace the lamp access cover and screws.