Acrobat user manual Installation 9
recommended by the clamp manufacturer, through the clamp hole in the
mounting bracket.
3 If permanently installing the fixture, verify that the hardware (not included)
and mounting surface can bear at least 10 times the fixture’s weight. The four
6 mm holes and the clamp hole in the mounting bracket may be used for
attachment.
4 Working from a stable platform, clamp or fasten the fixture to the structure.
5 Install a safety cable that can hold at least 10
times the weight of the fixture through/over the
support and mounting bracket as shown.
6 Loosen the swivel locks, tilt the fixture to the
desired angle, and retighten.
7 Verify that the fixture is at least 0.3 meters (12
in.) from the surface to be illuminated and at
least 0.1 meters (4 in.) from any combustible
materials. Verify that the clearance around the
air vents is at least 0.1 meters (4 in.).
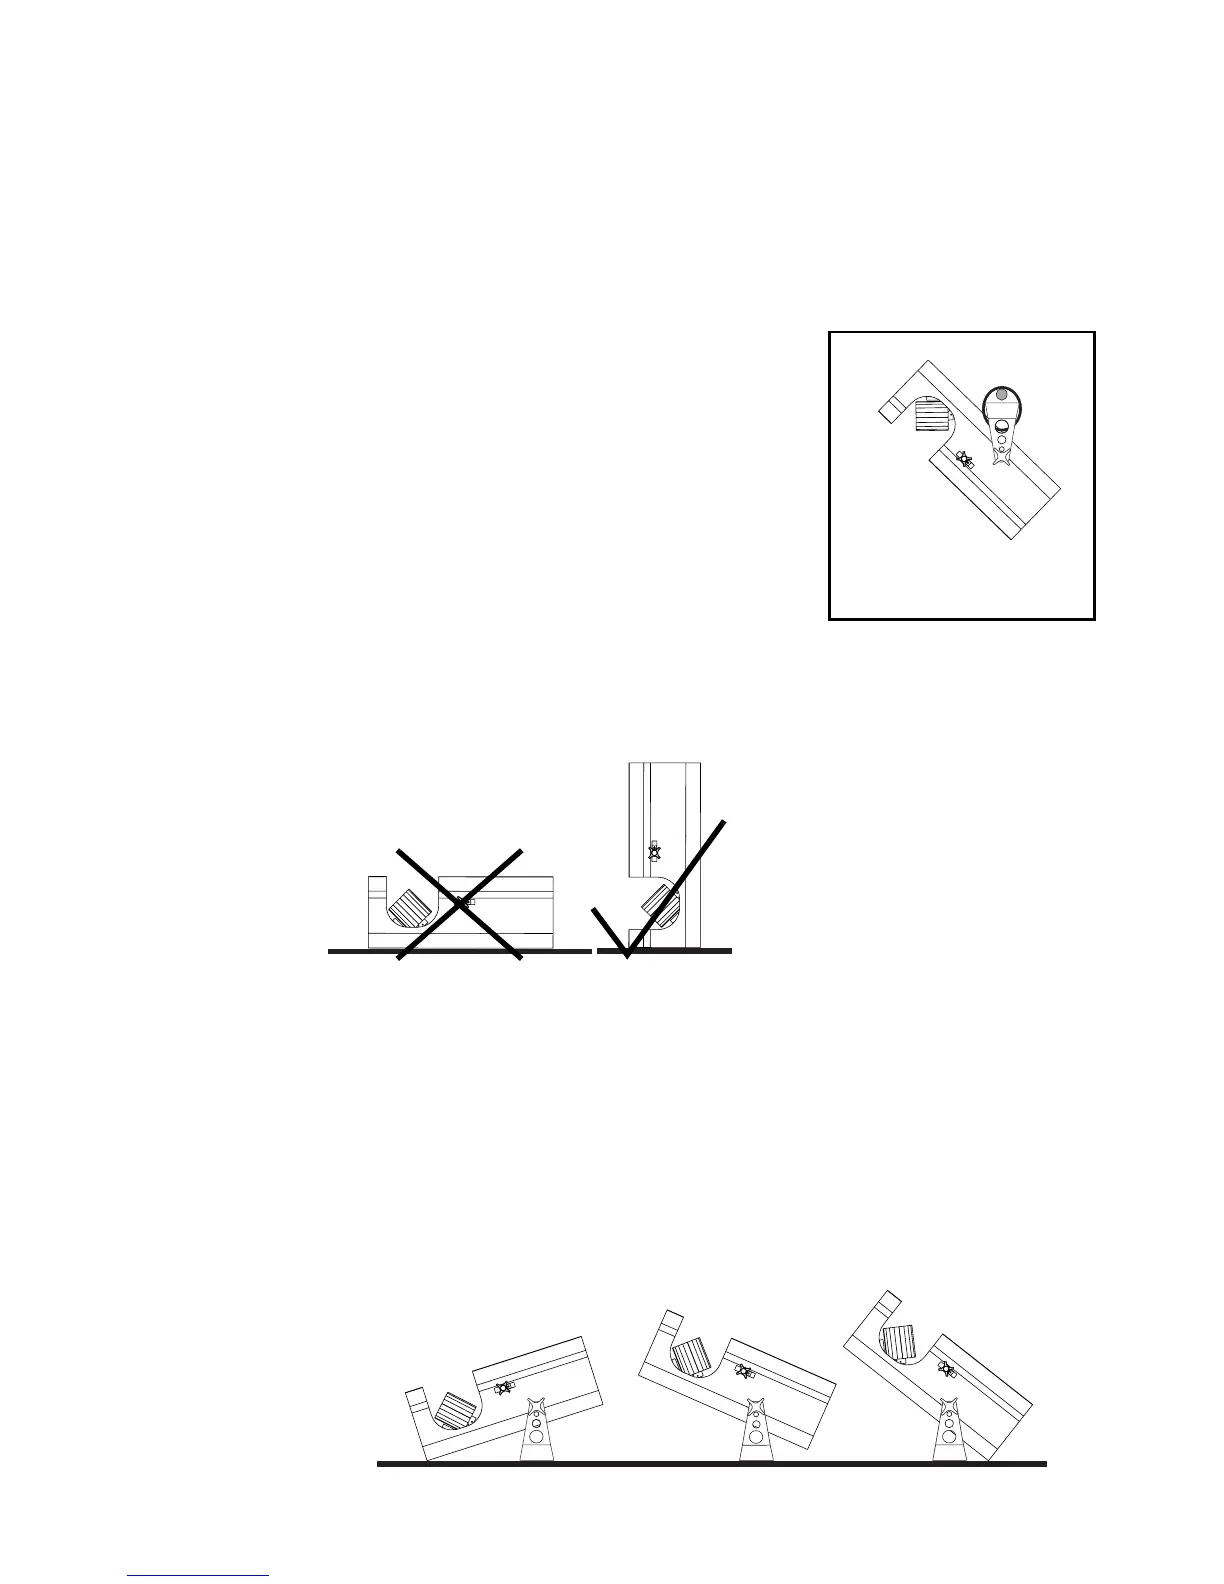
To use the bracket as a floor stand
The Acrobat may be placed on
the floor by standing it squarely
on the drum end or with the
support of the mounting bracket.
Never lay the fixture flat on its
back!
1 Install the mounting bracket as described above.
2 Set the fixture flat on its drum end or in one of the positions shown below.
Adjust the mounting bracket and tighten both swivel locks.
3 Verify (1) that the fixture is stable, (2) that the fixture is at least 0.3 meters (12
in.) from the surface to be illuminated and at least 0.1 meters (4 in.) from any
combustible materials, and (3) that the clearance around the air vents is at
least 0.1 meters (4 in.).
Rigging clamp not shown!