5
TOE-IN
To achieve superior stereo imaging we recom-
mend that you aim them towards the primary
listening position.
SOLID FOOTING
With the use of the included MiniETC™ (Energy
Transfer Coupler) spikes, your speakers will be
firmly planted on the floor, bass will tighten, and
imaging will become more coherent. To avoid
floor damage, do not implement the spikes until
you are secure in the positioning. MiniETC spikes
use a standard 1/4 - 20 thread.
Spike.Installation.Instructions.(Fig.6):
1) Carefully lay your speaker on its side.
2) Remove existing feet or spikes. Thread new
spikes into holes and screw them in all of the way.
If the speaker does not sit level loosen one spike
until level is achieved.
3) Tighten the jam nut snugly by hand. Do not over
tighten the nut.
4) Right the speaker. Caution: Make sure your
hands and any cabling are clear of the spikes.
Do not slide speaker as spikes are sharp and can
damage your floor or carpet.
5) Adjust to level by rotating spikes. Tighten the
jam nut securely when satisfied that speaker is
level. Caution: “Walking” the speaker may result in
a broken spike.
Fig. 5 Fig. 6
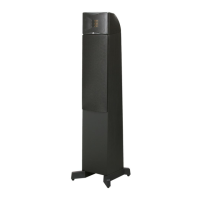
Motion 10
Motion 12