Do you have a question about the Master Chef G36402 and is the answer not in the manual?
Crucial safety warnings, precautions, and danger advisories for grill assembly and use.
Lists tools needed and hardware components for grill assembly. Includes visual identification.
Comprehensive list of all barbecue components with key numbers, descriptions, and part numbers.
Visual representation of barbecue components and their assembly order.
Instructions for attaching the wheels (casters) to the barbecue base.
Attaching the left and right side panels to the barbecue cart base.
Securing the door support rails to the side panels of the barbecue cart.
Mounting the upper back brace for structural support of the barbecue cart.
Connecting the main burner box assembly to the barbecue cart structure.
Installing the front door onto the assembled barbecue cart.
Attaching support brackets (A and B) to the burner box area.
Mounting the left and right side shelves to the barbecue body.
Attaching the grease cup hook and the grease cup to the barbecue.
Information regarding the Convertible Valve System and potential natural gas conversion.
Installing the cooking grates and the warming rack into the barbecue.
Connecting the electronic ignition components, including battery installation.
Connecting the propane tank, regulator, and performing necessary safety checks.
Details on purchasing and identifying the correct kit for converting the barbecue to natural gas.
Important warnings and cautions regarding hot surfaces during barbecue use.
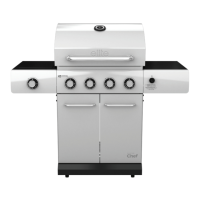
| Brand | Master Chef |
|---|---|
| Model | G36402 |
| Category | Grill |
| Language | English |