12
ASSEMBLY INSTRUCTIONS
x 6
1/4-20 x 3/8 in.
Screw
9
10
D1
K
C1
D1
CC
CC
J
K B1
Hardware Used
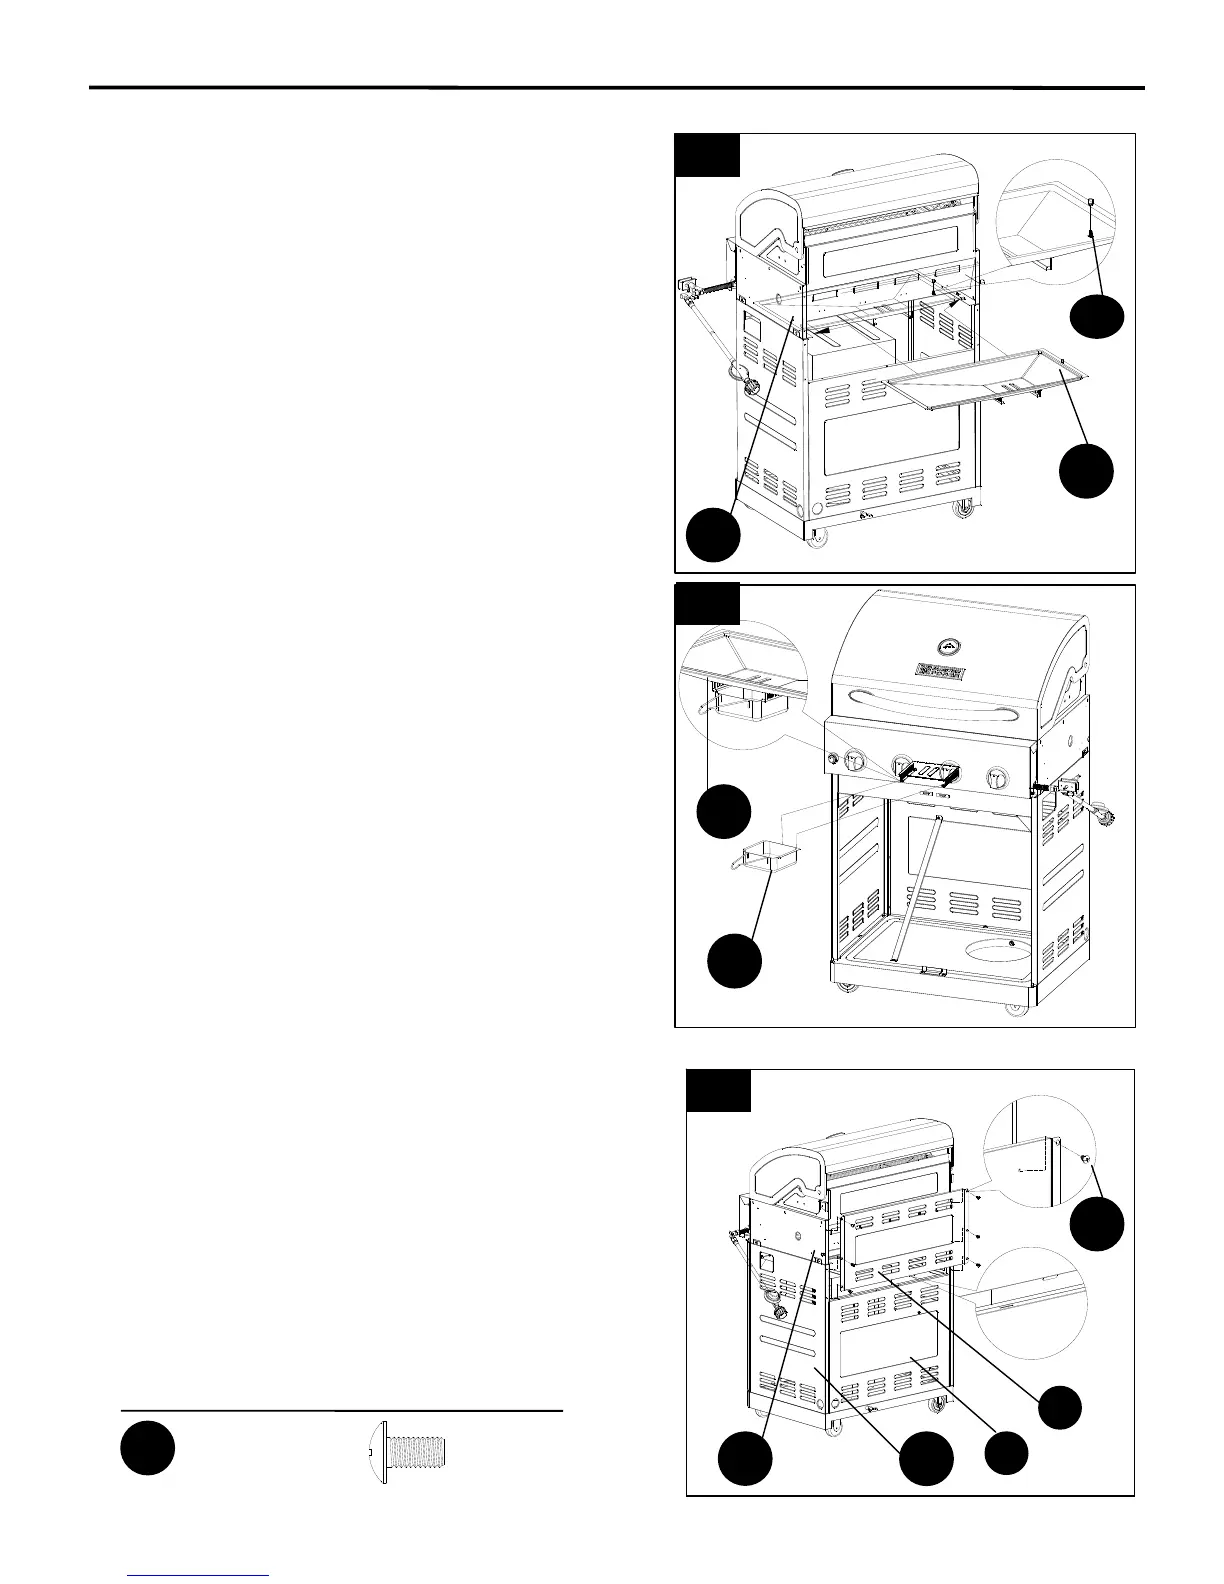
11. Install grease tray
Remove the pre-installed screw from the right of the
greasy tray (D1).
From the back of the grill, slide the grease tray (D1)
onto the ledges on the left and right sides of the grill
head as shown in Fig. 11.
There are stops built into the ledges to hold the
grease tray in place. Make sure the grease tray is
slid all the way in and is resting securely between
these stops.
From the front of the grill, reinstall the screw into the
grease tray through the supporting ledge. This will
prevent the grease tray from shifting during transport.
The correct direction is shown in the picture.
12. Install grease cup
Insert the grease cup (C1) onto the ledges of
the grease tray (D1) underneath the grill head as shown
in Fig. 12.
The handle of the grease cup needs to be tilted
down slightly in order for it to slide into the grease
tray ledges.
13. Install back grill head cover
Put the back grill head cover (J) into the hole on the back
panel (I) first.
Then attach the back grill head cover (J) as
shown in Fig. 13 using 6 1/4-20 x 3/8 in. screws (CC).
Install all screws loosely first and then tighten.
11
12
13
I
a