EasyManua.ls Logo

Master Forge GBC22491L - User Manual

Master Forge GBC22491L
26 pages
Print Icon
To Next Page IconTo Next Page
Loading...
ITEM#4082878
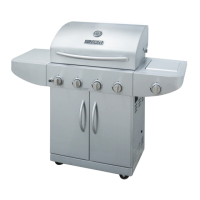
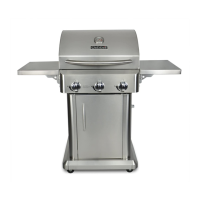
4-BURNER GAS GRILL WITH SIDE BURNER
MODEL#GBC22491L
ATTACH YOUR RECEIPT HERE
MASTER FORGE and logo design are trademarks or registered trademarks of LF, LLC. All rights reserved.
Serial Number Purchase Date
Questions, problems, missing parts? Before returning to your retailer, call
our customer service department at 1.800.963.0211, 8 a.m. - 8 p.m., EST,
Monday - Sunday. You could also contact us at partsplus@lowes.com or
visit www.lowespartsplus.com.
WARNING
FOR YOUR SAFETY:
For Outdoor Use Only
(outside any enclosure)
WARNING
FOR YOUR SAFETY:
Improper installation, adjustment, alteration,
service or maintenance can cause injury or
property damage. Read this instruction manual
thoroughly before installing or servicing this
equipment.
DANGER
If you smell gas -
1. Shut off gas to appliance.
2. Extinguish any open flame.
3. Open lid.
4. If odor continues, keep away from the
appliance and immediately call your gas
supplier or your fire department.
WARNING
FOR YOUR SAFETY:
1. Do NOT store or use gasoline or other
flammable liquids or vapors in the vicinity of
this or any other appliance.
2. An LP cylinder not connected for use shall
NOT be stored in the vicinity of this or any
other appliance.
DANGER
Never operate this appliance unattended.
WARNING
FOR YOUR SAFETY:
DO NOT LEAVE THIS APPLIANCE UNATTENDED
WHILE IN USE, ESPECIALLY COOKING THE FAT-
TY MEAT AND CLOSE THE LID TOO LONG TIME.
WARNING:
This product can
expose you to chemicals including carbon
monoxide, soot, lead and lead components,
which are known to the State of California
to cause cancer and birth defects or other
reproductive harm.For more information go to
www.P65Warnings.ca.gov.
GBC22491L-RA-OM-F104
VR21106
Español p.27

Questions and Answers

Summary

Safety Information

Package Contents

Hardware Contents

Assembly Instructions

Assemble Cart Frame and Legs

Install front and rear legs, leg seats, and cart frame supports to build the base structure.

Attach Wheels and Supports

Attach wheels, axle, and gas tank retainer wire to the assembled cart frame.

Mount Grill Body and Shelves

Secure the grill body assembly and attach the left and right side shelves to the frame.

Install Burners and Controls

Connect side burner, attach heat plates, cooking grids, and control knobs to the grill.

Installation Instructions

Inserting LP Gas Tank

Place the LP gas tank upright into the cart frame notches for connection.

Securing LP Gas Tank

Secure the LP gas tank by sliding the retainer wire over its shoulder.

Connecting LP Gas Tank

Ensure no debris is present and connect the regulator/hose assembly to the tank.

Disconnecting LP Gas Tank

Ensure the tank valve is closed, disconnect regulator, and store tank safely.

Operating Instructions

Checking for Leaks

Perform leak checks on burner connections and tank/gas line before operating.

Operating Main Burners

Details on lighting, preheating, and general operation of the main burners.

Lighting the Grill

Instructions for safely lighting the main burners using the igniter or a match.

Care and Maintenance

Before Each Use Checks

Pre-use checks including cleaning the grill area and checking burner airflow.

Cleaning Grill Surfaces

Instructions for wiping down and cleaning the exterior surfaces of the grill.

Cleaning Main Burners

Procedure for cleaning main burners, including removing parts and checking orifices.

Limited Warranty

Troubleshooting

Replacement Parts List

Overview

This document describes the Master Forge 4-Burner Gas Grill with Side Burner, Model #GBC22491L. It is an outdoor cooking appliance designed for residential use, featuring multiple burners and a side burner for versatile grilling.

Function Description

The Master Forge gas grill is designed for outdoor cooking using liquid propane (LP) gas. It features four main burners and one side burner, allowing for various cooking methods simultaneously. The grill includes a lid with a temperature gauge for monitoring internal heat, a warming rack, cooking grids, and heat plates to distribute heat evenly and prevent flare-ups. A grease tray and grease cup are integrated for easy cleanup of drippings. The side burner provides an additional cooking surface for pots and pans, expanding the grill's utility. The grill is equipped with an ignition system for easy lighting of the burners.

Important Technical Specifications

  • Fuel Type: Liquid Propane (LP) gas only. Conversion to natural gas is dangerous and voids the warranty.
  • Inlet Pressure: 11 inches water column.
  • LP Gas Cylinder: Requires a cylinder marked "propane" with a listed overfilling prevention device (OPD) and a cylinder collar. Must be arranged for vapor withdrawal.
  • Clearance: Minimum 36 inches (91.5 cm) from sides and back to combustible construction.
  • Side Burner/Side Shelf Weight Limit: Maximum 33 lbs.
  • Pot Capacity (Side Burner): Not to exceed 6 quarts.
  • Burner Flame Conditions (Normal): Soft blue flames with yellow tips between 1-2 inches (25.4-50.8 mm) in height.
  • Assembly Time: Approximately 45 minutes for two people.
  • Tools Required for Assembly: Wrench and Philips screwdriver (included).

Usage Features

Safety First:

  • Outdoor Use Only: Must not be used in buildings, garages, or any enclosed areas.
  • Clearance: Do NOT operate within ten feet (3.05 m) of walls, structures, or buildings. Do NOT use on or under balconies.
  • Unattended Operation: Never leave the appliance unattended while in use, especially when cooking fatty meats or with the lid closed for extended periods.
  • Gas Leaks: Always perform a leak test before lighting and each time the LP cylinder is connected. Do NOT smoke or use ignition sources during a leak test. If a leak is present, do NOT operate the grill.
  • LP Cylinder Storage: Store LP gas cylinders outdoors, out of reach of children, and away from temperatures over 125°F. Never store a spare LP cylinder under or near the appliance.
  • Flammable Materials: Do NOT store or use gasoline or other flammable liquids/vapors within 25 feet (7.62 m) of the appliance.
  • Lid Operation: Always open the grill lid carefully and slowly to release trapped heat and steam. Failure to open the lid before igniting burners, or not waiting 5 minutes for gas to clear if it doesn't light, can result in an explosive flame-up.
  • Grease Fires: Do NOT attempt to extinguish oil/grease fires with water. Use a type BC dry chemical fire extinguisher or smother with dirt, sand, or baking soda.
  • Food Safety: Always use a meat thermometer to ensure food is cooked to a safe temperature.

Operation:

  • LP Gas Tank Connection: Place the LP gas tank upright in the cart frame with the valve facing the gas line. Secure it with the retainer wire. Connect the regulator/hose assembly by turning the knob clockwise until it stops.
  • Lighting Main Burners:
    1. Open the lid.
    2. Ensure all control knobs are in the "OFF" position.
    3. Connect the LP gas tank and turn its valve to "OPEN."
    4. Push and turn a control knob to "HIGH." The burner should light. Repeat up to three times if necessary.
    5. If ignition doesn't occur within 5 seconds, turn the knob to "OFF," wait 5 minutes, and repeat.
    6. If the igniter fails, use the included lighting rod with a lit match to light the burners through the cooking grid and heat plates.
    7. Observe the flame to ensure all ports are lit and the flame height is correct (soft blue with yellow tips, 1-2 inches).
  • Lighting Side Burner:
    1. Open the side burner lid.
    2. Ensure the control knob is in the "OFF" position.
    3. Connect the LP gas tank and turn its valve to "OPEN."
    4. Push and turn the control knob to "HIGH." The burner should light. Repeat up to three times if necessary.
    5. If ignition doesn't occur within 5 seconds, turn the knob to "OFF," wait 5 minutes, and repeat.
    6. If the igniter fails, use the included lighting rod with a lit match to light the burner.
  • Turning Off:
    1. Turn the LP gas tank valve to "CLOSED."
    2. Turn all control knobs clockwise to the "OFF" position.
  • Controlling Flare-ups: Trim excess fat from meats. Cook high-fat meats on "LOW" or indirectly. Ensure the grill is on a level, non-combustible surface and grease drains into the receptacle. If a grease fire occurs, turn control knobs to "OFF" and the LP gas tank valve to "CLOSED." Do NOT use water.
  • First Use: Remove all labels and packaging. Operate the grill on "HIGH" with the lid closed for at least 15 minutes to "heat clean" internal parts and dissipate odors.

Maintenance Features

General Maintenance:

  • Regular Cleaning: The grill should be thoroughly cleaned and inspected on a regular basis.
  • Cool Down: All cleaning and maintenance should be performed when the grill is cool and the fuel supply is disconnected.
  • No Self-Cleaning Oven: Do NOT clean any grill part in a self-cleaning oven.
  • No Enlarging Orifices: Do NOT enlarge valve orifices or burner ports.
  • Abrasive Cleaners: Avoid abrasive cleaners as they will damage the product. Never use oven cleaner.

Before Each Use:

  • Cleanliness: Keep the grill area clear of combustible materials, gasoline, and other flammable vapors/liquids.
  • Airflow: Do NOT obstruct the flow of combustion and ventilation air. Keep the LP gas tank area free from debris.
  • Burner Flames: Visually check burner flames for proper operation (soft blue with yellow tips).
  • Burner Obstructions: Check for spiders, insects, and webs that can clog burner/venturi tubes, as this can lead to a fire.

Cleaning Surfaces:

  • Wipe surfaces with mild dishwashing detergent or baking soda mixed with water.
  • For stubborn surfaces, use a citrus-based degreaser and a nylon scrubbing brush.
  • Rinse with clean water and allow to air dry.

Cleaning Main Burners:

  1. Turn the LP gas tank valve to "CLOSED" and all control knobs to "OFF."
  2. Disconnect the LP gas tank.
  3. Remove cooking grids and heat plates.
  4. Remove burners by unscrewing fasteners, lifting them from the gas valve orifice, and disconnecting the spark electrode wire.
  5. Clean the venturi of each burner with a small bottle brush or compressed air.
  6. Remove all food residue and dirt from the burner surface.
  7. Clean clogged ports with a stiff wire (e.g., a paper clip).
  8. Inspect burners for damage (cracks or holes) and replace if necessary.
  9. Re-install burners, ensuring the gas valve orifice is correctly positioned inside the burner/venturi tube and the spark electrode is in place.
  10. Replace heat plates and cooking grids.
  11. Reconnect the LP gas tank and perform a leak test.

Cleaning Side Burner:

  1. Turn the LP gas tank valve to "CLOSED" and the control knob to "OFF."
  2. Disconnect the LP gas tank.
  3. Remove the side burner grid.
  4. Remove the side burner by unscrewing the screws that secure it to the side shelf.
  5. Lift the burner up and away from the gas valve orifice.
  6. Clean the venturi of the burner with a small bottle brush or compressed air.
  7. Remove all food residue and dirt from the burner surface.
  8. Clean any clogged ports with a stiff wire.
  9. Inspect the burner for damage (cracks or holes) and replace if necessary.
  10. Re-install the burner, ensuring the gas valve orifice is correctly positioned inside the burner/venturi tube and the spark electrode is in place.
  11. Replace the cooking grid.
  12. Reconnect the LP gas tank and perform a leak test.

Before Storing:

  1. Turn the LP gas tank valve to "CLOSED" and all control knobs to "OFF."
  2. Disconnect the LP gas tank.
  3. Clean all surfaces.
  4. Lightly coat the burner(s) and cooking grid(s) with cooking oil to prevent rusting.
  5. If storing indoors, disconnect the LP tank, place the protective cap on it, and store it outdoors in a well-ventilated area out of direct sunlight.
  6. If storing the grill indoors, cover it and store in a cool, dry place.
  7. If storing outdoors, cover the grill with a grill cover for weather protection.

Master Forge GBC22491L Specifications

General IconGeneral
BrandMaster Forge
ModelGBC22491L
CategoryGrill
LanguageEnglish

Related product manuals