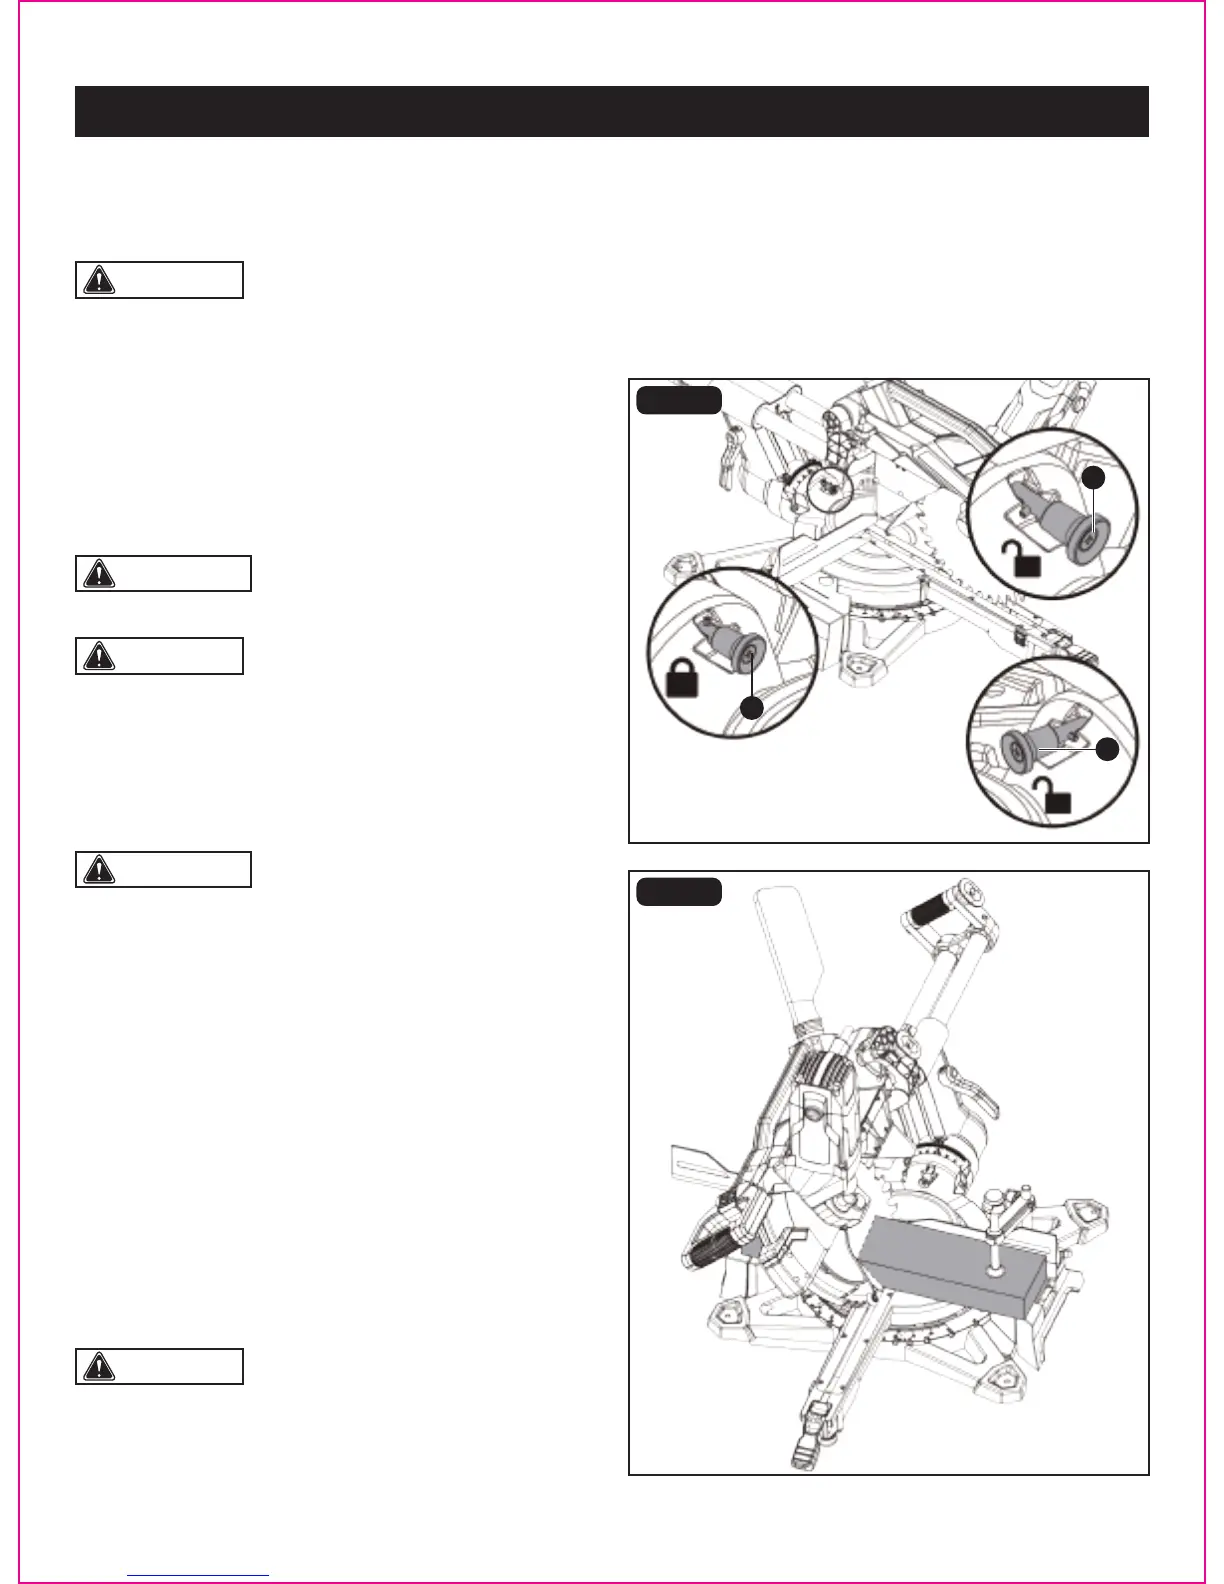
CAUTION: You can quickly locate 0°, 22.5°, 33.9°
and 45° left or right by using the bevel detent pin (A)
(Fig. 26a).
FIG. 26a
FIG. 26b
CAUTION: You can turn on the LED worklight for lighting in darker areas.
Page 32
WARNING: To avoid serious personal injury, always
lock the miter lock lever before making a cut. Failure to do
so could result in movement of the control arm or the miter
table while making a cut.
CAUTION: It may be necessary to slide the sliding
fence out to the required location or remove it to insure
proper clearence prior to making the cut.
WARNING: Failure to unplug the saw could result
in accidental start up, which may cause serious injury.
BEVEL CUT (FIG. 26a-26b)
A bevel cut is a cut made across the grain of the work piece
with the blade at an angle other than 90° to the miter table.
A straight bevel cut is made with the miter table set at the
0° position and the cutting head set at a bevel angle between
0° and 48° right or left.
• Unplug the saw.
• Mark the cutting line on the work piece with a pencil.
• Make sure that the miter table is positioned at 0°
and locked with the miter lock lever.
• Pull out the head lock knob to release the cutting head.
• Pull the bevel detent pin (A) out toward the front of the
machine and rotate it a 1/4 turn in either direction
and releasing it in that position. (Fig. 26a) (The bevel
detent pin has two positions: 1. Bevel common stop angles
(pin pulled completely out); 2. Quickly locate 0°, 22.5°,
33.9° and 45° left or right (pin pushed in).
• Loosen the bevel lock levers and tilt the cutting head to
the desired bevel angle as indicated on the bevel scale.
The blade can be positioned at any angle from a 90°
straight cut (0° on the scale) to a 48° right and a 48° left
bevel. Positive stops are provided at 0°, 22.5°, 33.9° and
45°.
• Tighten the bevel lock levers.
OPERATION
A
A
A
• Allow several seconds for the blade to reach maximum speed.
• Slowly lower the blade into and through the work piece. Complete the cut.
• Release the ON/OFF switch trigger; allow the saw blade to stop rotating before raising the blade out of the work piece.