headline bars
continuation tabs
notes
warnings
11
headline bars
continuation tabs
notes
warnings
model no. 054-6602-4 | contact us 1.800.689.9928
10
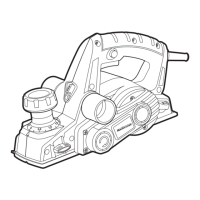
No. Part No. Part
1 On/off trigger switch 10 Clamping element
2 Lock-off button 11 Clamping screw
3 Depth-adjustment knob 12 Adjustable front base
4 Handle 13 Fixed rear base
5 Dust/chip extraction port 14 Edge guide
6 Edge-guide attachment knob 15 Rabbetting depth stop
7 Dust/chip extraction guide switch 16 Vacuum adapter
8 Reversible blade 17 Dust bag
9 Blade drum 18 Blade change wrench
IMPORTANT INFORMATION
Before attempting to use this tool, become familiar with all of its operating features and safety requirements.
For optimum performance and safety, read the following operating instructions carefully before using.
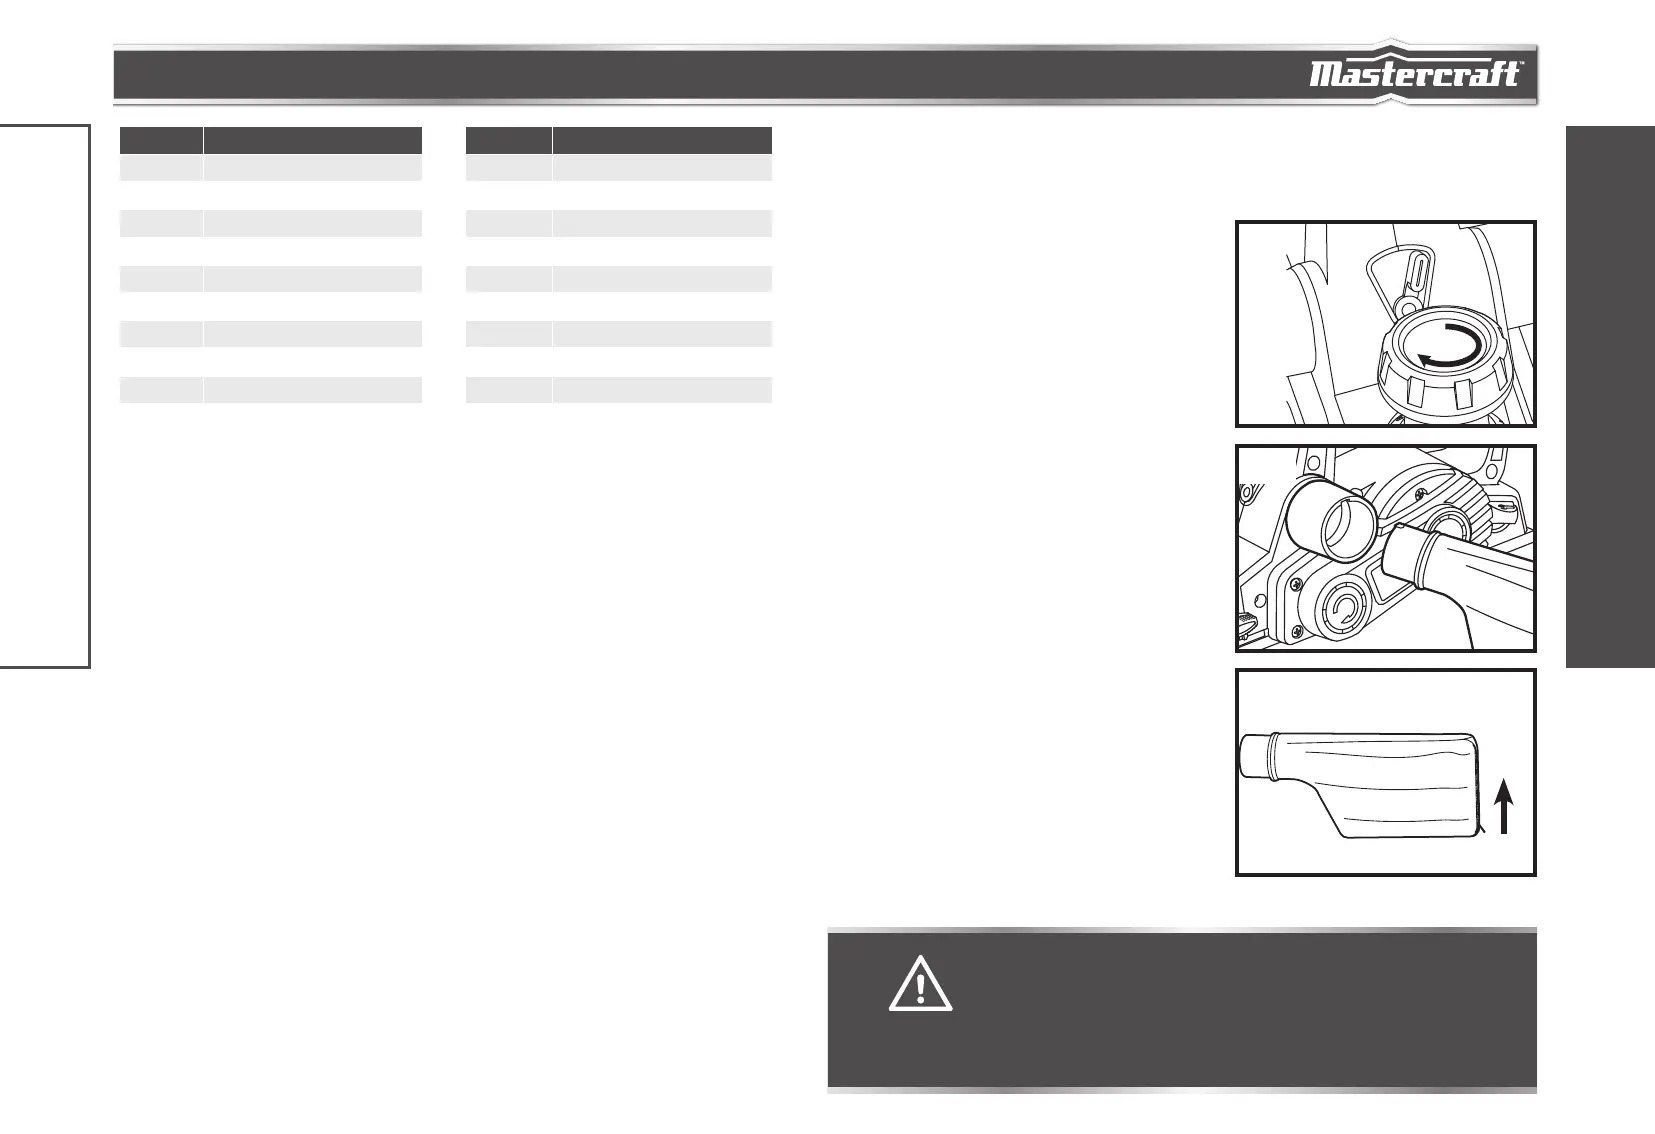
DUST/CHIP EXTRACTION GUIDE
SWITCH
(fig 1)
Moving the switch to the left of the tool will cause chips
to be discharged to the right; moving it to the right of tool
causes chips to be discharged the left.
DUST/CHIP EXTRACTION
The planer is equipped with two dust/chip extraction
ports, which may be used with a vacuum adapter or a
dust bag to keep your work environment cleaner.
Firmly attach the vacuum adapter or dust bag to the
extraction port. A workshop dust-extraction system or a
household vacuum cleaner can be connected to the vacuum
adapter for the efficient removal of dust and shavings.
The extraction port will fit 1-1/4" hoses.
DUST BAG
When planing, attach the dust bag to the dust/chip
extraction port for smaller jobs.
In addition, wear a suitable dust mask, as there may be
some residual airborne dust particles in the area.
To attach the dust bag (fig 2): Align the raised emboss
on the dust bag with the groove in the extraction port,
and slide the dust bag into the port. Then rotate the dust
bag towards the front of tool to lock it in place.
Empty the dust bag: Empty the dust bag by unzipping the
bag (fig 3) and then gently tap the bag to remove the dust.
For a more thorough cleaning of the dust bag, slip the
bag off of the frame and turn bag inside out. Use a soft
brush to brush the dust off of the lining.
fig 3
WARNING!
• Do not allow familiarity with the planer to cause a lack of alertness. A fraction of a second
of carelessness is enough to cause severe injury.
• Always ensure that the tool is switched OFF and unplugged from the power supply before
assembling parts, making adjustments, installing or removing planer blades, cleaning, or
when it is not in use. Disconnecting the planer will prevent accidental starting, which could
cause serious personal injury.
fig 1
IMPORTANT INFORMATION
KEY PARTS DIAGRAM
fig 2