headline bars
continuation tabs
notes
warnings
19
headline bars
continuation tabs
notes
warnings
model no. 054-6602-4 | contact us 1.800.689.9928
18
MAINTENANCE
BEFORE EACH USE
1. Inspect the planer, the trigger switch, the cord and the accessories for damage.
2. Check for damaged, missing, or worn parts.
3. Check for loose screws, misalignment or binding of moving parts, or any other condition that may affect
the operation.
4. If abnormal vibration or noise occurs, turn the tool off immediately and have the problem corrected before
further use. Unplug the tool from power source before cleaning or performing any maintenance.
5. Using compressed air may be the most effective cleaning method. Always wear safety goggles when
cleaning tools with compressed air.
PLANER BLADES
The planer blades have two cutting edges and may be reversed. When both cutting edges are dull, the planer
blade must be replaced.
The planer blades may not be re-sharpened. Do not attempt to sharpen or use re-sharpened blades of any kind.
Use only blades designated for use with this model, because other blades will cause vibration, decrease
performance and may not clamp securely in the blade holder.
REPLACING THE PLANER BLADES
REMOVING THE OLD PLANER BLADES
1. Disconnect the plug from the power source.
2. Place the planer upside down on a flat surface.
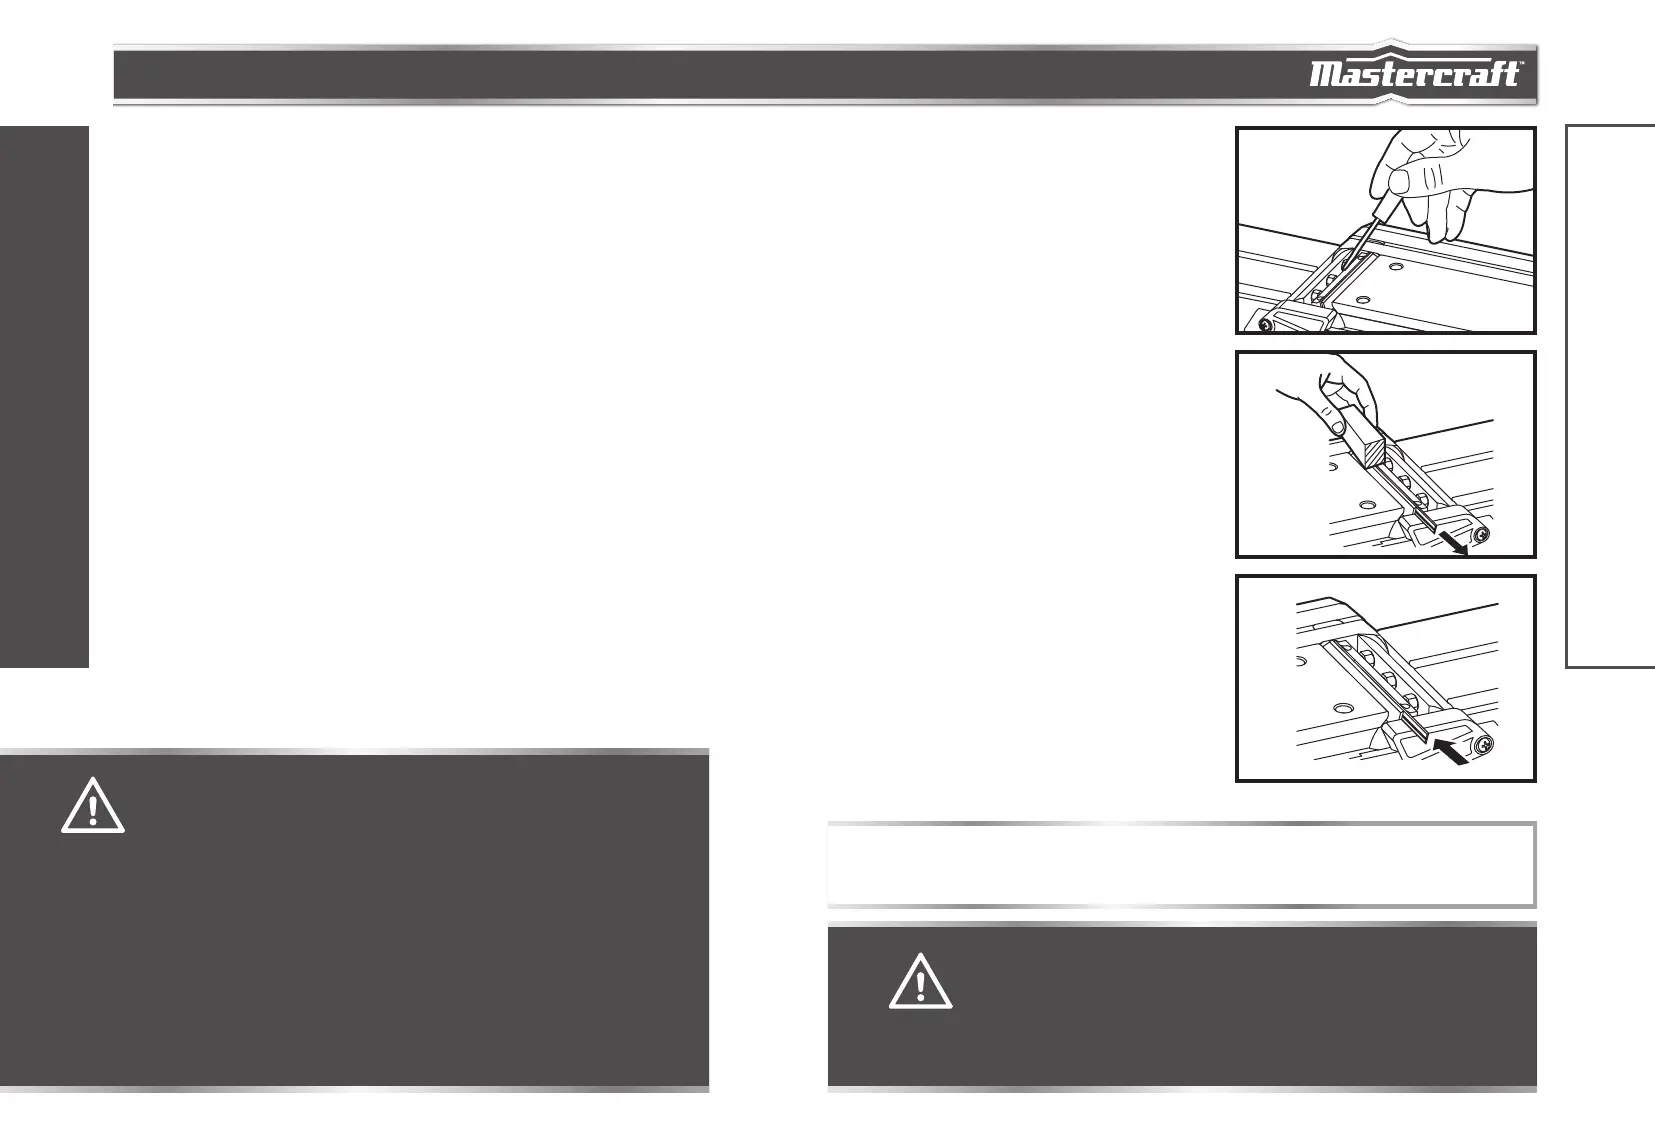
3. Loosen the three clamping screws with the wrench
that is provided (fig 14).
4. Push the blade sideways out of the blade drum.
A piece of wood may be used for this purpose (fig 15).
INSTALLING NEW PLANER BLADES
1. Disconnect the plug from power source.
2. Place the planer upside down on a flat surface.
3. Clean all surfaces before reinstalling the new blade,
as this will ensure an accurate blade setting and
proper tool performance.
4. Slide a new sharp blade into the blade holder of the
clamping element (fig 16). The blade groove must
engage with the blade holder.
5. Tighten the three clamping screws again with the
wrench (provided).
CAUTION!
• When installing blades, first clean out all chips and/or foreign matter adhering to the
blade drum and the clamping element. Use blades of the same dimensions and weight, or
else the drum will oscillate and vibrate, causing poor planing action and tool breakdown.
Tighten the clamping screws carefully when attaching the blades to the planer. A loose
clamping screw could be extremely dangerous. Regularly check and ensure that the
clamping screws are securely tightened.
MAINTENANCE
fig 16
fig 14
NOTICE: Your planing surface will end up rough and uneven unless the blades are set properly and
securely. The blades must be mounted so that the cutting edge is absolutely level relative to the surface of the
front and rear base.
MAINTENANCE
fig 15
WARNING!
• Do not allow brake fluids, gasoline and petroleum-based products, penetrating oil,
etc. come into contact with plastic parts. These substances contain chemicals that
can damage, weaken, or destroy plastic.
• When servicing, use only identical replacement parts. The use of any other parts may create
a hazard or cause damage to the product.
• Use only accessories that are recommended for this planer by the manufacturer.
Accessories that may be suitable for one tool may become hazardous when used with
another tool.
• Maintain tools with care. Keep cutting tools sharp and clean. Properly maintained tools with
sharp cutting edges are less likely to bind and are easier to control.
• To ensure safety and reliability, all repairs should be performed by a qualified service
technician.
• Be cautious when replacing the planer blades. Do not grasp the planer blades by the cutting
edges. Injury may result due to the sharp cutting edges of the planer blades.
• Always ensure that the tool is switched OFF and unplugged from the power supply before
installing or removing blades.
 Loading...