headline bars
continuation tabs
notes
warnings
model no. 054-6602-4 | contact us 1.800.689.9928
17
16
PLANING
(fig 11)
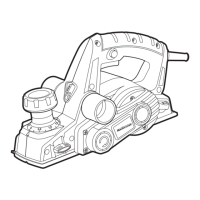
1. Unplug the planer and adjust the edge guide and
cutting depth as appropriate.
2. Clamp the workpiece securely on a workbench,
3. Connect the power cord of your planer to a standard
household power outlet.
4. While standing comfortably, hold the planer firmly
with both hands.
5. Place the front base of the planer against the
workpiece surface without the blades making any contact with the workpiece.
6. Switch on the tool and guide the tool with even feed over the surface to be planed.
7. Move the tool gently forward, applying pressure on the front of the tool at the beginning of the planing pass
and pressure at the rear of the tool at the end of the planning pass.
8. Push the planer beyond the edge of the workpiece without tilting it downwards.
The rate of planing and the depth of cut determine the quality of the cut. For rough cutting, you can increase
the depth of cut. To achieve a smooth cut, you will need to reduce the depth of cut and advance the planer
slowly across the workpiece.
The proper feed rate will depend on the type of material being cut and the depth of the cut. When planing hard
materials (e.g., hardwood), as well as when utilizing the maximum planer width, set only low planing depths
and reduce the planer feed as required.
Practice first on a scrap piece of material to gauge the correct feed rate and the cut dimensions.
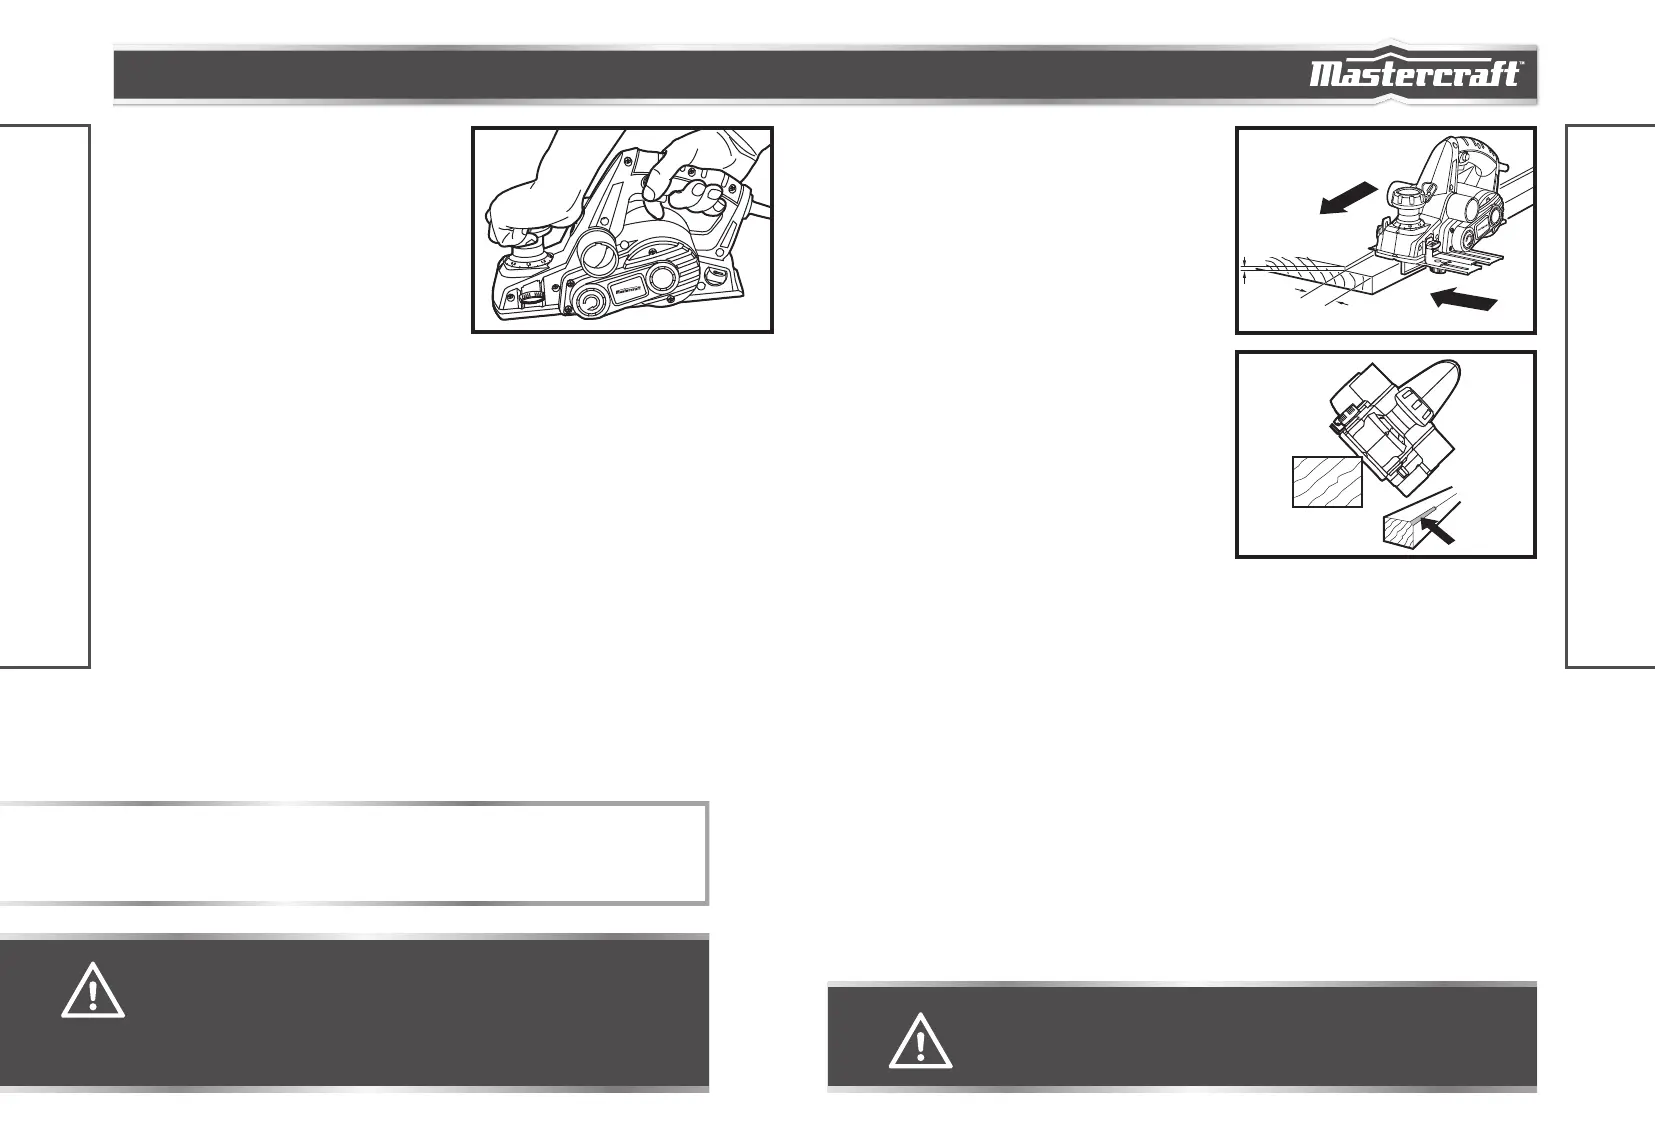
PLANING WITH THE EDGE GUIDE
The edge guide can be used to control the width of the
cut or for simply providing added stability and protection
when cutting materials that are up to 3-1/4" (82 mm)
wide (fig 12).
CHAMFERING
(fig 13)
The “V” groove in the front base allows quick and easy
chamfering of workpiece edges.
1. Place the “V” groove on the front base over the edge
to be chamfered. Be sure the blades are not touching
the workpiece.
2. Position the “V” groove absolutely flat on the edge to
be beveled.
3. Grasp the tool firmly with both hands, turn the tool on
and push the planer forward with steady pressure on
the front base.
WARNING!
• Hold the tool with both hands while starting the tool, since torque from the motor can
cause the tool to twist.
fig 13
fig 12
12.7 mm
max
82 mm
max
OPERATING INSTRUCTIONS
OPERATING INSTRUCTIONS
fig 11
NOTICE:
• Planing is easier if you incline the workpiece slightly away from you so that you plane “downhill”.
• Moving the planer too quickly may cause a poor quality of cut and can damage the blades or the motor.
Moving the planer too slowly may burn or mar the workpiece.
WARNING!
• Hold the tool with both hands while starting the tool, since torque from the motor can
cause the tool to twist.
CAUTION!
• Always use two hands when holding the planer.
• Wherever possible, clamp the workpiece to a workbench or clamping table.
 Loading...