Before You Start - Unpacking
Your Mastercraft belt & disc sander has been shipped completely assembled with the exception of: the
sanding disc, disc guard, mitre gauge, work support and worktable.
Carefully remove all parts from the shipping carton. Do not discard the packing material until you have
carefully inspected the belt & disc sander, identied and located all parts, and satisfactorily operated
your new tool. If all parts are present, proceed to assembly.
Examine all parts to ensure no breakage has occurred during shipping. Missing or damaged parts
should be replaced before use. Should you discover or suspect that parts are missing or damaged, do
not return to the store. Call (Toll-Free) the number on the front of this Owner’s Manual.
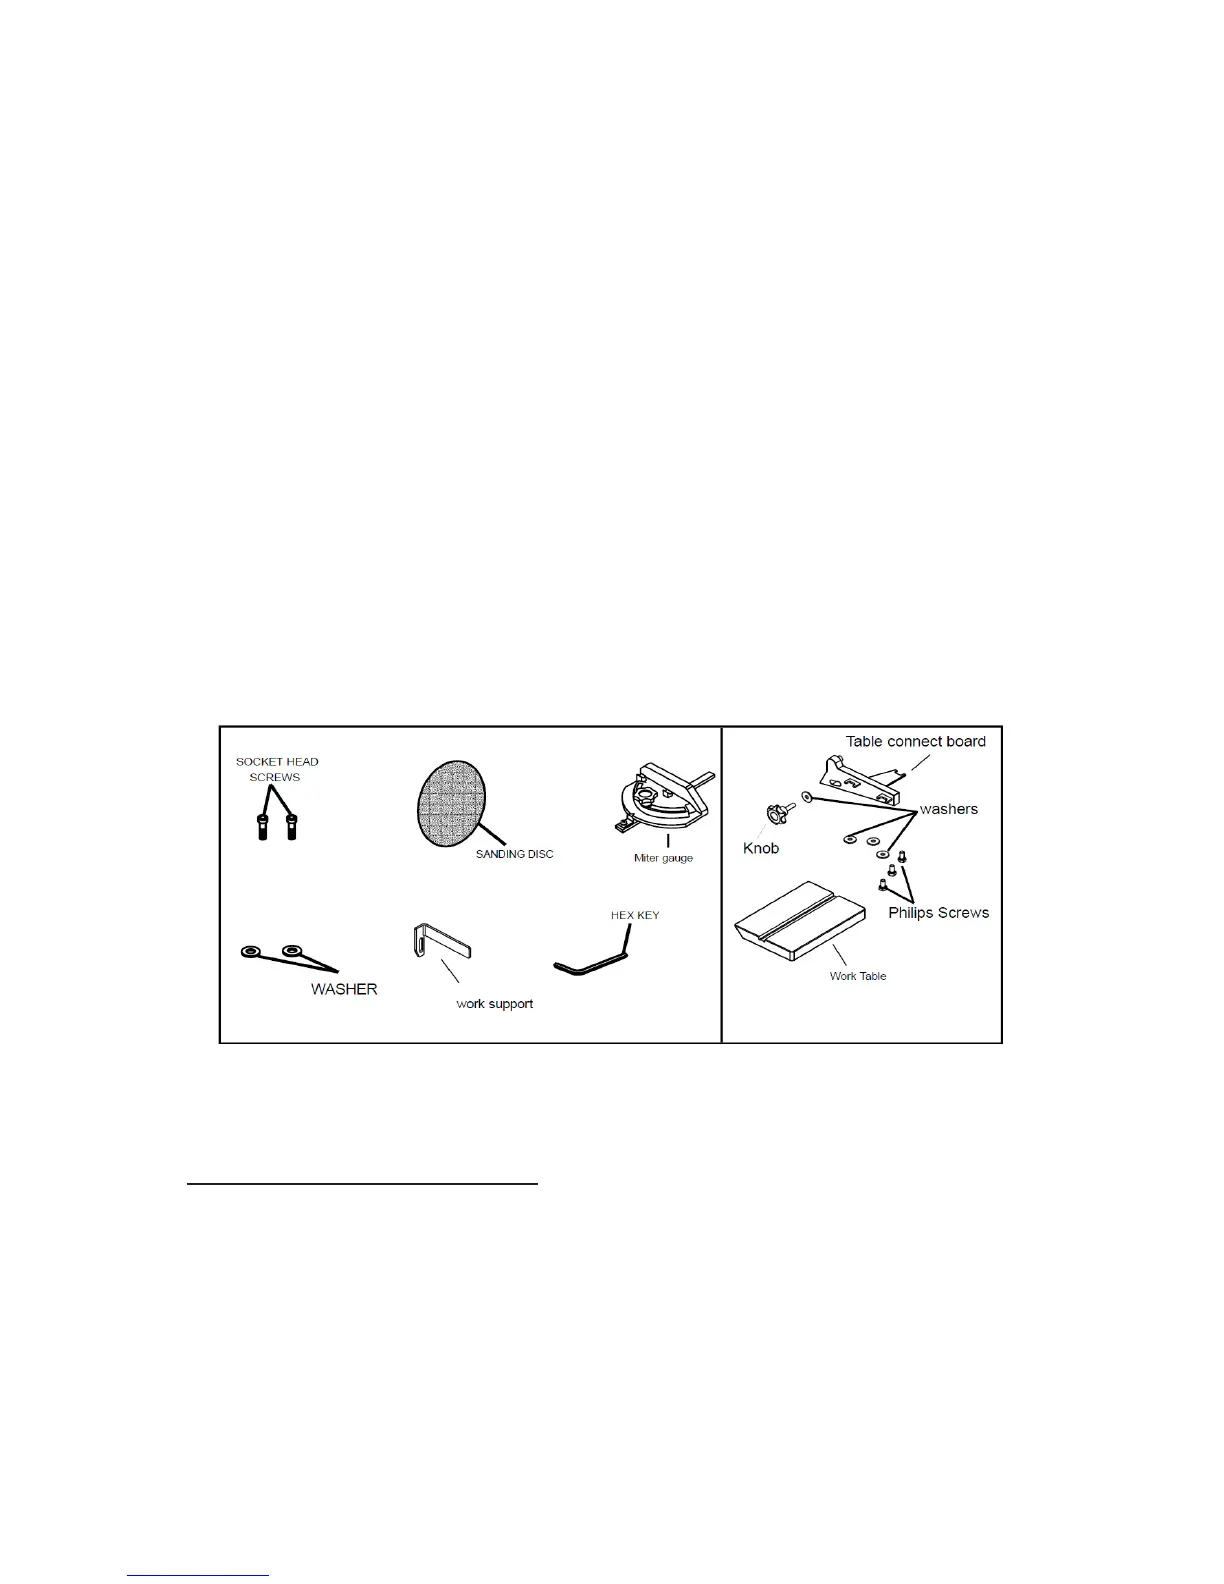
Parts & Accessories List
1. Socket head screws
2. Sanding disc
3. Mitre gauge
4. Washers
5. Work support
6. Hex key 15/64” (6 mm?)
7. Worktable
8. Adjustment knob
9. Table connection bracket
10. Phillips screws
Before You Start – Assembly and Installation
WARNING! Always ensure the sander is unplugged prior to attempting any assembly,
installation or changing of parts and accessories.
Mounting the Sander to the Workbench
CAUTION: If during operation there is any tendency for the sander to tip over, slide or walk on
the supporting surface, the sander should be properly mounted to a workbench or stand.
1. Position the sander on the workbench where you expect/intend to use it.
2. Mark the workbench through the mounting holes located in the sander base. Drill holes in the
workbench at the marks.
3. Using long bolts, washers, locking washers and nuts, as shown (not supplied), secure the
sander to the workbench. Note: All bolts should be inserted from the top. Washers and hex
nuts should be fastened from the underside of the workbench.
7