5
OPERATING INSTRUCTIONS
With the Lid secured, appliance on and the screen displaying 00
00, select the desired cooking function by reading the following
instructions.
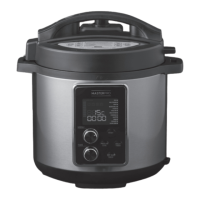
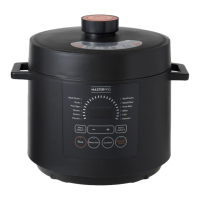
There are twelve MENU functions programmed for your
appliance. The default times are programmed for quick and
easy cooking for small proportions of food 1.5kg or less (unless
specified below). When cooking food that is more than 1.5kg,
use the Custom PRESSURE COOK function. Each of the default
times is programed to detect the weight of food being cooked
and how much liquid is inside the pot during the cooking cycle.
The appliance will automatically build up pressure, cook the
food and go to KEEP WARM when cooking is complete.
MENU FUNCTIONS DEFAULT
COOKING TIME
ADJUSTABLE TIMES
RICE 12 MIN 1-99 MIN
MULTIGRAIN 17 MIN 1-99 MIN
SOUP 20 MIN 1-99 MIN
BEAN/CHILLI 20 MIN 1-99 MIN
STEAM 25 MIN 1-99 MIN
POULTRY 30 MIN 1-99 MIN
MEAT/STEW 35 MIN 1-99 MIN
PORRIDGE 40 MIN 1-99 MIN
SAUTÉ 30 MIN N/A
EGGS 4 MIN 1-10 MIN
YOGHURT 8 HOURS 6-24 HOURS
SLOW COOK 30 MIN 0.5-9.5 HOURS
SELECTING A MENU FUNCTION
1. Use the MENU dial to scroll through the MENU functions.
2. The Default Cook Time will display for each function. For
example, if WHITE RICE is selected, the display will show
P06. Press the START button to begin the cooking cycle.
The Heating Icon
will illuminate.
3. As the appliance begins to heat and pressure builds, the
Red Float Valve will rise. The amount of liquid and other
ingredients in the appliance determines the length of time
needed for full pressure to build – generally 5-40 minutes,
depending on the recipe.
4. Once the appliance has pressurised, the Pressurised icon
will illuminate.
5. Using the same WHITE rice example, while the appliance is
building up pressure, the Indicator Bars will scroll vertically.
The timer will not begin to countdown until the pressure
has built up to capacity. Once it begins to pressure cook, the
display will show a solid P:06 and begin countdown.
6. The raised Red Float Valve indicates you are cooking under
pressure. The lid is now locked and cannot be opened.
YOU SHOULD NEVER ATTEMPT TO OPEN THE LID WHILE
PRESSURE COOKING.
TIP: The cooking time for all MENU functions, with the
exception of SAUTE and SLOW COOK, can be adjusted
between 1-99 minutes. Simply turn the TIMER dial right to
the increase or left to decrease to the desired cooking time,
then press START to begin cooking.
SETTING CUSTOM PRESSURE COOK TIME
1. Press the PRESSURE COOK button, then turn the TIMER
knob right to increase or left to decrease to the desired
cooking time. (EX: If you set cook-time to 30 minutes, the
screen will display P:30).
Press the START button to begin the cooking cycle.
2. The Heating Icon
will illuminate.
3. As the appliance begins to heat and pressure builds, the
Red Float Valve will rise. The amount of liquid and other
ingredients in the appliance determines the length of time
needed for full pressure to build - generally 5-40 minutes,
depending on the recipe.
4. While the appliance is building up pressure, the Indicator
Bars will scroll vertically. The timer will not begin to
countdown until the pressure has built to capacity. When
proper pressure is achieved, the Pressurised Icon
will
illuminate, the display will show a solid P:30 for a cook-time
of 30 minutes and begin countdown.
5. The raised Red Float Valve indicates you are cooking under
pressure. The Lid is now locked and cannot be opened.
YOU SHOULD NEVER ATTEMPT TO OPEN THE LID WHILE
PRESSURE COOKING.
AUTO-KEEP WARM FEATURE
When cooking has completed, the appliance will beep and
automatically go to KEEP WARM. The KEEP WARM icon will
illuminate and the display will show
.
NOTE: The KEEP WARM setting should not be used for more
than 4 hours. The quality and texture of food will begin to
change after 7 hours on KEEP WARM. A bit of condensation
in the Upper Ring during KEEP WARM is normal. To set the
appliance to KEEP WARM, press the KEEP WARM/CANCEL
button until the display shows
.
TO RESET OR CANCEL
User can reset or cancel any function at any time by pressing
the KEEP WARM/CANCEL button until the display shows 00 00.
REMOVING LID AFTER PRESSURE COOKING
When the pressure cooking cycle has completed, the appliance
will automatically switch to KEEP WARM. At this point, you may
release pressure in one of two ways - Natural Pressure Release
or Quick Pressure Release.
1. Natural Release: Following pressure cooking, allow the
appliance to remain on KEEP WARM. The pressure will
begin to drop - time for pressure to drop depends on the
amount of liquid in the appliance and the length of time that
pressure was maintained. Natural Release can take from
15-30 minutes. During this time, cooking continues so it is
recommended for certain cuts of meats, soups, rice, and
some desserts. When pressure has fully released, the Red
Float Valve will drop and the Lid will unlock to open. As a
safety feature, the Lid will not open unless all pressure is
released. Do not force the Lid open. If the Lid feels tight,
please allow additional time for pressure to fully release
before attempting to open the Lid.
2. Quick Release (recommended for foods that should be
Medium or Medium-Rare): Following pressure cooking,
the appliance will beep and go to KEEP WARM. Press the
KEEP WARM/CANCEL button and the display will show 00
00. Using an oven monitor or long utensil, carefully turn the
Pressure Limiting Valve to the “Ceiling Venting” position to
release pressure until the Red Float Valve sinks.
Figure 18
Figure 19
 Loading...