INST
ALLATION
18
4.7 INSTALLATION STEP-BY-STEP
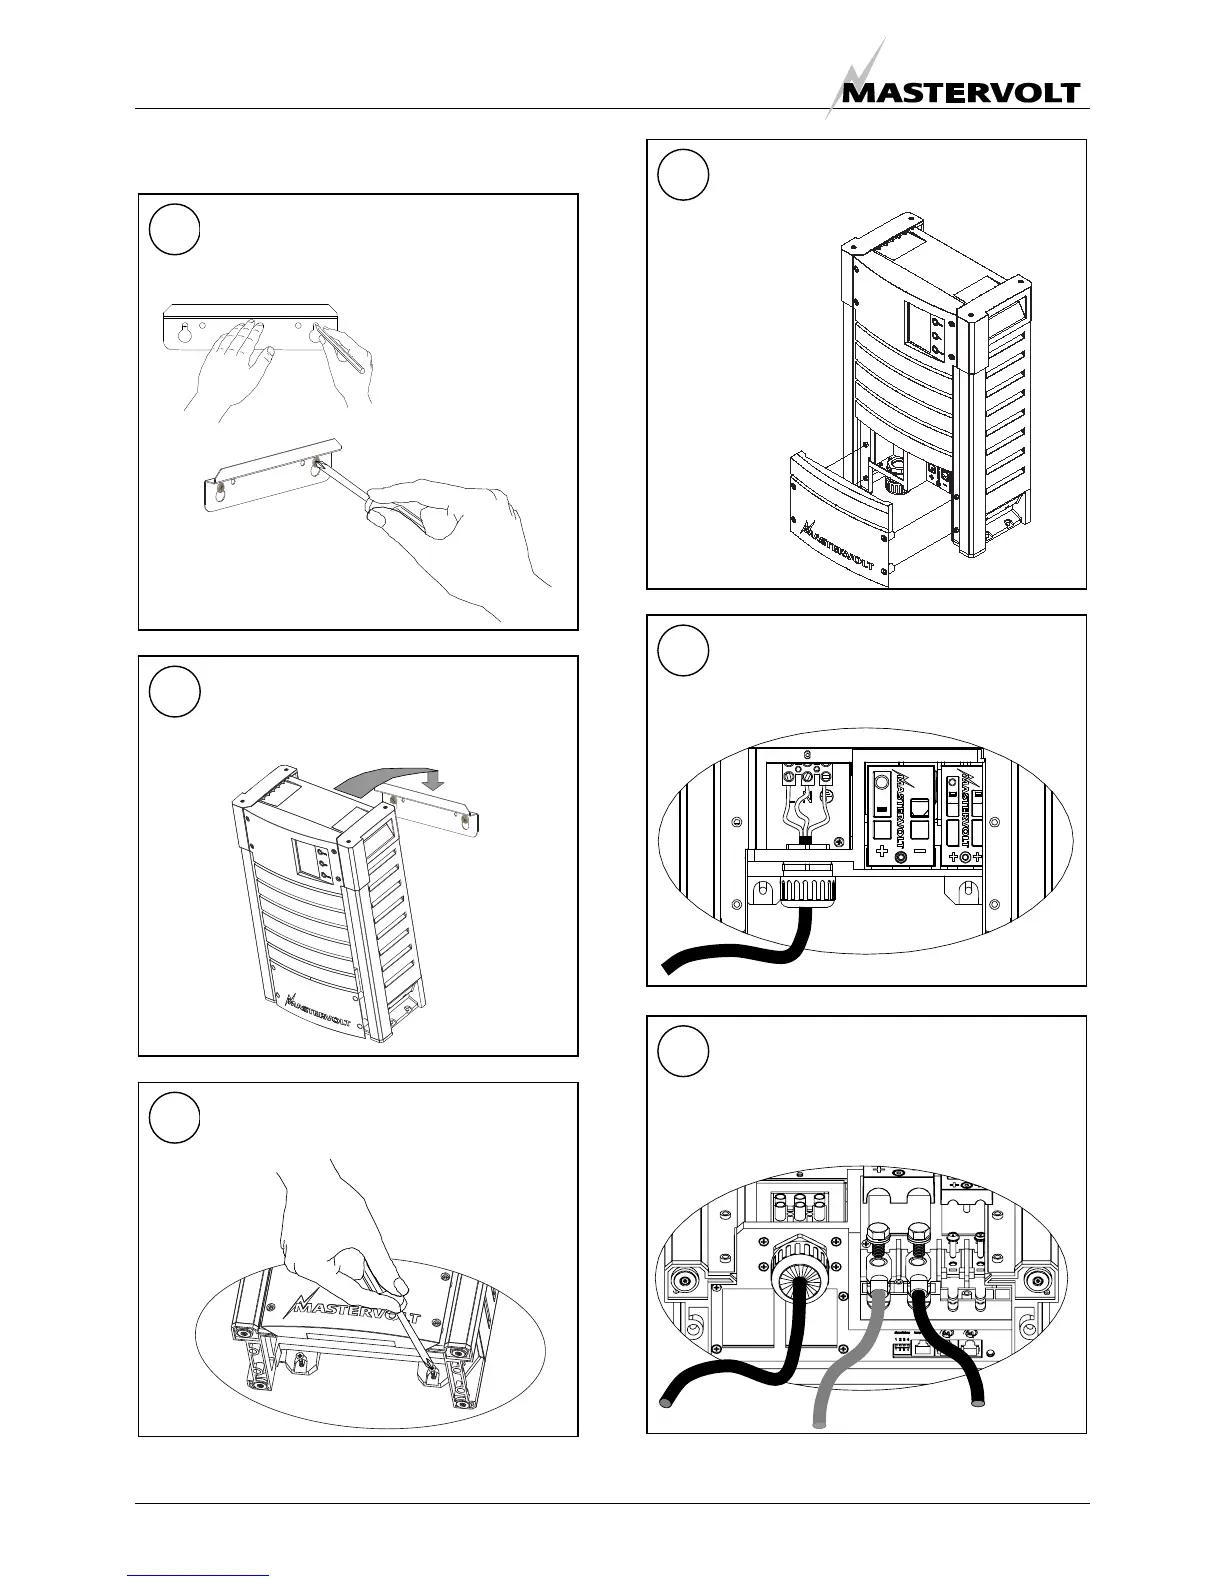
6
Remove the isolation cap from the DC
terminals. Attach crimp-on ring terminals to
both DC-cables. Connect the DC-cabling of
battery bank 1, positive to +, negative to – .
4
Open the connection compartment by
loosening the four screws.
5
Feed the AC wiring through cable gland and
connect the wiring to the screw terminals.
Tighten the cable gland firmly.
3
Fix the cabinet to the wall by fastening two
screws at the lower side of the cabinet as
well.
2
Place the ChargeMaster over the mounting
bracket and then move it downwards until it is
suspended from the mounting bracket.
1
Mark the position of the mounting spots by
using the mounting bracket. Then Fix the
mounting bracket to the wall.
 Loading...