6 7
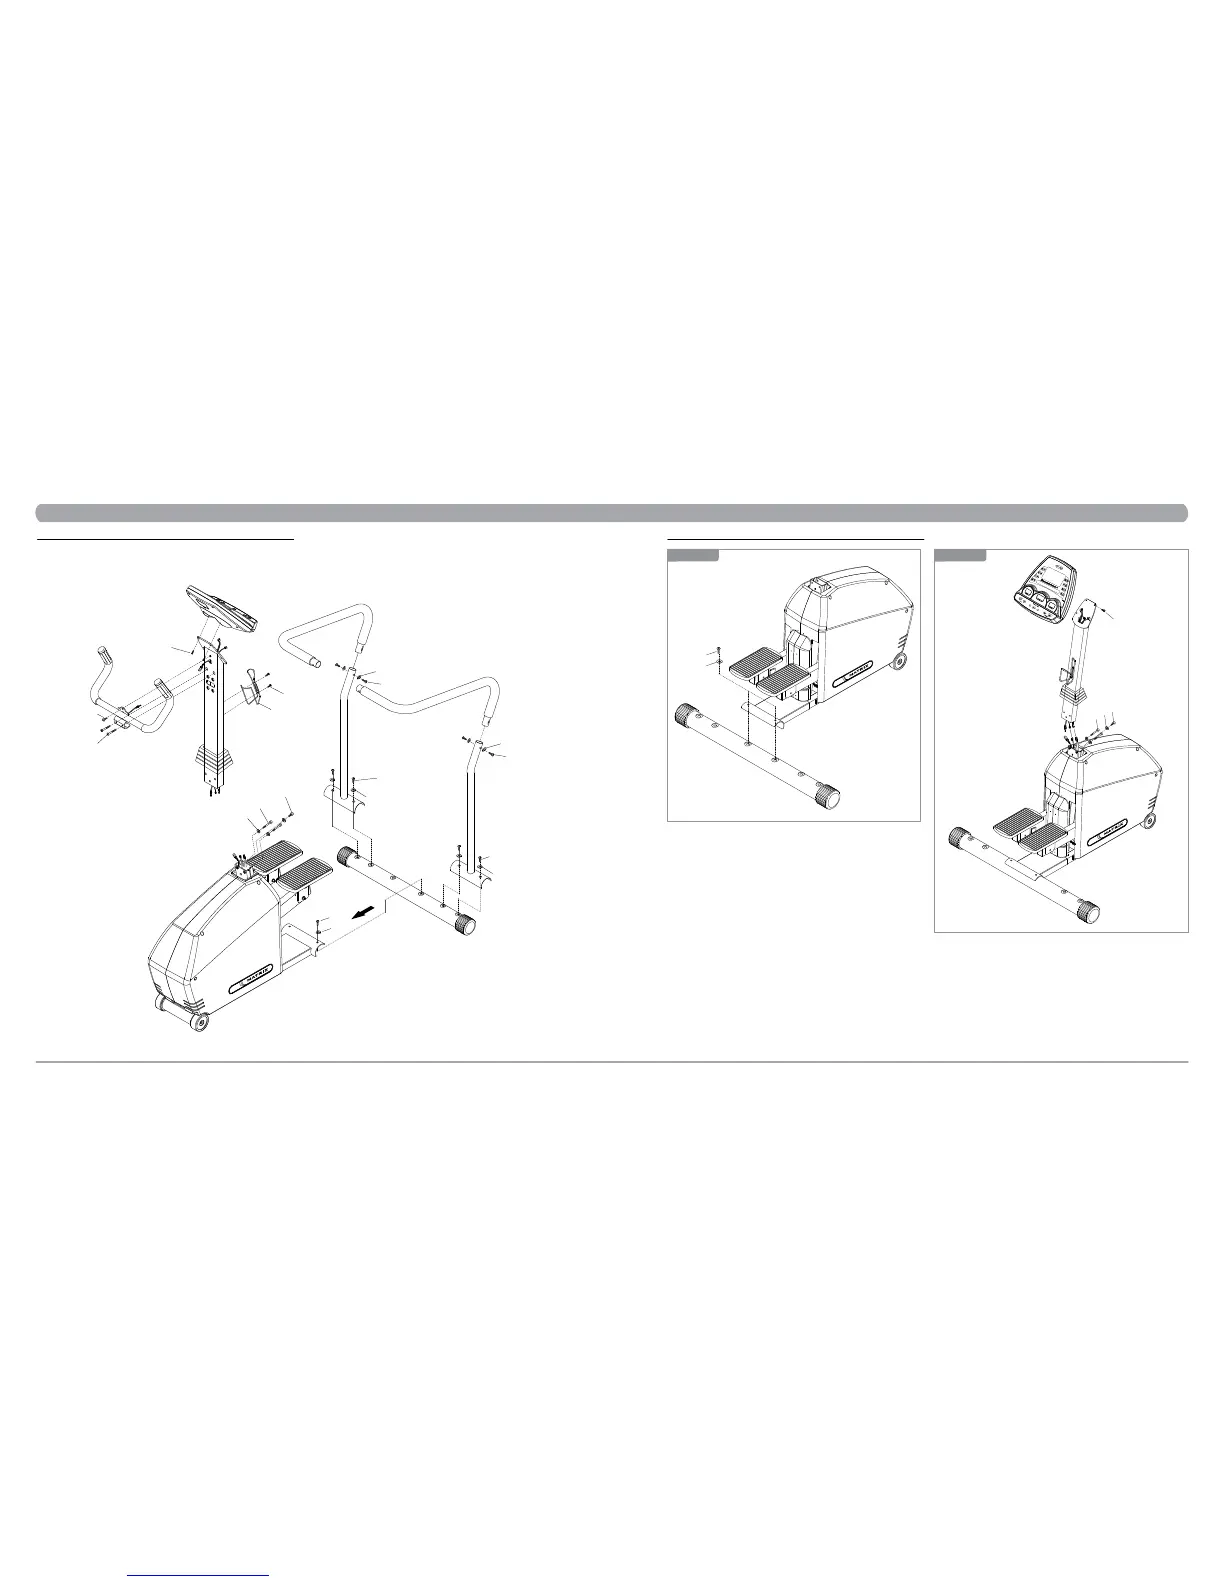
4.2 EXPLODED DIAGRAM
CHAPTER 4: Stepper parts and assembly Guides
Z09
Z05
Z04
Z06
C41
C23
Z09
Z11
Z09
Z11
Z09
Z11
N22
Z10
Z10
Z05
Z03
Z02
Z01
CHAPTER 4: Stepper parts and assembly Guides
4.3 ASSEMBLY STEPS
1) Thread the Console Mast through the Console Mast Boot.
2) Feed the cable through the Console Mast. Tape the cable to the top of the
Console Mast to secure it temporarily.
3) Attach the Console Mast to the Base Frame using the bolts (Z01, Z02) and
washers (Z03). Ask your assistant to hold the Console Mast while tighten
screws. Using the #6 L-type Alen Wrench (Z33) tightens the screws
securely.
4) Remove the four mounting bolts from the back of the console with the
Phillips Screwdriver. Plug in the wire harness and the two heart rate wires
to the back of the console. Attach the console to the console mast with the
four bolts removed earlier in this step.
1) Install the rear foot in position at the rear of the stepper with the mat-
ing holes in the frame bracket. Insert the two bolts (Z11) and washers
(Z09) through the frame bracket and rear foot. Using the #5 L-type Allen
Wrench (Z32) tightens the screws securely.
Z09
Z11
STEP 1
N22
Z02
Z03
Z01
STEP 2