EasyManua.ls Logo

Matrix A5x-02 - User Manual

Matrix A5x-02
70 pages
Print Icon
To Next Page IconTo Next Page
Loading...
A5X-02 ASCENT TRAINER
SERVICE MANUAL

Table of Contents

Questions and Answers

  • M
    Matthew JohnsonAug 21, 2025
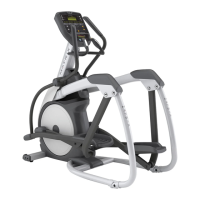
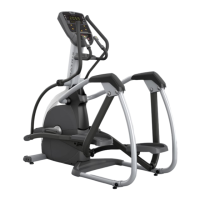
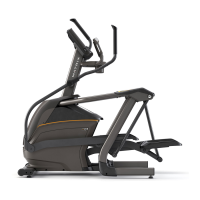
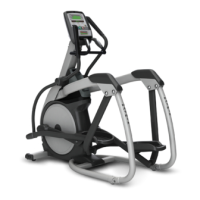
    Why Matrix Elliptical Trainer shows no or high heart rate?
    • J
      John JohnsonAug 21, 2025
      If your Matrix Elliptical Trainer is showing no or a high heart rate, consider the following: * Press GO and test if a heart rate registers. If the console receives a signal from the HR grips, the HR window on the console should flash HR. * If the console isn't flashing HR, remove the console and ensure the HR wiring is plugged in. Inspect the wiring from the HR grips to the console for any pinches or tears. If damaged, replace the HR grips. * If the console flashes HR but no rate appears, or the heart rate is higher than expected, remove the console and disassemble the front. Check that the HR power harness is securely plugged into the HR board. If connections are secure, replace the console.
  • S
    Savannah GreeneOct 31, 2025
    Why Matrix A5x-02 doesn't power up?
    • A
      Ashley ThorntonOct 31, 2025
      If your Matrix Elliptical Trainer isn't powering up, there are several things to check: * Ensure the unit is plugged in and the outlet has power (120v AC). Also, verify the power converter brick has a green LED lit. If necessary, replace the power converter. * Confirm the power switch is in the ON position. If there's power at the converter and the switch is ON, check the power switch continuity after removing the entertainment port plate. Replace the switch if needed. * Remove the right side disk and check the power LED on the lower control board (RL). If it's not lit, ensure the console communication cable is connected to the LCB. If connections are good but the LCB isn't powering up, replace the LCB. * Unplug the console communication cable after removing the console. Measure v...
  • A
    April KeithNov 10, 2025
    What to do if Matrix A5x-02 Elliptical Trainer does not record distance or RPM?
    • M
      Michael ReynoldsNov 10, 2025
      If your Matrix Elliptical Trainer isn't recording distance or RPM, here's what you can do: * If the unit resets after 30 seconds of pedaling, ensure that "Incline reset" is in the ON position within Manager Mode. * Try selecting a different program and start pedaling, and check if RPM is displayed. If RPM is shown, the console should be replaced. * Remove the right side disk and see if the green LED labeled RPM on the lower control board flashes when the main drive pulley is turned. If it doesn't flash, check for 4 magnets on the pulley. If the LED still doesn't flash, ensure the speed sensor cable is plugged into the lower control board. If plugged in, unplug it and check the sensor wire for continuity. Replace the speed sensor if necessary. * If all tests have been done, replace...

Summary

Chapter 1: Serial Number Location

1.1 Serial Number Location

Specifies the location for the serial number on the Ascent Trainer unit.

Chapter 2: Important Safety Instructions

2.1 Moving the Unit

Instructions on how to safely move the Ascent Trainer unit.

2.2 Read and Save These Instructions

Emphasizes reading and saving safety instructions for proper operation.

2.3 Electrical Requirements

Details electrical requirements, grounding, and dedicated circuits for the Ascent Trainer.

Chapter 3: Preventative Maintenance

3.1 Recommended Cleaning Tips

Provides tips for daily cleaning and maintenance of the Ascent Trainer.

3.2 Check for Damaged Parts

Advises on inspecting the equipment for damage and using genuine parts.

3.3 Care and Maintenance Instructions

Outlines scheduled maintenance tasks and required tools for the equipment.

3.4 Preventative Maintenance Checklist

Provides a checklist for daily and quarterly preventative maintenance tasks.

Chapter 4: Console Overlay and Workout Description

4.1 Console Description

Explains the layout and functions of the Ascent Trainer's console buttons.

4.2 Workout Setup Steps - Manual

Details the steps to set up a manual workout program on the console.

4.3 Workout Setup Steps - Fat Burn

Guides users through setting up the Fat Burn workout program.

4.4 Workout Setup Steps - Level Based

Explains setup for level-based programs like Rolling Hills and Interval Training.

4.5 Workout Setup Steps - Fitness Test

Provides instructions for setting up and performing the Cooper Fitness Test.

4.6 Workout Setup Steps - Target Heart Rate

Details how to set up and use the Target Heart Rate workout mode.

4.7 Workout Setup Steps - Constant Watts

Guides users in setting up and using the Constant Watts workout program.

4.8 Auto Calibration Instructions

Explains the procedure for running the auto calibration for lift motors.

Chapter 5: Manager Mode

5.1 Using Manager Mode

Instructions on how to enter and navigate the Manager Mode for customization.

5.2 Manager Mode Overview

Provides an overview of the customizable settings available in Manager Mode.

Chapter 6: Engineering & Service Mode

6.1 Using Engineering; Service Mode

Details how to access and use Engineering and Service Modes for diagnostics and settings.

Chapter 7: Troubleshooting

7.1 Electrical Diagram

Presents the electrical system diagram for the Ascent Trainer.

7.2 LCB Error Indicators

Explains the meaning of various LED indicators on the Lower Control Board (LCB).

7.3 Console Error Codes

Lists and explains console error codes and their solutions.

7.4 Troubleshooting Issues

Addresses common issues like unit not powering up, no distance/RPM, and heart rate problems.

Chapter 8: Part Replacement Guide

8.1 Front Disk Replacement

Step-by-step guide for replacing the front disk of the Ascent Trainer.

8.2 Front Shroud Removal

Instructions for removing the front shrouds for access to internal components.

8.3 Lower Control Board Replacement

Detailed procedure for replacing the Lower Control Board (LCB).

8.4 ECB (Electronic Brake) Replacement

Step-by-step guide for replacing the Electronic Braking System (ECB).

8.5 ECB Belt Replacement

Instructions for replacing the belt associated with the ECB unit.

8.6 Drive Belt Replacement

Detailed steps for replacing the main drive belt of the Ascent Trainer.

8.7 Pulley Axle Set Replacement

Guide for replacing the pulley axle set assembly.

8.8 Drive Axle Set Replacement

Step-by-step instructions for replacing the drive axle set.

8.9 Console Replacement

Procedure for removing and installing a new console unit.

8.10 Overlay & Keypad Replacement

Instructions for replacing the console overlay and keypad.

8.11 Handlebar Assembly Replacement

Guide for removing and installing the handlebar assembly.

8.12 Rear Shroud Replacement

Instructions for removing and replacing the rear shrouds.

8.13 Incline Motor Replacement

Step-by-step guide for replacing the incline motor.

8.14 Dual Action Handlebar Replacement

Procedure for replacing the dual action handlebar component.

8.15 Foot Pedals Replacement

Instructions for removing and installing the foot pedals.

8.16 Pedal Arm Replacement

Guide for replacing the pedal arm assembly.

8.17 Link Arm Replacement

Step-by-step instructions for replacing the link arm.

8.18 Swing Arm Replacement

Instructions for removing and installing the swing arm.

8.19 Rear Pivot Arm Replacement

Guide for replacing the rear pivot arm assembly.

8.20 Testing the Ascent Trainer

Procedures for testing the Ascent Trainer after installation or repair.

Chapter 9: Ascent Trainer Specifications and Assembly Guide

9.1 Ascent Trainer Specifications

Lists technical specifications and features of the Ascent Trainer.

9.2 Fasteners & Assembly Tools

Lists necessary fasteners and tools required for assembling the Ascent Trainer.

9.3 Ascent Trainer Assembly Steps

Provides step-by-step instructions for assembling the Ascent Trainer.

9.4 Stabilizing the Ascent Trainer

Instructions on how to properly stabilize the Ascent Trainer on the floor.

Chapter 10: Upgrades

10.1 Belt Tensioner Bearing Replacement

Procedure for replacing the belt tensioner bearing.

10.2 Bearing Assembly Shimming

Steps to shim the bearing assembly to eliminate noise.

10.3 Upgrading Handgrips with Resistance Buttons

Instructions for upgrading handgrips to include resistance control buttons.

10.4 Installing Adjustable Tensioner

Guide for installing an adjustable bracket assembly for belt tension.

Chapter 11: Software Upgrade Procedure

11.1 Software Upgrade Procedure

Step-by-step guide for performing a software upgrade via USB.

Matrix A5x-02 Specifications

General IconGeneral
Contact Heart RateYes
Wireless Heart RateYes
Stride Length20 inches
Console DisplayLCD
Assembled Dimensions70" L x 28" W x 66" H
Assembled Weight205 lbs
Drive SystemFront
Dimensions70" L x 28" W x 66" H
DisplayLCD

Related product manuals