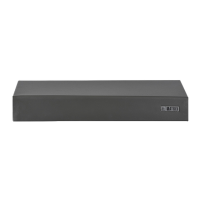
25 Matrix SATATYA NVR Quick Start
• When connecting the Ethernet Port of SATATYA NVR to a network computer, you may
need to change the IP Address, the Subnet Mask and Gateway address of SATATYA
NVR. You may ask your Network Administrator for the IP Address assignment used
on the network, the IP Address, Subnet Mask and Gateway Address for SATATYA
NVR. You may configure the IP Address Assignment and other network parameters
from the Local View or from the Device Client. See “Configuring Network Settings”
on page 49.
Backup Storage Device
• To store back up of the recordings, you may connect any removable storage device such as
an external hard disk or a pen drive to the USB ports labeled Backup.
• For Manual and Scheduled backup connect the device to the USB port. See “LED And
Buzzer State” on page 7.
Mouse/Keyboard
• Connect a wired or wireless Mouse or Keyboard to USB port.
GSM Dongle
• Connect the GSM dongle to the USB port as described in See “Ports and Connectors” on
page 5.
Connecting Wires to the Terminal Blocks
• Connections to the Alarm Input and Out port are to be made using the Terminal Block Plugs
provided to you in your package.
Wire range of the Terminal Block plugs is 28-16 AWG (0.5 -1.5mm
2
).
Connecting Power Supply
The AC input to the Universal Power Supply adapter can be 100-240VAC@50- 60Hz. It is
advisable to route the power supply from the mains through a Uninterrupted Power
Supply (UPS) for continuous operation.
• If you have completed all the connections you want to make, plug the power adapter into the
power outlet. Switch on power supply. Wait for the reset cycle to complete.
To Power On Device
NVR0801X, NVR1601X, NVR1602X,
NVR3202X
NVR3204X, NVR6404X, NVR6408X
Power supply 12VDC, 5A SMPS
 Loading...