4
2.4 ADJUSTING THE BELT
After placing the treadmill in the position it will be used, the belt must be
checked for proper tension and centering. The belt might need to be
adjusted after the first two hours of use. Temperature, humidity, and use
cause the belt to stretch at different rates. If the belt starts to slip when a
user is on it, be sure to follow the directions below.
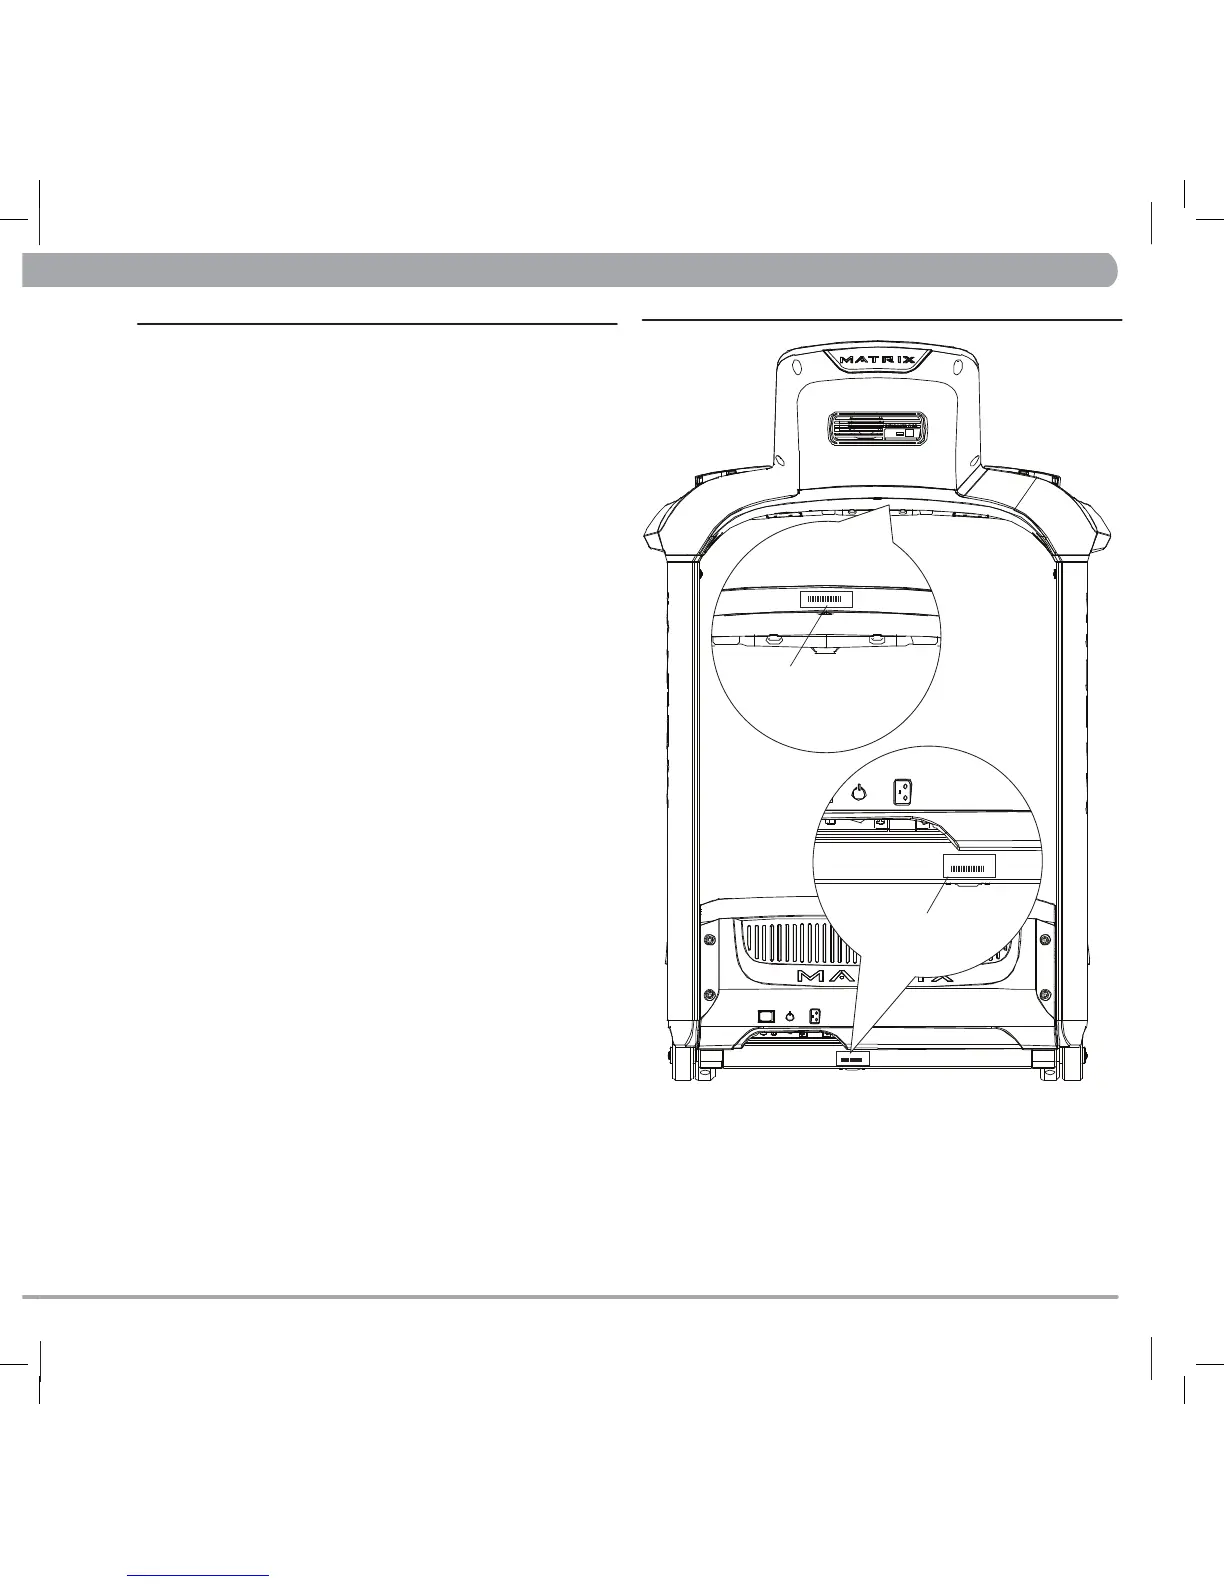
Locate the two hex head bolts on the rear of the treadmill.
The bolts are located at each end of the frame at the back of
the treadmill. These bolts adjust the rear belt roller. Do not
adjust until the treadmill is on. This will prevent over
tightening of one side.
The belt should have equal distance on either side between
the frame. If the belt is touching one side, do not start the
treadmill. Turn the bolts counter clockwise approximately one
full turn on each side. Manually center the belt by pushing
the belt from side to side. Tighten the bolts the same amount
as when the user loosened them, approximately one full turn.
Inspect the belt for damage.
While the treadmill is running at 3 mph, observe the belt
position. If it is moving to the right, tighten the right bolt by
turning it clockwise ¼ turn, and loosen the left bolt ¼ turn.
If it is moving to the left, tighten the left bolt by turning it
clockwise ¼ turn and loosen the right ¼ turn. Repeat Step 3
until the belt remains centered for several minutes.
Check the tension of the belt. The belt should be very snug.
When a person walks or runs on the belt, it should not
hesitate or slip. If this occurs, tighten the belt by turning
both bolts clockwise ¼ turn. Repeat if necessary.
STEP 1
STEP 2
STEP 3
STEP 4
CHAPTER 2: P