15
Transcoding for Blu-ray Disc authoring in Adobe Encore
3 In the Export Settings dialog box, select your desired Matrox format,
preset, video settings, and audio settings as explained in “Exporting to
Matrox MAX H.264 files using Adobe Media Encoder” on page 10 (see
steps 2 to 9).
4 From the Source Range list in the Source Panel, select the range you want
to export, such as
Work Area.
5 Click Export to immediately start your export.
Transcoding for Blu-ray Disc authoring in
Adobe Encore
Instead of exporting material to a Matrox .264 file from Adobe Media Encoder or
Premiere Pro and then importing the file into Adobe Encore for Blu-ray Disc
authoring, you can choose to perform the transcoding directly within Encore. The
transcoding will be accelerated using the Matrox MAX H.264 codec.
°To transcode to Matrox H.264 format for Blu-ray Disc authoring:
1 Start Adobe Encore, create a new Blu-ray project, and import the asset (clip
or Premiere Pro sequence) that you want to transcode as explained in your
Adobe Encore documentation.
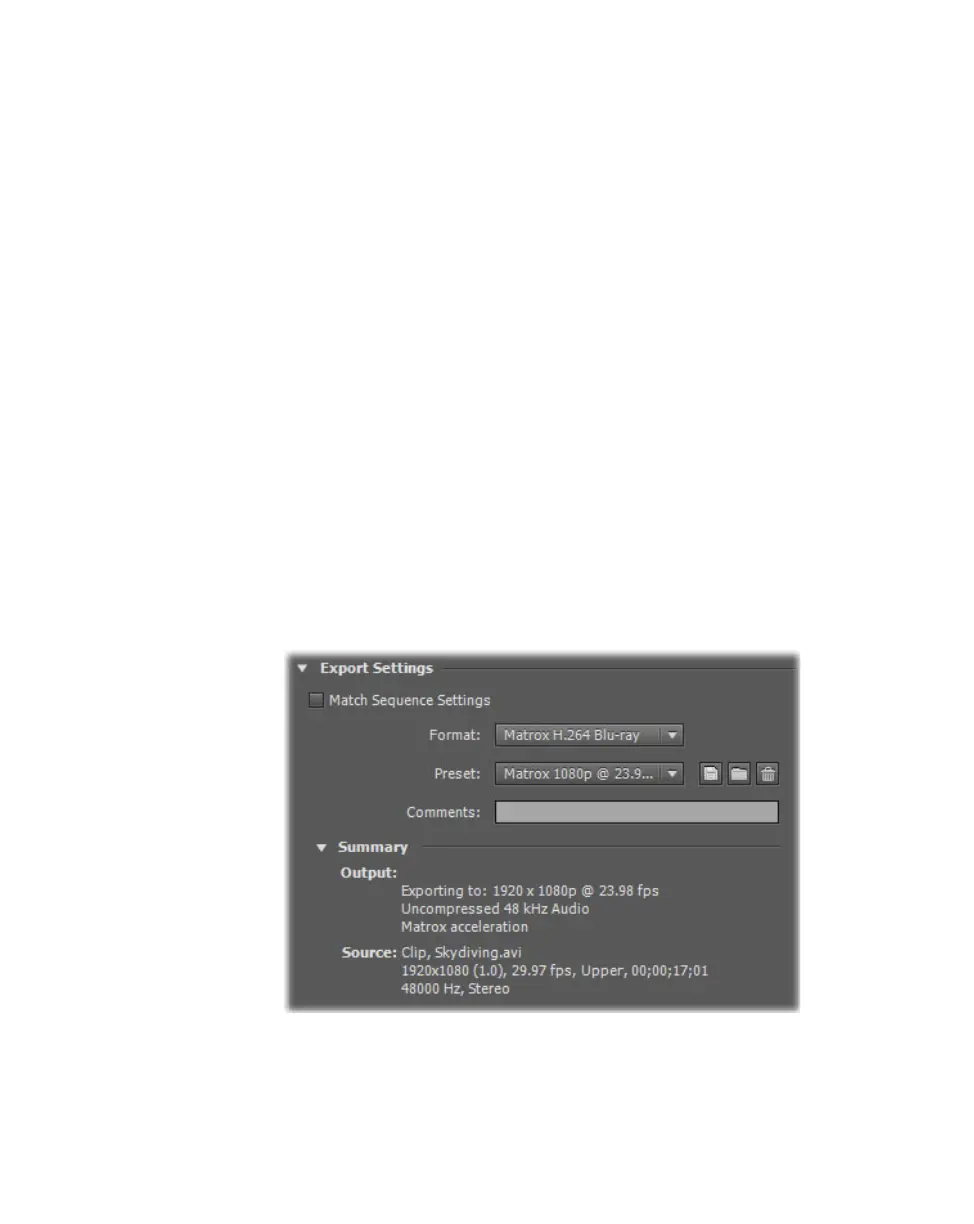
2 Right-click the clip or sequence in the Project panel, choose Transcode
Settings
, and click Edit Quality Presets to display the Export Settings
dialog box:
3 From the Format list, select Matrox H.264 Blu-ray, and from the Preset
list, select the preset that matches the video format you want for the
transcoding. Appropriate video and audio settings are automatically set
based on your selected preset.