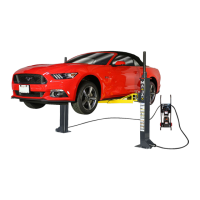
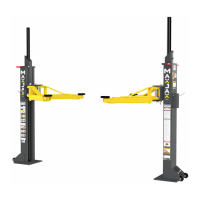
MaxJax™ Portable Mid-Rise Lift 18 P/N 5900268 — Rev. A4 — July 2022
⚠ DANGER Do
not
perform any maintenance or reinstallation without first making sure that the
Lift is
completely disconnected from the power source
and cannot be re-
energized until all maintenance tasks are complete.
4. Put a clean rag under the hydraulic connections near the bottom of the Hydraulic Cylinder, then
disconnect the Hydraulic Hose.
Make sure to clean any Hydraulic Fluid from the Hydraulic Hoses.
5. Loosen then remove the five Anchor Bolts from the Base Plate; Remove any shims and keep both
the Bolts and shims handy for future use.
⚠ CAUTION Be careful not to disturb the Post until you are ready to move it to your storage area.
Tip We recommend that you mark or otherwise note the Shim locations used at each
Anchor to help at the time of re-installation.
6. Insert an Anchor Plug (5530412) in each Anchor Sleeve in the ground, to prevent the Anchor
Sleeves from filling with debris while the Posts are in storage.
7. Using a downward force, push and tilt the Post onto its Wheels, and then carefully move the Post
to the desired location.
8. Repeat Steps 4 through 7 for the other Post.
Re-installation
When you are ready, you can easily re-install your MaxJax using the Anchor Sleeves already in place.
To re-install your Lift:
1. Verify the installation area and path is clear of debris, tools, and equipment.
2. Clean the Anchor holes with compressed air or with a nylon brush.
⚠ WARNING You must wear OSHA-approved (publication 3151) personal protective equipment
at all times when installing, using, maintaining, or repairing the Lift: safety glasses,
leather gloves, steel-toed boots, back belts, and hearing protection are required.
3. Make a visual inspection of all the Drop-in Anchors for damage or extreme wear.
⚠ WARNING You must inspect all Drop-in Anchors for proper setting and or damage
each
time the Lift is re-installed
. Do
not
use the Lift if the Drop-in Anchors are
damaged, extremely worn, or if the Concrete is cracked or defective.
4. Align the Posts with the Anchor locations.
5. Verify the Lift Arms are level, the Lift Posts are Perpendicular to the Floor and install any needed
Shims under the Base Plates.
6. Tighten all the Anchor Bolts in place.
Important: Do
not
use an impact wrench to tighten the Anchor Bolts.
⚠ DANGER The Lift must be re-leveled, shimmed, and bled each time the Lift is re-installed.
Failure to do so may result in damage to the Lift or serious injury.
 Loading...